
Report on Hirings user guide - File
Official title: Report on Hirings (ROH) - Data gateway user guide - File (BH1202)
Chapter 1: Security notes
All communications between your PC and the ROH Data Gateway application will be encrypted. This behaviour is built into your browser (e.g., Internet Explorer, Firefox) and will be automatically invoked when you connect to the ROH Data Gateway application.
Ensure that you are connected to the ROH Data Gateway application by being familiar with the information contained in this document; in particular, verify that the site you are connected to:
- uses the "https" protocol; i.e. the Uniform Resource Locator (URL) or internet address starts with https://;
- presents the screens as displayed in this document;
- presents the Department's Server Certificate as described; and
- functions in a fashion consistent with that described in this document
Your User ID and Password are an important part of ROH Data Gateway application security.
It is essential that the User ID and Password knowledge be restricted, both within your organization and at the Department. If compromise is known or suspected, the User ID and Password must be changed immediately. Use the Change Password function of the ROH Data Gateway application to accomplish this.
User IDs and Passwords are verified and a record is kept of who connects, when, for how long, and what files were accessed.
Your User ID and Password is your "account" as referred to in the "Authorized Users Only" statement on the Login page.
Detailed information on Web security is available at Entrust, Microsoft, and Verisign.
Chapter 2: Connecting and logging into the ROH data gateway application
Connect to the Internet in the usual fashion.
Enter the URL as provided to you by the Department.
1. Welcome default page
Note the following:
- For security reasons, your current session will be terminated and you will be returned to this Welcome default page if you have not been active for more than 20 minutes.
- If there is a problem with the ROH Data Gateway application, a notification page will be displayed instead of the following Welcome Default Page.
A successful connection to the ROH Data Gateway application will result in the screen shown below being presented by your browser. To proceed into the ROH Data Gateway application, select the language of your choice.
Terms and conditions are viewable from the welcome page by clicking on the link.

To continue, click on the language of your choice.
2. Verify the web server certificate
To verify the Web server certificate, right-click anywhere on the default.aspx page; select Properties then Certificates. The following screen (or similar) will come up:

It is very important to take the time to verify the correctness of the information displayed on this screen. If you have any questions, please contact your system administrator or the Department's contact.
To continue, close this window by clicking on OK.
3. Login screen
3.1 Logging in
Enter your User ID and Password as assigned to you by Service Canada. The User ID is not case-sensitive. The Password is case-sensitive.
To continue, click on the SUBMIT AUTHORIZATION button.
Note the following:
- The password given to you the first time is a temporary one; you will need to change it after your first successful login. It is important to keep your password confidential. Change your password regularly.
- For instructions on what to do if you forget your User ID and/or Password, proceed to step 3.2 below.
- The "Announcement" section will only be displayed if there are announcements.
- For security reasons, your current session will be terminated and you will be returned to the Welcome default page if you have not been active for more than 20 minutes.

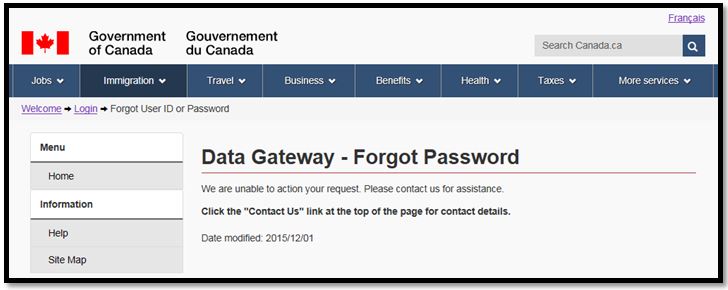
3.2 Forgot user ID or password
3.2.1 Click the “Forgot your user ID and/or password?” link
The following page will be displayed:

3.2.2 Click the “Participant of the Report on Hirings (ROH) program” link
The following page will be displayed:

3.2.3 Enter your Business Number and e-mail address and click the “Submit” button
Note: The Business Number and E-mail address fields are not case-sensitive. However, an error message will be displayed if any of the following Business Number and E-mail address rules are violated:
Business Number:
- The first nine digits (positions 1 to 9 from left to right) of the Business Number must be numeric.
- The first nine digits (positions 1 to 9 from left to right) of the Business Number must fulfill conditions of the MOD10 check.
- Character positions 10 to 11 (from left to right) of the Business Number must contain the value "rp" or "RP".
- The last four digits (position 12 to 15 from left to right) of the Business Number must be numeric and greater than zero.
E-mail address:
- The E-mail format must be "your name@your domain.com" (the .com can be any extension - i.e., org or .ca).
- The maximum length for the E-mail cannot exceed 105 characters.
3.2.4 If the Business Number and e-mail address pass all the above rules, the following authentication (security) rules will be applied:
Business Number:
- The Business Number must be registered in the ROH program.
- The Business Number must be for an ROH information provider.
- The ROH information provider must be currently participating.
E-mail address:
- The E-mail address must be the same as the E-mail address that is currently registered for the ROH information provider.
3.2.5 If the Business Number and E-mail address pass all the authentication (security) rules:
- An E-mail containing your new (reset) User ID and Password will be sent to your E-mail address. Refer to the sample E-mail below:

Important note:
Even though the E-mail requests state that you can change your User ID and Password, you in fact only have the ability to change your Password.
Only ROH program participants who report organization and hiring details by the ROH Data Gateway application manual data entry (Forms) method have the ability to change both their User ID and Password.

3.2.6 If the Business Number and/or E-mail address violates any of the authentication (security) rules, then the following notice will be displayed:
- An E-mail containing your new (reset) User ID and Password will be sent to your E-mail address. Refer to the sample E-mail below:
4. Terms of use screen
Agreeing to comply with the "Terms of Use" is a condition of using the ROH Data Gateway application. Please read it carefully.
This window appears the first time a connection is attempted for a User ID and Password that has not previously agreed to this version of the Terms of Use. Should the Terms of Use be amended, you will be required to agree to the amended version prior to using the ROH Data Gateway application.

To continue, select either "I Agree" or "I Disagree" and click on the CONTINUE button.
5. Change password
If you are logging into the ROH Data Gateway application for the first time, you will be automatically taken to the Change Password page. On this page you will be asked to enter your current temporary password which will be given to you by Service Canada. Next, enter your new password and confirm it.
The password must follow these rules:
- The password should have a minimum length of 8 characters
- The password must have at least 1 uppercase character
- The password must have at least 1 lowercase character
- The password must have at least 1 numeric character
- The password must have at least 1 special characters or punctuation character (e.g. !$%&/()?+*#-@:)
- The password must be different than your username
- The password must not contain any whitespace
- The password cannot be the same as the current or previous user's passwords
Note the following:
Your user account will be disabled after three (3) unsuccessful login attempts with the same user ID. If 15 unsuccessful login attempts are made with an invalid user ID (inexistent in the Data Gateway), you will be redirected to the account disabled page automatically. Your account will be automatically enabled after 30 minutes.
It is important to keep you password confidential.
Use the Forgot your User Id and/or Password feature described in section 3.2 of the user guide or Contact Service Canada if you forget your User Id or Password.

To continue, click on the Change Password button.
Chapter 3: Report on Hirings (ROH) program data gateway application home page
Note: For security reasons, your current session will be terminated and you will be returned to the Welcome default page if you have not been active for more than 20 minutes.
The following ROH Data Gateway Application home page will be displayed once you have logged into the ROH Data Gateway application. Your User ID and Session Number will be displayed at the top of the page.
This page contains a number of buttons and links to help you navigate through the website.
Only your organization name (name of the ROH information provider organization) will appear in the Select an organization drop-down list. The name(s) of the organization(s) that you may report on behalf of (for) will not appear in this drop-down list.
You can upload a file and or view your file upload history. Refer to the following chapters on how to perform these functions.
You can also change your password at any time from this home page (for instructions, refer to Chapter 2, section 5).
The ROH Data Gateway Application Home page can be reached from any page by clicking the Home link under the left-side Menu section of the page or on the top toolbar.

Chapter 4: ROH program reporting compliance and BH1202 file submissions
Note: For security reasons, your current session will be terminated and you will be returned to the Welcome default page if you have not been active for more than 20 minutes.
1. ROH program reporting requirements
As the ROH information provider, you must upload (submit) at least one BH1202.xml file per month. You can upload as many BH1202.xml files per month if you wish. Refer to Chapter 5 for the detailed instructions and requirements on how to properly create the BH1202.xml file.
If you wish to report for an organization for the first time or resume reporting for an organization that previously stopped participating in the ROH program, then simply include in your BH1202.xml file an "organization" transaction for that organization.
Once you start reporting for an organization, you must continue reporting for that organization every month regardless of whether or not the organization had hirings or recalls for that month.
In other words, you must include in your BH1202.xml file one "organization" transaction along with any of its related "hiring_recall" transactions for every organization that you report for.
Always provide in your BH1202.xml file the most up-to-date information for all organizations that you report for.
If you wish to stop reporting for an organization, simply omit that organization from your BH1202.xml file.
If you forget to upload at least one BH1202.xml file per month, you will be notified in the following ways until you are again in compliance with the ROH program BH1202.xml file reporting requirements:
- You will be notified by e-mail.
- After you have logged into the ROH Data Gateway application, the following Hiring and Recall Submission Reminder page will be displayed:

Carefully read the Hiring and Recall Submission Reminder.
Note: Only information on your organization (the ROH information provider) will be displayed. Information on any organization that you may report for will not be displayed.
Click the CONTINUE button to acknowledge that you have read the Hiring and Recall Submission Reminder.
Once you have clicked the CONTINUE button, the following will occur:
- The ROH Data Gateway Application home page will be displayed.
- If our internal records indicate that your organization and/or any one of the organizations that your report for has a Participation Status of "Late or Not Reporting," the Participation Status of these organizations will be updated to "Notified as a Result of Late or Not Reporting."
2. Uploading BH1202 files
2.1 From the home page, click the “Upload file” button. The following page will then be displayed:

2.2 Enter the number of files you wish to upload (usually 1) and click the “Continue” button
If your previously submitted file was not rejected, the Upload page below will be displayed:
Important Note:
If your previously submitted file was rejected, the warning message below will be displayed.
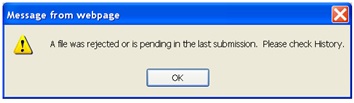
Please rectify the problem with your previously submitted file and resubmit before submitting a new file.
Click the OK button to acknowledge the message. The Upload page below will be displayed.

2.3 Use the “Browse” button to select and enter your file for upload in the “Select the file(s) to upload” field.
2.4 Click the “Upload now” button. The following page will then be displayed:

The page will contain the file upload statistics along with the specific file upload details like the Reference Number, etc.
It is recommended that you keep a record of the Reference Number for future reference.
Important notes:
- A "The file to be uploaded was not found" error message will be displayed if you did not enter a value in the "Select the file(s) to upload" field. In this event, select the correct file (file directory path and file name) and resubmit.
- A "The file to be uploaded was not found or empty" error message will be displayed if you uploaded a file with no data. In this event, upload a file that contains data.
- You will receive a *notification by e-mail once your uploaded file has been processed (validated, etc.) by the ROH program (*usually within two business days).
- You have until the end of the day (midnight) of the file upload to delete the uploaded file before it is processed (validated, etc.) by the ROH program. For instructions on how to delete an uploaded file, refer to section 3. Viewing and/or deleting previously uploaded BH1202 files.
3. Viewing and/or deleting previously uploaded BH1202 files
To view the processing results of previously uploaded BH1202 files and/or delete previously uploaded BH1202 files, perform the following steps:
3.1 From the Home page, click the “View History” button. The following page will then be displayed:

The list of uploaded files will be displayed in descending Upload date and time order (from the latest to the oldest).
The following table contains information on the main file upload statuses that may be displayed.
| Upload Status | Meaning | Required action by user | Can the uploaded file instance be deleted if it has this upload status? |
|---|---|---|---|
| File received | The file has been successfully transferred to the Data Gateway application | None | Yes |
| An error occurred while transferring the file | The file was not successfully transferred to the Data Gateway application. | Delete the uploaded file instance and attempt to upload the file again. Contact us if the problem persists. | Yes |
| The file transfer failed | The file cannot be saved in the Data Gateway application. | Attempt to upload the file again. Contact us if the problem persists. Note: The user is unlikely to see this message |
No |
| The file could not be copied to the application queue | The file could not be transferred from the Data Gateway application to the ROH application. An attempt to transfer the file will be made at a later time. | None. Note: The user is unlikely to see this message. |
No |
| The validation of the XML file against the XSD schema was completed successfully | The file passed the validation against the XSD schema. | None. Further processing of the file must still take place. Once the processing of the file has been completed, the Upload Status will be changed to either "Accepted", "Accepted with errors" or "Rejected - Please correct and resubmit". |
No |
| The validation of the XML file against the XSD schema failed | The file failed the validation against the XSD schema. | None. Further processing of the file must still take place. Once the processing of the file has been completed, the Upload Status will be changed to "Rejected - Please correct and resubmit". |
No |
| Accepted | The processing of the file by the ROH application has completed and no major errors were detected. | None | No |
| Accepted with errors | The processing of the file by the ROH application has completed and no major errors were detected but one or more of the file's transactions have been rejected. | Review the reasons why one or more of the file's transactions have been rejected. To review the reasons, refer to section 3.1.2. below. Correct the rejected transactions and include these corrected transactions in your next month's regularly scheduled file submission. Refer to Chapter 5 – BH1202 File Creation Instructions and Requirements. | No |
| Rejected – Please correct and resubmit | The processing of the file by the ROH application has completed and one or more major errors were detected. | Review the reason why the file has been rejected. To review the reasons, refer to section 3.1.2. below. Create a new corrected file as soon as possible and submit it (upload it) prior to your next month's regularly scheduled file submission. Refer to Chapter 5 – BH1202 File Creation Instructions and Requirements. |
No |
| Rejected – Do not resubmit | The user's Data Gateway account was deleted or disabled before the file could be processed by the ROH application. | None | No |
3.1.1 To delete an uploaded file instance:
- Click the uploaded file's Delete button which is located to the left of the Reference Number.
Only submitted files with specific Upload Statuses can be deleted. Refer to the above table for the specific Upload Statuses. - Confirm that you want the uploaded file deleted.
The Upload History page will then be automatically refreshed with the uploaded file instance omitted.
3.1.2 To view the file's upload history details, click the file's corresponding Reference Number link.
The following page will then be displayed:
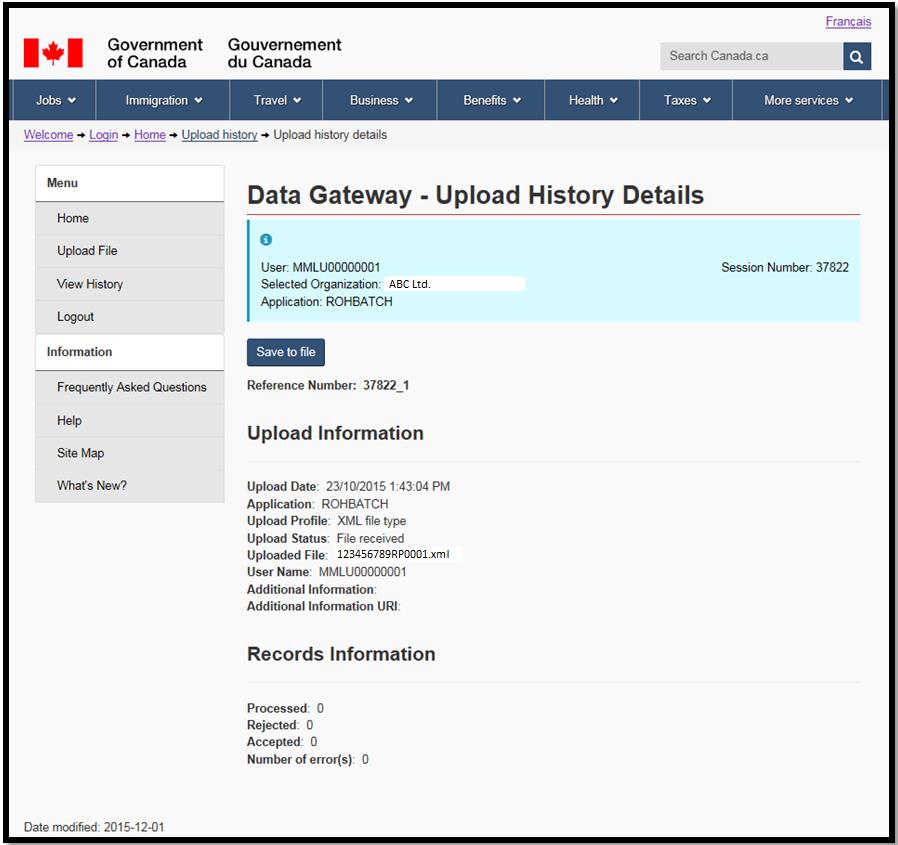
Note the following:
- If you would like to save the details that are displayed on the Upload History Details page to a file, click the Save to file button and then follow the instructions.
- The Records Information section contains the following BH1202 file processing grand totals:
- "Processed": Refers to the total of all the organization and hiring_recall transactions/records processed.
- "Accepted": Refers to the total of all the organization and hiring_recall transactions/records accepted.
- "Rejected" and "Number of error(s)": Refers to the total of all the organization and hiring_recall transactions/records rejected.
- The first message under the Messages section will usually contain the following BH1202 file processing sub-totals:
- Total organization transactions/records:
- "Processed"
- "Accepted"
- "Rejected" - Total hiring_recall transactions/records:
- "Processed"
- "Accepted"
- "Rejected"
- Total organization transactions/records:
Any remaining messages under the Messages section will contain the BH1202 file processing warning and/or error messages listed in the order of their detection.
Chapter 5: BH1202 file creation instructions and requirements
1. Description
The BH1202 file contains information on organizations that participate in the ROH program by the "File" reporting method along with their corresponding hirings and recalls. The BH1202 file replaces the previous ROH CPS (Centralized Payroll System) file.
2. Requirements
2.1 You can name the file whatever you wish, but we recommend the following format:
Note: The only restriction on the file name is to limit the length of the file name including extension to 36 characters.
<BH1202><Your 15 character CRA Account Number><File Creation Date – YYYYMMDD><.xml>
For example: BH1202999999999RP999920110930.xml
2.2 The file content must adhere to the requirements outlined in the BH1202.xsd file (XML Schema).
The entire BH1202.xml file will be rejected if this requirement is not met.
Note the following about the BH1202.xsd file:
- A link to the BH1202.doc file is located at the following official Report on Hiring Program Employer site:
Once you have downloaded the BH1202 XML Schema and saved it to your computer, you must change the file extension from .doc to .xsd.
- The purpose of the BH1202.xsd (XML Schema) file is to define the legal building blocks and structure of the BH1202.xml file.
To be more specific, the BH1202.xsd (XML Schema) file:- defines elements that can appear in the BH1202.xml file
- defines attributes that can appear in the BH1202.xml file
- defines which elements are child elements in the BH1202.xml file
- defines the order of child elements in the BH1202.xml file
- defines the number of child elements in the BH1202.xml file
- defines data types for elements and attributes in the BH1202.xml file
- defines default and fixed values for elements and attributes in the BH1202.xml file
- The name of the root element in the BH1202.xsd file is "BH1202".
- Every element in the BH1202.xsd file has a corresponding description.
- Every English element name in the BH1202.xsd file has a corresponding French element name. As a result, your BH1202.xml file can contain either English or French element names.
- Almost every element full (long) name in the BH1202.xsd file has a corresponding short name (acronym). It is strongly recommended that you use the short name in your BH1202.xml file in order to reduce the size of your file.
- Prior to submitting a BH1202.xml file to the ROH program, validate your BH1202.xml file against the BH1202.xsd (XML Schema) file and make, if applicable, the necessary corrections. In other words, only submit BH1202.xml files that have met all the requirements defined in the BH1202.xsd (XML Schema) file.
- It is strongly recommend that you use a professional XML editor that supports XML Schemas to view this BH1202.xsd file.
As well, a professional XML editor will help you to:- create a sample BH1202.xml file
- create an error-free BH1202.xml file
- validate your BH1202.xml file against the BH1202.xsd schema file
- stick to a valid XML structure
2.3 In addition to the requirements defined in the BH1202.xsd (XML Schema) file, the following requirements must also be adhered to:
Note:
The following requirements are enforced by our ROH program software that processes your submitted BH1202.xml file(s). They are not enforced by the BH1202.xsd (XML Schema) file.
2.3.1 The "creation_date_time" element value must be unique.
This requirement is in place to ensure that you only submit BH1202.xml files that have not been previously submitted.
The entire BH1202.xml file will be rejected if this requirement is not met.
2.3.2 The "creation_date_time" element value must be greater than all of the previously submitted BH1202.xml file's "creation_date_time" element values.
This requirement is in place to ensure that you submit your BH1202.xml files in the proper sequence (for example: January, February, March…).
The entire BH1202.xml file will be rejected if this requirement is not met.
2.3.3 The "creation_date_time" element value must not be in the future.
The entire BH1202.xml file will be rejected if this requirement is not met.
2.3.4 The first "organization" transaction in your BH1202.xml file must contain the *ROH information provider organization details.
*The organization that is registered in the ROH program as the legitimate provider of ROH information on behalf of itself and/or other organizations via the BH1202.xml file reporting method.
The entire BH1202.xml file will be rejected if this requirement is not met.
2.3.5 The first "cra_account_number" element instance value in your BH1202.xml file must be the same as the CRA Account Number value of the organization that is registered in the ROH program as the legitimate ROH information provider of this BH1202.xml file.
Important note:
If your organization's (ROH information provider) CRA_account_number changes, notify us (see Chapter 6, section 2. Contact Us) before submitting your next file. We need to update your organization's CRA account number in our ROH program'sdata base. Otherwise, your next file will be rejected.
The entire BH1202.xml file will be rejected if this requirement is not met.
2.3.6 The "business_number" element value must fulfill conditions of the MOD10 check for every organization transaction in your BH1202.xml file that represents a *child organization.
*An organization that the ROH information provider reports for (on behalf of).
The entire "organization" and related "hiring_recall" transaction(s) will be rejected if this requirement is not met.
2.3.7 Every "zip_code" element value in your BH1202.xml file must correspond to a legitimate US state, etc.
In most cases, the entire "organization" and related "hiring_recall" transaction(s) will be rejected if this requirement is not met.
2.3.8 Every "postal_code" element value in your BH1202.xml file must adhere to the following requirement :
If the first character position (from the left) is X, then the next two character positions (from the left) must be one of the following allowable values: 0A, 0B, 0C, 0E, 0G, 0H, 0K, or 1A.
In most cases, the entire "organization" and related "hiring_recall" transaction(s) will be rejected if this requirement is not met.
2.3.9 If the organization transaction represents a *child organization that is participating in the ROH program for the first time or is resuming their participation in the ROH program, then their "cra_account_number" element value must:
*An organization that the ROH information provider reports for (on behalf of).
- be registered with the Canada Revenue Agency (CRA), and their account with CRA must be open; and
- not correspond to an organization that is currently participating in the Automated Earnings Reporting System (AERS).
The entire "organization" and related "hiring_recall" transaction(s) will be rejected if this requirement is not met.
2.3.10 You can only report for participating child organizations (include child organization transactions in your BH1202.xml file) that are currently registered/linked in the ROH program to your organization (ROH information provider).
The entire "organization" and related "hiring_recall" transaction(s) will be rejected if this requirement is not met.
2.3.11 Every "social_insurance_number" element value in your BH1202.xml file must fulfill conditions of the MOD10 check.
The entire "hiring_recall" element transaction will be rejected if this requirement is not met.
2.3.12 Every "first_day_worked" element value in your BH1202.xml file must not be in the future or more than six months old.
The entire "hiring_recall" element transaction will be rejected if this requirement is not met.
2.3.13 A *hiring_recall transaction that has been previously reported for the same corresponding "organization" transaction is not allowed.
*A "hiring_recall" transaction that has the same "social_insurance_number" and "first_day_worked" element values as a previously reported "hiring_recall" transaction for the same corresponding "organization" transaction.
The entire "hiring_recall" element transaction will be rejected if this requirement is not met.
2.3.14 The "hiring_recall" transaction's "first_day_worked" element value must not be within seven calendar days (before or after) of a previously reported "hiring_recall" transaction for the same "social_insurance_number" element value and corresponding "organization" element instance.
The entire "hiring_recall" element transaction will be rejected if this requirement is not met.
3. BH1202 file transaction content options
3.1 If you are an ROH information provider organization that will report all hirings and recalls under only one (your) CRA Account Number, then:
3.1.1 If there are no hirings or recalls to report, your BH1202.xml file must contain only your ROH information provider details.
For example:
Only one "organization_and_hiring" transaction containing:
- a corresponding "organization" transaction; and
- followed by one or more corresponding "hiring_recall" transactions
3.2 If you are an ROH information provider organization that will report hirings and recalls for multiple organizations, your BH1202.xml file must contain:
3.2.1 Only one ROH information provider "organization_and_hiring" transaction containing:
- a corresponding "organization" transaction; and
- optionally followed by one or more corresponding "hiring_recall" transactions.
3.2.2 Followed by only one *"organization_and_hiring" transaction for each child organization that the ROH information provider reports for containing:
- a corresponding child "organization" transaction; and
- optionally followed by one or more corresponding child "hiring_recall" transactions.
Chapter 6: Miscellaneous ROH data gateway application features and information
Note: For security reasons, your current session will be terminated and you will be returned to the Welcome default page if you have not been active for more than 20 minutes.
1. Government online initiative standard toolbar
The ROH Data Gateway application uses the Government On-Line initiative standard toolbar at the top of every page.

The following list defines each of the terms used in the standard Government On-Line top toolbar.
- Français:
- This link changes the language of the Data Gateway to French.
- Jobs:
- This link opens the Government of Canada – Jobs and the workplace website.
- Immigration:
- This link opens the Government of Canada - Immigration and citizenship website.
- Travel:
- This link opens the Government of Canada – Travel and tourism website.
- Business:
- This link opens the Government of Canada – Business and industry website.
- Benefits:
- This link opens the Government of Canada – Benefits website.
- Health:
- This link opens the Government of Canada – Health website.
- Taxes:
- This link opens the Government of Canada – Taxes website.
- More Services:
- This link opens the Government of Canada – All services and information website.

The following list defines each of the terms used in the Government On-Line standard toolbar (located at the bottom of the screen).
Contact Information
- Most asked-about topics:
- This link opens the Government of Canada – Contact information website and directly to the Most asked-about topics section.
- Specialized enquiries:
- This link opens the Government of Canada – Contact information website, and directly to the Specialized Enquiries section.
- General Inquiries:
- This link opens the Government of Canada – Contact information website, and directly to the General Enquiries section.
News
- Newsroom:
- This link opens the Government of Canada – latest News and information website.
- News Releases:
- This link opens the Government of Canada – News Releases website.
- Media Advisories:
- This link opens the Government of Canada – Media Advisories website.
- Speeches:
- This link opens the Government of Canada – Speeches website.
- Statements:
- This link opens the Government of Canada – Statements website.
Government
- How government works:
- This link opens the Government of Canada – How government works website.
- Departments and agencies:
- This link opens to the Government of Canada – Departments and agencies website.
- Prime Minister:
- This link opens to the Government of Canada – Prime Minister website.
- Ministers:
- This link opens to the Government of Canada – Ministers website.
- Public service and military:
- This link opens to the Government of Canada – Public service and military website.
- Policies, regulations and laws:
- This link opens to the Government of Canada – Policies, regulations and laws website.
- Libraries:
- This link opens to the Government of Canada – Libraries website.
- Publications:
- This link opens to the Government of Canada – Publications website.
- Statistics and data:
- This link opens to the Government of Canada – Statistics and data website.
- About Canada.ca:
- This link opens to the Government of Canada – About Canada.ca website.
Transparency
- Government-wide reporting:
- This link opens to the Government of Canada – Government-wide reporting website.
- Open government:
- This link opens to the new Government of Canada portal – Open Government website.
- Proactive disclosure:
- This link opens to the Government of Canada – Government-Wide Reporting – Proactive Disclosure – Treasury Board of Canada Secretariat website.
- Terms and conditions:
- This link opens to the Government of Canada – Terms and conditions website.
- Privacy:
- This link opens to the Government of Canada – Privacy website.
- Feedback:
- This link opens to the Government of Canada – Feedback website.
- Social media:
- This link opens to the official listing of Government of Canada – Social media channels website.
- Mobile centre:
- This link opens to the Government of Canada – Mobile centre website.
2. Contact us
2.1 Click the “Contact us” link in the standard toolbar at the top of the page.
The following “Contact us” page will be displayed:

2.2 Click the page's “Report on Hirings” program link option.
The following “Contact us” page will be displayed. Follow the instructions on the page.
Note:
The Data Gateway User Guide – File (BH1202) will be displayed if you click the page's Data Gateway User Guide – File (BH1202) link.
The Frequently Asked Questions – File (BH1202) page will be displayed if you click the page's Frequently Asked Questions – File (BH1202) link. Refer to section 6 of this chapter for more information on the Frequently Asked Questions pages.

3. Help
3.1. Clicking on the “Help” link in the standard toolbar at the top of every page brings up the following Help page.
The following page will be displayed:

3.2 Click on the “Report on Hirings - File (BH1202)” link to bring up the following Help page.

The Help page contains a general information section for every ROH Data Gateway application page (screen).
To view a page's general information section;
- Click on the page's corresponding name link located under the Report on Hirings – File (BH1202) section of the Help page.
For example, if you are interested in viewing the general information section of the Accessibility Help page, click the Accessibility Help link. You will then be brought to the Accessibility Help general information section of the Help page.
- Or, scroll up or down on the Help page until you have reached the page's general information section.
Note: Each general information section will also include the location within the Data Gateway User Guide as well as a link to the Data Gateway User Guide where you can view detailed information and instructions on the page.
4. What’s new?
This page provides the user with new information relating to the ROH Data Gateway application. Check this page occasionally for news and updates.
To go back to where you were, click on “Back.” Or go to any other link from the toolbar.

5. Frequently asked questions
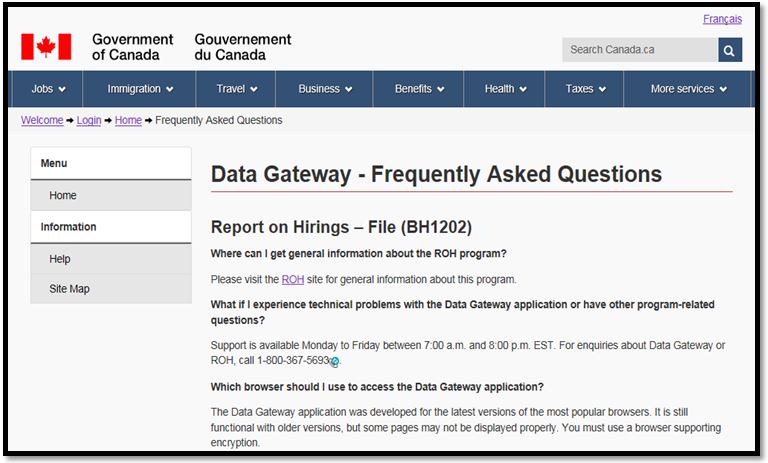
5.1 Click the “Frequently asked questions” link on the page. The following Frequently Asked Questions page will be displayed:

5.2 Click the page's “Report on Hirings – File (BH1202)” program link option. The following
Frequently Asked Questions page will be displayed. Simply scroll down to your question to view the answer.
6. Site map
Click the Site Map link under the left-side Info section of the page to view the current official version.
7. Exiting from the ROH data gateway application
Click on the Logout link under the left-side Menu section of the page to exit the ROH Data Gateway application.
8. Secure session exit notice
The following warning page will be displayed when you attempt to leave a secure session in the Data Gateway application.
Click Yes if you wish to terminate your session in Data Gateway and be redirected to the new chosen link.
Click No if you wish to continue your session in Data Gateway and cancel the redirection to the new link.

Page details
- Date modified: