
D-Day: Canada’s three services on Operation Overlord


Related Links
- D-Day and the Battle of Normandy 75th anniversary — 1944-2019
- Ministers mark 75th anniversary of D-Day and the Battle of Normandy
- Swiftly and surely on D-Day: 430 Squadron and the Normandy invasion
- D-Day: The RCAF and Air Defence of Great Britain
- D-Day: The RCAF and Coastal Command
- D-Day: The RCAF and Bomber Command
- D-Day Profile of Courage: Flying Officer Leonard Ralph Allman
- Canadian airmen killed on D-Day
- D-Day: The RCAF and Second Tactical Air Force
- D-Day and air power
- Operation Overlord: D-Day remembered
- D-Day and the Battle of Normandy
News Article / June 6, 2019
Click on the photo under “Image Gallery” to see more photos.
By Chris Charland
June 6, 2019, marks the 75th anniversary of D-Day—the Allied invasion of Normandy.
The successful invasion marked the turning point in the Second World War.
In February 1943, United States President Franklin D. Roosevelt and British Prime Minister Winston Churchill, along with their respective advisors, held a high-level conference in Casablanca, Morocco. They were there to discuss the future conduct of the war.
They decided that plans for the re-entry in to Europe must be given top priority and the concentration of forces and materials needed for the forthcoming invasion began.
In March 1943, United States Army General Dwight D. Eisenhower selected the British Army’s acting Lieutenant-General Frederick Morgan as chief of staff to the supreme allied commander of the allied force that would invade northern Europe. Morgan is credited as being the original planner for the invasion of Europe.
Lingering concerns and differences of opinion on Operation Neptune, the assault phase of Operation Overlord, were addressed at the Quebec Conference in August 1943. It was agreed that the invasion of France would take place in May 1944.
On November 28, 1943, General Eisenhower, affectionately known as “Ike”, was appointed the supreme allied commander. His duty was no less than to enter the continent of Europe in conjunction with all other allied nations, undertake operations aimed at the heart of Germany and destroy its forces. Taking into consideration a nearly full moon and the Normandy tides, June 5, 1944, was set as the day for an invasion on a scale that had never before been attempted.
The entire daring escapade was a monumental logistics nightmare. In all, more than 7,000 vessels carrying more than 150,000 troops would have to cross the English Channel to France undetected and arrive exactly on time to establish a beachhead. Once the details of invasion were coordinated, the land forces, under Field Marshal Sir Bernard L. “Monty” Montgomery, put forth the logistical requirements. All allied air operations would be under the command of the Royal Air Force’s Air Chief Marshal Sir Trafford Leigh-Mallory
The build-up also had to provide for the debarkation of reinforcements without interruption for five to six weeks after the landing . . . any delay would carry heavy consequences.
The initial landing was delayed by 24 hours to June 6 due to stormy weather, which also indirectly caused the sinking of the minesweeper USS Osprey. Additionally, an American tank landing craft, United States LCT2498, broke down and subsequently capsized and sank in the vicious swell.
Mother Nature, not the Germans dealt the first blows against Operation Overlord. Nevertheless, D-Day and the Allied forces arrived at the beaches of Normandy with full force on the morning of June 6.
The crack 1st Canadian Parachute Battalion led by Lieutenant-Colonel G.F.P. Bradbrooke was part of the tough and tumble 3rd Brigade of the British 6th Airborne Division whose members were nicknamed “Red Devils”. The Canadian Red Devils dropped into France after 1 a.m. on June 6, an hour before the arrival of the rest of the brigade, with the aim of securing the DZ (Drop Zone), capturing the enemy headquarters located at the site and destroying the local radio station at Varaville. They were the first Canadian unit to arrive in France.
After that, the Canadians were to destroy vehicle bridges over the Dives River and its tributaries at Varaville. Having done that, they were to neutralize various fortified positions at the crossroads. Additional responsibilities included protecting the left (southern) flank of the 9th Battalion as the battalion assaulted the enemy gun battery at Merville. Upon completing that, the Canadians were to hold a strategically important position at the Le Mesnil crossroads.
Remarkably, the Canadian paratroopers had accomplished all they set out to do by mid-day on June 6.
The Canadian Army’s 3rd Canadian Division, led Major General R.F. “Rod” Keller, along with the 2nd Canadian Armoured Brigade under the command of Brigadier R.A. Wyman, formed part of General Miles Dempsey’s 2nd British Army.
The Canadians, numbering just over 14,000, came ashore at Juno Beach. The five-mile wide Juno Beach was divided into two primary sectors, Mike and Nan. In turn, each of these was sub-divided into smaller sections denoted by the sector name followed by a colour. Many heroic deeds were performed on the first day at Juno Beach. The Allies had come to expect nothing less. The relentless pursuit of the Canadian Army’s objectives was measured in human currency; of the 14,000 Canadians who stormed Juno Beach, 340 were killed, 574 were wounded and 49 were captured by the defending Germans.
This was a small comfort, considering planners had predicted a much higher casualty rate.
The 3rd Canadian Infantry Division* comprised the following units:
- Royal Winnipeg Rifles
- Regina Rifle Regiment
- Canadian Scottish Regiment
- Queen's Own Rifles of Canada
- Le Régiment de la Chaudière
- North Shore (New Brunswick) Regiment
- HIghland Light Infantry of Canada
- Stormont, Dundas, and Glengarry Highlanders
- Nova Scotia Highlanders
- Cameron Highlanders of Ottawa (M.G.)
- 17th Duke of York's Royal Canadian Hussars
- 12th Field Regiment, Royal Canadian Artillery
- 13th Field Regiment, Royal Canadian Artillery
- 14th Field Regiment, Royal Canadian Artillery
- 19th Army Field Regiment, Royal Canadian Artillery
- 3rd Anti-Tank Regiment, Royal Canadian Artillery
- 4th Light Anti-Aircraft Regiment, Royal Canadian Artillery
- 5th Field Company, Royal Canadian Engineers
- 6th Field Company, Royal Canadian Engineers
- 16th Field Company, Royal Canadian Engineers
- 18th Field Company, Royal Canadian Engineers
- 3rd Canadian Field Park Company, Royal Canadian Engineers
- 3rd Canadian Divisional Bridge Platoon, Royal Canadian Engineers
- 3rd Infantry Divisional Signals
- 3rd Infantry Divisional Troops Company
- 14 Field Ambulance
- 22 Field Ambulance
- 23 Field Ambulance
- 6th Canadian Armoured Regiment (1st Hussars)
- 10th Canadian Armoured Regiment (Fort Garry Horse)
- 27th Armoured Regiment (Sherbrooke Fusiliers)
* Units of the Royal Canadian Electrical and Mechanical Engineers and the Royal Canadian Ordnance Corps also provided vital support during the landings.
- 48 Royal Marine Commando
- 4th Special Service Brigade
- 26th Assault Squadron
- 80th Assault Squadron
- 5th Assault Regiment, Royal Engineers
- 6th Assault Regiment, Royal Engineers
- Two detachments of the 22nd Dragoons, 79th Armoured Division
- 3rd Battery 2nd Royal Marine Armoured Support Regiment
- 4th Battery, 2nd Royal Marine Armoured Support Regiment
- “C” Squadron, Inns of Court Regiment
The Royal Canadian Navy was extremely active before and during the first day of Operation Overlord.
A force of 19 corvettes was assigned to provide escort service to the many ships and floating docks heading for assembly points on the south coast of England Eleven frigates, nine destroyers and five corvettes were seconded to the Royal Navy to provide an ASDIC (anti-submarine detection investigation committee) screen around the western approaches to the English Channel one week before the invasion date. This was to guard against the constant German U-Boat threat.
Only hours before the invasion, Canadian “Bangor” Class minesweepers cleared shipping lanes of mines and then ensured that the anchorage swept clear. The last part of their assignment was to sweep the lanes for the assault boats, right to the limit of the deep water. While under a moonlit sky, they crept within a mile and a half (2.4 kilometres) of shore, pretty well under the noses of the unsuspecting Germans.
Fortunately, they were not spotted; German coastal artillery guns would have made mincemeat of them.
The RCN’s two landing ships, HMCS Prince Henry and HMCS Prince David, carried 14 landing craft (LCI or landing craft, infantry) to a point where they could be launched for the run into the beachhead. In the British sector, 30 “Fleet” class destroyers, including HMCS Algonquin and HMCS Sioux, provided direct fire support for the landing craft carrying part of the 3rd Canadian Infantry Division after they were launched from the landing ships.
Mines and other underwater obstructions were a constant threat to the landing craft and few escaped without some sort of damage. Leading the second wave were 26 landing craft of the RCN’s 260th, 262nd and 264th Flotillas. These flotillas were carrying a combined force of 4,617 soldiers, primarily from the 3rd Canadian Infantry Division. Six speedy and deadly MTBs (motor torpedo boat) were assigned to patrol the Seine estuary. RCN corvettes would go on to escort additional convoys into Baie de la Seine during the rest of the day. Naval losses were described as “incredibly light”, especially considering how many enemy long-range naval guns and other weapons were still operational at the time of the landings.
The following RCN vessels took part in the invasion of Normandy:
- HMCS Haida
- HMCS Huron
- HMCS Algonquin
- HMCS Sioux
- HMCS Gatineau
- HMCS Kootenay
- HMCS Qu’Appelle
- HMCS Ottawa (II)
- HMCS Chaudière
- HMCS Restigouche
- HMCS Skeena
- HMCS St. Laurent
- HMCS Saskatchewan
- HMCS Meon
- HMCS Teme
- HMCS Cape Breton
- HMCS Grou
- HMCS Matane
- HMCS Outremont
- HMCS Port Colberne
- HMCS Saint John
- HMCS Swansea
- HMCS Waskesiu
- HMCS Alberni
- HMCS Baddeck
- HMCS Camrose
- HMCS Drumheller
- HMCS Louisburg (II)
- HMCS Lunenburg
- HMCS Mayflower
- HMCS Moose Jaw
- HMCS Summerside
- HMCS Prescott
- HMCS Mimico
- HMCS Calgary
- HMCS Kitchener
- HMCS Port Arthur
- HMCS Regina
- HMCS Woodstock
- HMCS Lindsay
- HMCS Prince David
- HMCS Prince Henry
- HMCS Bayfield
- HMCS Guysborough
- HMCS Vegreville
- HMCS Kenora
- HMCS Mulgrave
MTBs 459, 460, 461, 462, 463, 464, 465 and 466
MTBs 726, 727, 735, 736, 743, 744, 745, 747, 748
LCI(L)s 117, 121, 166, 177, 249, 266, 271, 277, 285, 298 and 301
LCI(L)s 115, 118, 125, 135, 250, 252, 262, 263, 270, 276, 299 and 306
LCI(L)s 255, 288, 295, 302, 305, 310 and 311
LCAs 736, 850, 856, 925, 1021, 1033, 1371 and 1372
LCAs 1957, 1059, 1137, 1138, 1150, 1151, 1374 and 1375
It was a maximum effort for the crews of Bomber Command’s 6 (RCAF) Group on the night of June 5-6, 1944. A force of 190 aircraft, comprising Avro Lancaster and Handley Page Halifax four-engine heavy bombers, flew 230 sorties in support of pre-invasion operations. A large number of targets were struck, with particular attention paid to the German coastal artillery emplacements on the beachhead. In all, more than 870 tons of high explosives were dropped for the loss of one Canadian Halifax.
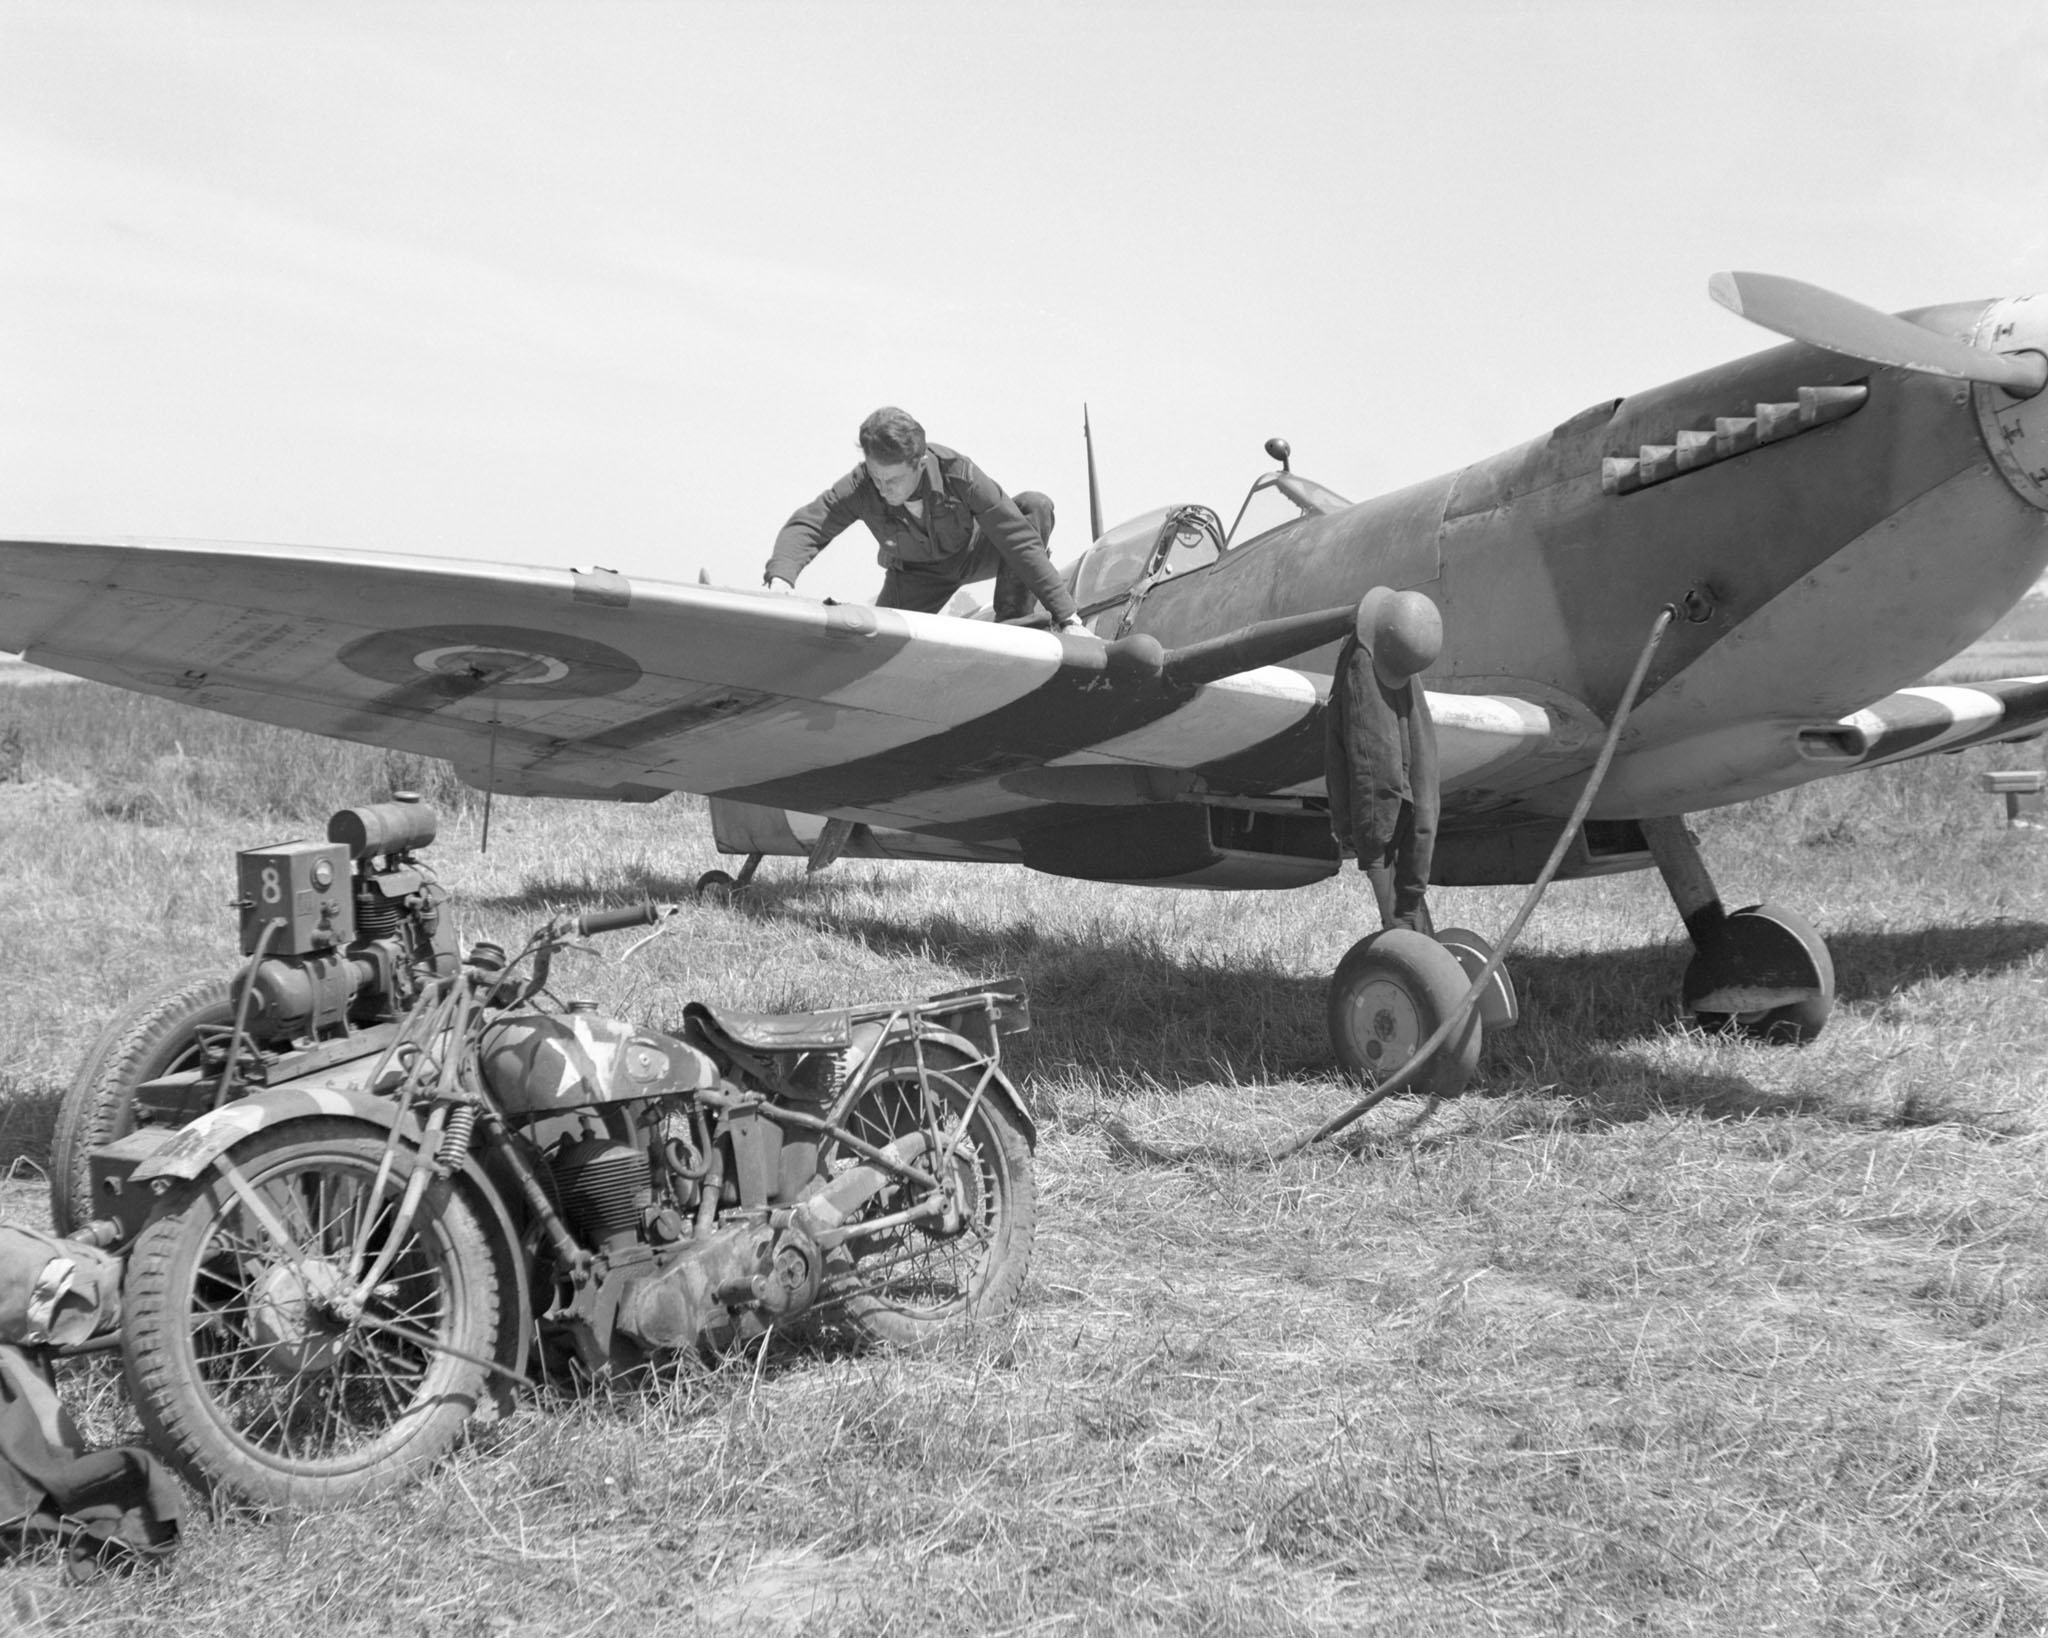
RCAF fighter and fighter-bomber squadrons went into action providing support to the Canadian ground forces as the invasion kicked into high gear. The aerial activity over Normandy resembled swarms of locusts—the planes seemed to keep coming with no end in sight. An estimated 1,000 aircraft from 39 of the 42 Royal Canadian Air Force squadrons stationed overseas took on the aerial support of the invasion with roles ranging bombing, air superiority, ground attack and photo reconnaissance.
The following Royal Canadian Air Force squadrons were involved in pre-invasion activities and in support of the actual invasion.
For more information about the squadrons involved in D-Day, their aircraft and their roles, visit “Who was in the air on D-Day?”
- 400 “City of Toronto” (Fighter Reconnaissance) Squadron
- 414 “Sarnia Imperials” (Fighter Reconnaissance) Squadron
- 430 “City of Sudbury” (Fighter Reconnaissance) Squadron
- 401 “Ram” (Fighter) Squadron
- 411 “Grizzly Bear” (Fighter) Squadron
- 412 “Falcon” (Fighter) Squadron
- 403 “Wolf” (Fighter) Squadron
- 416 “Lynx” (Fighter) Squadron
- 421 “Red Indian” (Fighter) Squadron
- 438 “Wild Cat” (Fighter-Bomber) Squadron
- 439 “Westmount” (Fighter-Bomber) Squadron
- 440 “City of Ottawa” (Fighter-Bomber) Squadron
- 441 “Silver Fox” (Fighter) Squadron
- 442 “Caribou” (Fighter) Squadron
- 443 “Hornet” (Fighter) Squadron
- 402 “City of Winnipeg” (Fighter) Squadron
- 409 “Nighthawk” (Night Fighter) Squadron
- 410 “Cougar” (Night Fighter) Squadron
- 406 “Lynx” (Night Fighter) Squadron
- 418 “City of Edmonton” (Intruder) Squadron
- 408 “Goose” (Bomber) Squadron
- 419 “Moose” (Bomber) Squadron
- 420 “Snowy Owl” (Bomber) Squadron
- 424 “Tiger” (Bomber) Squadron
- 425 “Alouette” (Bomber) Squadron
- 426 “Thunderbird” (Bomber) Squadron
- 427 “Lion” (Bomber) Squadron
- 428 “Ghost” (Bomber) Squadron
- 429 “Bison” (Bomber) Squadron
- 431 “Iroquois” (Bomber) Squadron
- 432 “Leaside” (Bomber) Squadron
- 433 “Porcupine” (Bomber) Squadron
- 434 “Bluenose” (Bomber) Squadron
- 405 “Vancouver” (Bomber) Squadron
- 422 “Flying Yachtsman” (General Reconnaissance) Squadron
- 423 (General Reconnaissance) Squadron
- 415 “Swordfish” (Torpedo Bomber) Squadron
- 404 “Buffalo” (Coastal Fighter) Squadron
- 407 “Demon” (General Reconnaissance) Squadron
All in all, Canadian combatants from all three services gave an outstanding account of themselves on the first day of the battle. They would continue to distinguish themselves by dogged determination and selfless acts of heroism, helping write the final chapter and finally closing the book on the Third Reich’s so-called one thousand-year reign.
Mr. Charland is a senior associate air force historian.