Glass Negatives
Notes
- Placement of a negative's emulsion side varies from one scanner to another. To ensure that the emulsion is against the proper face of the optical reader, follow individual scanner guidelines.
- Digitize at a higher resolution due to the fragility of the negative and for preservation purposes.
- Do test scans if possible. Depending on the quality of the negative, it is sometimes preferable to digitize as a positive, and then invert the image with image-processing software (e.g., Photoshop®).
- Concentric ring patterns (dark and bright bands) may appear while scanning negatives. These patterns are called "Newton's Rings", and are caused by the interaction of light waves reflecting on two glossy surfaces - one convex and one flat - and the air pockets between them.
- Possible ways to avoid them:
- Use a mount to raise the negative, thus avoiding contact with the scanner glass.
- Insert an anti-Newton's ring sheet between the negative and the scanner glass.
Remarks
- The technician must verify the final image by comparing the original negative with the digitized version.
Recommendations
- 600 ppi, with a minimum of 6,000 pixels for the longest measurement (8 x 10, or 1:1 for formats larger than 8 x 10).
- Refer to the general guidelines to calculate the number of ppi required for a given dimension.
Note that it is the original document which measures 8 x 10, not the final digital file. - Digitize in transparency mode.
- For reference purposes, digitize a transparent greyscale (on film) before each digitization session.
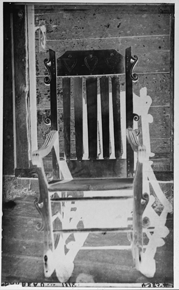
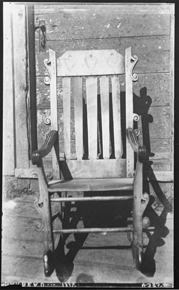
- Digitize as a positive, and then invert the image with image-processing software (e.g., Photoshop®).

CD2002-115-002
Original
CD2002-115-002
Reversed - If the negative allows, reframe the image in a way which preserves the border and any notations found there.
- Balance the white levels in the lightest zone (D-Max), then balance the black in the darkest zone (D-Min).
- Convert in greyscale profile "Gray Gamma" 2.2, 8 bits.
- Save the image as an uncompressed TIFF, named to standards established by the Corporation's Photo Archives.
- Produce a JPEG version as described in the general guidelines.
Contact information for this web page
This resource was published by the Canadian Heritage Information Network (CHIN). For comments or questions regarding this content, please contact CHIN directly. To find other online resources for museum professionals, visit the CHIN homepage or the Museology and conservation topic page on Canada.ca.