
The Candidate Assessment Tool
The Candidate Assessment Tool is an inclusive and accessible platform that can be used by public servants and members of the public to complete Public Service Commission of Canada tests.
On this page
- Getting started: Account setup, password and display preferences
- Take a test
- Tests with assessment accommodation
- Tests with alternate testing arrangements
- Obtain your test results
Getting started: Account setup, password and display preferences
Use a modern browser like Chrome, Edge, Safari, or Firefox; the Candidate Assessment Tool will not work for older browsers such as Internet Explorer.
Create an account
- Go to Candidate Assessment Tool – Home and select the language of your choice (English or French).
- Select the Create an account tab.
- Fill out all the fields in the form.
- Note: use a personal email address as it's more permanent than your work email address.
- Click Create an account at the bottom of the screen.
Login and logout
The Candidate Assessment Tool uses two-factor authentication to ensure user accounts are verified each time users log in. Two-factor authentication is, however, temporarily turned off during some tests. More specifically, it is turned off:
- for the entire duration of an unsupervised internet test
- 30 minutes before a supervised in-person test, remaining off for twice the test duration
Note: Two-factor authentication is not turned off during the Oral Language Assessment.
To login: Go to Candidate Assessment Tool – Home and login with your email address and password. You will receive a security code by email. Enter this code within 15 minutes to log in to the Candidate Assessment Tool.
To logout: Select MENU in the top left corner of your screen and select Logout from the list.
Create your profile
- Select MENU in the top left corner of your screen.
- Select My Profile. This will take you to the My Personal Information tab, where you can input personal details for your profile.
- You'll need to fill out the Employment Equity section before you can take a test
Change or reset your password
Make sure you have your password readily available on the day you take the test.
To change your password:
- In your account, select MENU in the top left corner of your screen.
- Select My Profile.
- Select Password from the column on the left side and follow the steps to change your password.
To reset your password (if you've forgotten it):
- Go to Candidate Assessment Tool – Home, and click Forgot Password? in the bottom left corner. Enter the email address of your account and click Send Password Reset Link.
- Follow the instructions on resetting your password that will be sent to your email address.
Change your display preferences
We want to make sure you have the support you need to fully demonstrate your abilities. You can customize the testing environment to best meet your needs.
You can modify your view to have your preferred font size, style and text spacing saved in your profile. You can also use your browser settings to change the zoom resolution and colour for both text and page background. There are 3 ways to change your display preferences.
From the MENU tab:
- Select MENU in the top left corner of your screen.
- Select My Profile.
- Select Preferences from the column on the left side.
- Choose your preferred display settings.
From the Display button:
- Click Display in the top right corner of your screen.
- Choose your preferred display settings.
From browser options (variable between browsers):
- Use your browser's built-in zoom in and zoom out functionalities.
- Use your browser's built-in options to modify background and font colours, where available.
If you find that not all your needs have been met once you've customized your display parameters, you may submit an assessment accommodation request.
Take a test
Navigate the test environment
Important note: Be careful not to use the back and forward features (arrows) on your browser's navigation once you've started, as it could cause technical issues.
During the test, your test environment will include these buttons and features:
Timer
Located in the bottom left corner, the Timer counts down your remaining time to take the test. Selecting the minus symbol (-) will hide the timer. Once the timer has started for your official test, it will continue to count down time, even if you close your browser window or turn off your computer.
Français / English buttons
Located in the top right corner, the Français and English buttons allow you to switch the test environment between English and French. These buttons do not change the language of the test questions.
Test Instructions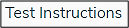
Located in the top left corner, the Test Instructions tab displays navigation instructions and information about your test. If you select Test Instructions during the test, the test timer will still continue to count down.
Test Questions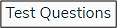
Located in the top left corner, the Test Questions tab allows you to see and answer the questions.
Tools
Located in the top right corner of the screen, the Tools button displays or hides the Notepad, described below.
Notepad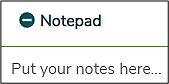
Located on the right side of the screen, the Notepad section is where you can make notes for yourself as you go through the test. Selecting the minus symbol (-) will hide the notepad. These notes won't be saved or submitted as part of the test.
Display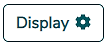
Located in the top right corner of the screen, the Display button allows you to change your display preferences, as described in the Change your display preferences section.
Quit Test
The Quit Test button is located in the top right corner. Click this button at any time will allow you to quit the test without submitting your answers.
If you click this button:
- your answers will be deleted, and you won't be able to recover them
- your test won't be scored
- you will lose access to the test, and there may be a delay before you can be retested
Submit Test
The Submit Test button is located in the bottom right corner of the screen.
Navigating the test questions
The column on the left side of your screen provides a numbered list of all the questions in the test and summarizes the status of each question:
- not viewed: questions not viewed will show an icon of an eye crossed out

- viewed: questions viewed will show an unobstructed eye icon

- unanswered: unanswered questions will show an icon of an empty circle

- answered: questions answered will show an icon of a circle that has been filled in

- marked for review: these questions will have an exclamation mark next to them

Viewing and answering questions
- Selecting a numbered question will display the question in the centre of the screen, followed by the choice of answers
- You can select an answer or choose to skip a question by selecting the Next or Previous buttons
- You can change your answers at any time before the test time expires
- Don't forget to come back and answer questions you choose to skip, as the system won't remind you to complete these questions before submitting your test
- You can Mark for Review a question to remind yourself to go back to it later on; an exclamation point will appear next to this question in the list of questions on the left; you can also click the same button again to deactivate the Mark for Review option
- You don't need to unmark questions for review before submitting the test; questions will be scored regardless
Practise with sample tests
Familiarize yourself with the test environment and test format by taking a sample test.
To take a sample test:
- Select Sample Tests from the top left corner of your screen.
- Scroll down to view the available tests; select a test by clicking the Start button next to it.
If you use accessibility software, make sure to test it out in a sample test; if the software doesn't work or if you need more support tailored to your situation, you may request assessment accommodation.
Unsupervised internet tests
Getting started
Once you've practised with sample tests and you're ready to take a test:
- Log in to your Candidate Assessment Tool account, if you aren't already connected.
- If your profile isn't complete or needs updating, you'll get a notification that your personal information needs to be updated before you can take the test
- Once this is done, select MENU and then My Tests, followed by the My Current Tests tab
- Enter the Test Access Code provided in your email invitation in the Code field and click Submit Code.
- Click the Start option located to the right of the test name, under the Actions column.
- You'll see a "Welcome" message where you'll be asked to disable auto-translation in your browser. You'll need to disable auto-translation to abide by the test's terms of use.
- Disable auto-translation (variable between browsers)
- Click the 3 dots (…) in the top right of the window and then Settings.
- Select Languages in the left pane.
- Turn off "Offer to translate pages that aren't in a language you/I read."
- Read the welcome message, the terms of use and the general instructions related to the platform; then click Next at each prompt.
- A pop-up box will appear, prompting you to accept the terms of use and to confirm that you wish to start the test. Select "Yes, I wish to proceed" and then the Next button.
- Read the instructions specific to the test that you must take, and click the Next button to see the sample questions on the next page. Select Start Test once you are ready to start.
Technical difficulties
If you have technical difficulties during the test (for example, you have an unexpected computer failure or you accidentally close your browser window), log back into the system and continue where you left off. Don't delay, because your allotted time for completing the test elapses even while you're logged out of the system.
If you experience extreme technical difficulties during the test (for example, an extended power outage), refer to the email with the test information and contact the generic email address or contact person as soon as possible.
In-person supervised tests
Booking an in-person supervised test session
If you've received an invitation to book an in-person supervised test session, you can do so by following these instructions:
- Log in to your Candidate Assessment Tool account.
- If your profile isn't complete or needs updating, you'll receive a notification that your personal information needs to be updated before you can take the test
- Once this is done, select MENU and then My Tests, followed by the My Current Tests tab on the left of your screen
- Enter the Reservation Code provided in your email invitation and select Submit Code.
- Use the Find Test Session option under the Actions column to view the available test sessions.
- Select Session Information to obtain the address of the test centre and select Reserve when you've found the test session that you'd like to book.
Once your booking is complete, you'll receive a confirmation email with the full details of your test session.
If you don't find a session with availability, check again periodically, as new sessions are regularly added to the system. If you can't book a test session before the "deadline date" provided in your invitation email, refer to the invitation and contact the email address provided or the contact person to receive further instructions.
Modifying a reservation
To change your reservation:
- Log in to your Candidate Assessment Tool account and select the My Current Tests option in the list of options on the left of your screen.
- Select the Manage Reservations tab.
- Select the Edit Reservation option under the Actions column.
- Select See other availabilities and select a new test session.
Oral Language Assessment
Booking a test session for the Oral Language Assessment
If you've received an invitation to book a test session, you can do so by following these instructions:
- Log in to your Candidate Assessment Tool account.
- If your profile isn't complete or needs updating, you'll receive a notification that your personal information needs to be updated before you can take the test
- Once this is done, select MENU and then My Tests, followed by the My Current Tests option on the left of your screen.
- Enter the Reservation Code provided in your email invitation and select Submit Code.
- Use the Find Test Session option under the Actions column to view the available test sessions.
- Select Session Information when you've found the test session you'd like to reserve.
- Add the phone number where you can be reached during the test.
- Read the terms of use and the privacy notice statement. Once you've confirmed that you've read them and accepted the terms of use, select Reserve to finalize the reservation.
Once your booking is complete, you'll receive a confirmation email with the full details of your test session.
If you can't find an available session, check again periodically, as new sessions are regularly added to the system. If you can't book a test session before the date provided in your email invitation, contact the email address or the contact person provided in your invitation for further instructions.
Modifying a reservation
To change your reservation:
- Log in to your Candidate Assessment Tool account and select My Current Tests in the list of options on the left of your screen.
- Select the Manage Reservations tab next to the Make a Reservation tab.
- Select the Edit Reservation option under the Actions column.
- Select See other availabilities and select a new test session.
Tests with assessment accommodation
If you have a disability or a condition that may impact your performance during the test, you can request assessment accommodation measures. They will be tailored to your situation and may include additional time to take your test, a break, reader services, alternative test formats (for example, a test version compatible with assistive technology), and technical support.
Unsupervised internet tests and in-person supervised tests
Requesting assessment accommodation
You can request assessment accommodation in the Candidate Assessment Tool as soon as you receive your test invitation. To do so, first you'll need to create your Assessment Accommodation Profile and then submit an accommodation request.
Note that departments and agencies that invite candidates to take an unsupervised internet test or to book an in-person supervised test are notified when candidates submit an assessment accommodation request. This enables them to ensure that there is enough time to process the accommodation request, and that candidates have enough time to take their test.
Please note that the content of accommodation profiles and requests can only be viewed by the Assessment Accommodation Unit in charge of identifying the appropriate assessment accommodation measures; it cannot be accessed by, nor shared with, other departments and agencies.
Create your assessment accommodation profile
Log in to your Candidate Assessment Tool account and select Home in the top left corner of the screen.
- Select MENU and then My Profile.
- Select Assessment Accommodation Profile in the list of options on the left of the screen and complete the required information.
- Select Save.
Submit an assessment accommodation request
Unsupervised internet tests
- Follow the steps to take your test in the Unsupervised internet tests section of this page, but do not start your test yet. If you start your test immediately, you will not receive the proper assessment accommodation measures, which may impact your results.
- Select the Request an Accommodation
 option located to the right of the test name, under the Actions column.
 - A pop-up screen will open with information about assessment accommodation. After clicking OK, a new screen will appear. Provide the required information, including any additional information on your request in the Comments (optional) box. Then, confirm that your Assessment Accommodation Profile is up to date before clicking Submit Request.
Important
Once you've submitted your request, do not start your test. If you open your test, no accommodation will be in place yet. Your request will be processed by an assessment specialist from the Public Service Commission, and you will be notified when the assessment accommodation report is ready for your review.
In-person supervised tests
- Follow the actions to book an in-person test in the Booking an in-person supervised test session section of this page, but do not book your test yet.
- Select the Request an Accommodation option located to the right of the magnifying glass icon
 , under the Actions column.
 - A pop-up screen will open. Select the Location (test centre) where you want to take your test, and add any additional information on your request in the Comments (optional) box. Then, confirm that your Assessment Accommodation Profile is up to date before submitting your request.
- You can access your test session information and accommodation request details in the Manage Reservations tab.
Important
Your request will be processed by an assessment specialist from the Public Service Commission, and you'll be notified when the assessment accommodation report is ready for your review. Your test session will be booked by the test centre once you approve your accommodation measures.
Cancelling your assessment accommodation request
If you no longer feel you need assessment accommodation to take your test, you can cancel your request by taking the following actions:
Unsupervised internet tests
- Select MENU, My Tests and then the My Current Tests option.
- Under the Take a Test tab select the View Accommodation Request Details option located to the right of the test name, under the Actions column.
- Select the Cancel Request option.
In-person supervised tests
- Select MENU, My Tests and then the My Current Tests option.
- Under the Manage Reservations tab, select the View Accommodation Request Details option.
- Select the Cancel Request option.
- Your Reservation Code will be reactivated in the Make a Reservation tab, allowing you to find and book a test session.
Monitoring your request status
You can view the processing status of your assessment accommodation request by selecting the View Accommodation Request Details option.
Reviewing the proposed assessment accommodation
You'll be notified when the assessment accommodation report is ready for your review in the Candidate Assessment Tool. You can review it by selecting the View Accommodation Request Details option.
Once you've reviewed the assessment accommodation measure(s), you must choose one of the following options:
- accept the accommodation measure(s) as-is, by clicking I agree
- email the assessment specialist using the email address provided if you have questions or concerns with the assessment accommodation measure(s)
Taking a test with assessment accommodation
You may have access to the options described below if they've been identified as appropriate accommodation measures to remove barriers and if they allow you to fully demonstrate your competency. These options are in addition to the ones described in the Change your display preferences and Navigate the test environment sections.
Extra time
When you click Start Test, a pop-up window will appear showing the total duration of the test, which will include the extra time you've been allotted.
When you're ready to begin, select "Yes, I want to continue," and click Start Test. The timer is in the bottom left corner of the screen and displays your remaining time to complete the test.
Breaks
If you've been given time for breaks, a pop-up window will appear, indicating that you have a bank of timer pauses when you click Start Test. This bank allows you to:
- Pause the test at any time during the test
- Choose the length and number of pauses you want until your pause time is up
When you're ready to begin, click "Yes, I want to continue" and select Start Test.
Pause the test
You'll see the Pause Test button in the middle of the screen, towards the bottom of the screen. When you click this button, you'll be redirected to a window that shows how much time you have left for breaks. You'll be able to see the time running in your pause bank by viewing the timer box in the middle of the screen.
You can choose to save some of the time to take additional breaks before the end of the test, or let the time run out completely before resuming your test.
Resume the test
You'll see the Resume Test button in the lower-middle part of the screen while the test is paused. When you click this button, a pop-up window will appear. You'll need to confirm that you want to resume the test by clicking the Resume Test button in the lower right corner of the pop-up window to stop your pause bank timer.
You'll be redirected to your test, and the timer for your test will start running again.
You can repeat the process of pausing and resuming the test until your pause bank runs out. Once your bank timer is at 0:00:00, you have no break time left. You will automatically be redirected to your test, and the test timer will start to run again.
Oral Language Assessment
Requesting assessment accommodation
You can request assessment accommodation in the Candidate Assessment Tool as soon as you're invited to take the test. You'll need to first create your Assessment Accommodation Profile and then submit an accommodation request.
Once you've submitted a request, the department or agency that invited you to take the test will be notified so that they can ensure there's enough time to process your request, and that you have enough time to take your test.
However, the content of accommodation profiles and requests can only be viewed by the Public Service Commission's Assessment Accommodation Unit in charge of identifying appropriate assessment accommodation; it cannot be accessed by, nor shared with, the department or agency that invited you to take the test.
Create your assessment accommodation profile
- Log in to your Candidate Assessment Tool account and select Home in the top left corner of the screen.
- Select MENU and then My Profile.
- Select Assessment Accommodation Profile in the list of options on the left of the screen and complete the required information.
- Click Save.
Submit an assessment accommodation request
- Follow the instructions for booking a test session for the Oral Language Assessment, but do not book your test yet.
- Select the Request an Accommodation option located to the right of the magnifying glass icon , under the Actions column.
- A pop-up screen will open. Provide the required information including the phone number you can be reached at if needed, and add any additional information on your request in the Comments (optional) box. Confirm that your Assessment Accommodation Profile is up to date. Read the terms of use and the privacy notice statement. Once you've confirmed that you've read them and accepted the terms of use, click Submit Request.
- You can access your test session information and accommodation request details in the Manage Reservations tab.
Important
Your request will be processed by an assessment specialist from the Public Service Commission, and you'll be notified when the assessment accommodation report is ready for your review. Your test session will be scheduled by the test centre once you've approved the accommodation.
Cancelling your assessment accommodation request
- Select MENU, My tests, and then the My Current Tests option.
- Under the Manage Reservations tab, select the option View Accommodation Request Details.
- Select the Cancel Request option.
- Your Reservation Code will be reactivated in the Make a Reservation tab, allowing you to find and book a test session.
Monitoring your request status
You can view the processing status of your assessment accommodation request by selecting the View Accommodation Request Details option.
Reviewing the proposed assessment accommodation
You'll be notified when the assessment accommodation report prepared by the assessment specialist is ready for your review in the Candidate Assessment Tool. You can review it by selecting the View Accommodation Request Details option.
Once you've reviewed it, you must choose one of the following options:
- accept the accommodation as-is by clicking I agree
- email the assessment specialist using the email address provided if you have questions or concerns about the measure(s)
Tests with alternate testing arrangements
Alternate testing arrangements are used in specific circumstances, for example, if you:
- need an alternate test time due to location (international time zones)
- have a preference for in-person testing
You'll also need alternate testing arrangements if you've had access to Public Service Commission test content in a current or previous role, as either:
- a test administrator
- a test developer
- a board member
If you need both alternate testing arrangements and assessment accommodation measures, follow the instructions for requesting tests with assessment accommodation, and include details for both needs in your request.
Request an alternate testing arrangement
- Depending on the test you need to take, follow the applicable instructions to claim your code for either:
- taking unsupervised internet tests
- booking an in-person supervised test session
- booking a test session for the Oral Language Assessment
Important: Do not book or start your test yet.
- Select the Alternate testing arrangement option
 located to the right, under the Actions column.
 - A pop-up screen will open. Provide the requested information and add any additional information for your request in the Comments (optional) box and click Submit Request.
- Your request will be processed by an assessment specialist. They may contact you by email if more information is needed to assess your request.
If your request is approved, you'll be informed of the next steps.
If your request is denied, you'll receive an email notifying you, and you can proceed to take or schedule a regular test using the same test access code or reservation code.
For supervised in-person tests and for the Oral Language Assessment, you can access your test session information and Alternate Testing Arrangement request in the Manage Reservations tab.
Obtaining your test results
You can access your test results through the My Tests section in the Candidate Assessment Tool.
For unsupervised internet tests, results are available 48 hours after the test expiry date (you can find this "deadline date" in your email invitation).
For in-person supervised tests, results are available 48 hours after you completed your test. To view your results:
- Select MENU from the top left of your screen.
- Select My Tests and then My Test Results.
- To view your result, find the test and its date of completion, and select it from the list.
For the Oral Language Assessment, results are not available in the Candidate Assessment Tool at this time.
These results are valid only when certain conditions, such as respecting the retest waiting period, are met. For more information on the retest waiting period and test validity, select the test you're interested in from the list of Public Service Commission tests.