
Meetings in the modern workplace
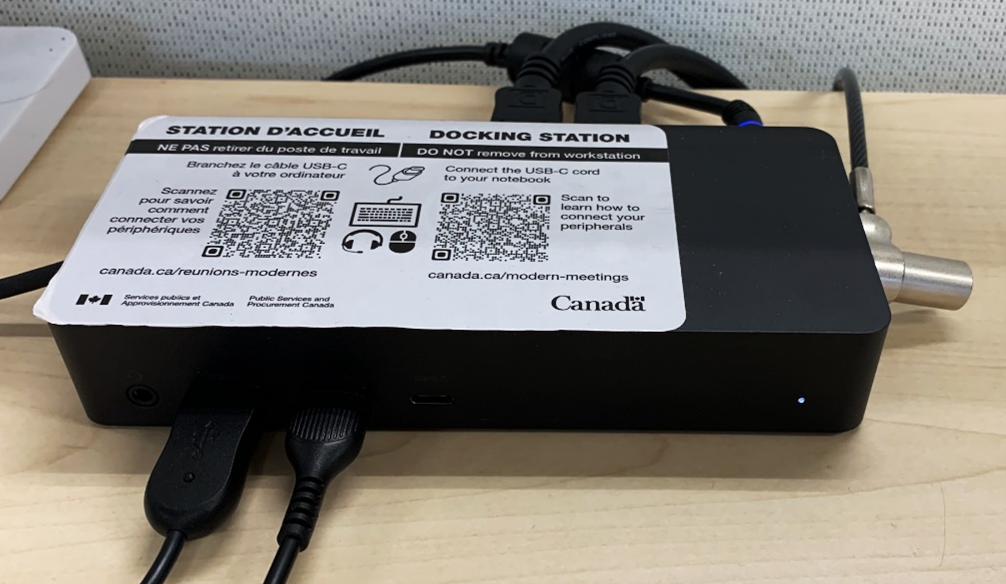
Docking station
A docking station is a device that simplifies the connection of your notebook to peripheral equipment (monitor display, mouse, keyboard, headset, and others), the network and the power outlet.
Connecting to a docking station
To connect your notebook to a docking station, plug the small USB-C cord from the docking station into a USB-C port on your notebook.
- If you don’t have a USB-C port on your notebook, plug the small USB into the larger USB adapter, then plug the USB adapter into a USB-A port on your notebook
- If you are using the Targus USB adapter, be sure that the arrows on the male and female connecters are aligned
- Power is not available if you are using the USB-C to USB-A adapter to connect to your notebook
- Whether you use a USB-C or a USB adapter to connect, your notebook will automatically start using the monitors
Note
The docking station will provide network connectivity in areas that are not serviced by Wi-Fi.
Connecting your peripherals
The docking station has several USB ports for you to plug in your peripherals, for example, your keyboard, mouse and headset.
- Plug in your peripheral’s USB cord or USB receiver
- after a short pause, your notebook should automatically start using the peripheral
- Don’t forget to unplug and take all your peripherals, including any USB receivers, when you leave
Note
If you are using the peripheral for a Microsoft Teams meeting, be sure to check that the device settings are configured properly in Microsoft Teams.
Configuring your display settings
As a default, your screen will be mirrored on the in-room monitor display. To extend your display:
- right-click your desktop background to open Display Settings
- on the right-side, find the drop-down menu
- you will see the Duplicate these displays option is selected by default
- change the option by selecting Extend these displays
- select Keep changes on the prompt appearing
To rearrange the screens for display and mouse continuity:
- In Display Settings, drag the display icons to arrange them in the configuration you want
- Use the Identify button to determine the identity of the screens (icon 1 or 2)
- When you have completed your configuration, select Apply
Troubleshooting tips
Try these troubleshooting tips if you experience issues with the docking station.
Your notebook does not connect to the monitor
- Ensure your notebook lid is open
- Ensure that the docking station’s USB C or USB A adapter cord and the 2 screens are plugged into your notebook
- Ensure your notebook is turned on
- Check that the docking station is plugged in to a power source
- Check that the monitor is plugged in to a power source and turned on
- Reboot your notebook with the docking station plugged into your notebook
Your headset or camera is not working during a Microsoft Teams meeting
Check that your Device Settings are configured properly in Microsoft Teams. In the Microsoft Teams meeting window:
- select More (…) in the Microsoft Teams meeting control bar
- select Settings, then select Device Settings to open the settings menu
- under Audio Devices, under your headset device, select Audio Devices and Speaker
- scroll down to Camera and set to your camera device
To check your device settings before a meeting, locate Device Settings by selecting the ellipses (...) in the upper right corner of the Microsoft Teams application then select Settings, then Peripherals.
Contact us
Please report all issues to your local Workplace Coordinator or Modern Meeting Coach. Look for signage about Workplace Coordinators near the boardroom or at the entrance of the office.
USB-C cord

Plug the small USB into the larger USB adapter
