
Record of employment (ROE) Web user guide
On this page
- Introduction
- Section 1 - ROE Web main page
- Section 2 - Privacy notice statement and security
- Section 3 - Creating a new ROE
- Section 4 - Creating a new ROE for a self-employed fisher
- Section 5 - Submitting the ROE
- Section 6 - Saving the ROE as a draft
- Section 7 - Help information for the blocks on the form
- Section 8 - Correcting the ROE
- Section 9 - How to search for ROE(s)
- Section 10 - How to amend a ROE
- Section 11 - How to delete an issued ROE
- Section 12 - Looking for newer versions of stored pages
Note:
As the record of employment (ROE) Web system is enhanced, some of the screens may change from the way they look in this guide.
Introduction
There may be instances where you need to complete a ROE on the screen instead of uploading a payroll extract file from your payroll software. You can do that on ROE Web by using an electronic version of the paper form. As with the ROE Payroll Extract method, this version can be submitted electronically.
When you submit an ROE via ROE Payroll Extract and make corrections on the online form, those corrections will not be made in your payroll software automatically. This could lead to inconsistent information. When changes are required, we recommend to make changes in your payroll software before submitting the ROE.
This user guide does not explain how to fill out a ROE form. For that information, please refer to the How to Complete an ROE link in the Help and Support menu of the ROE Web application.
Section 1 - ROE Web main page
From the organization page select the record of employment - Main Page link. Note that ROE Web Important Notices are posted above the Quick Links when applicable.
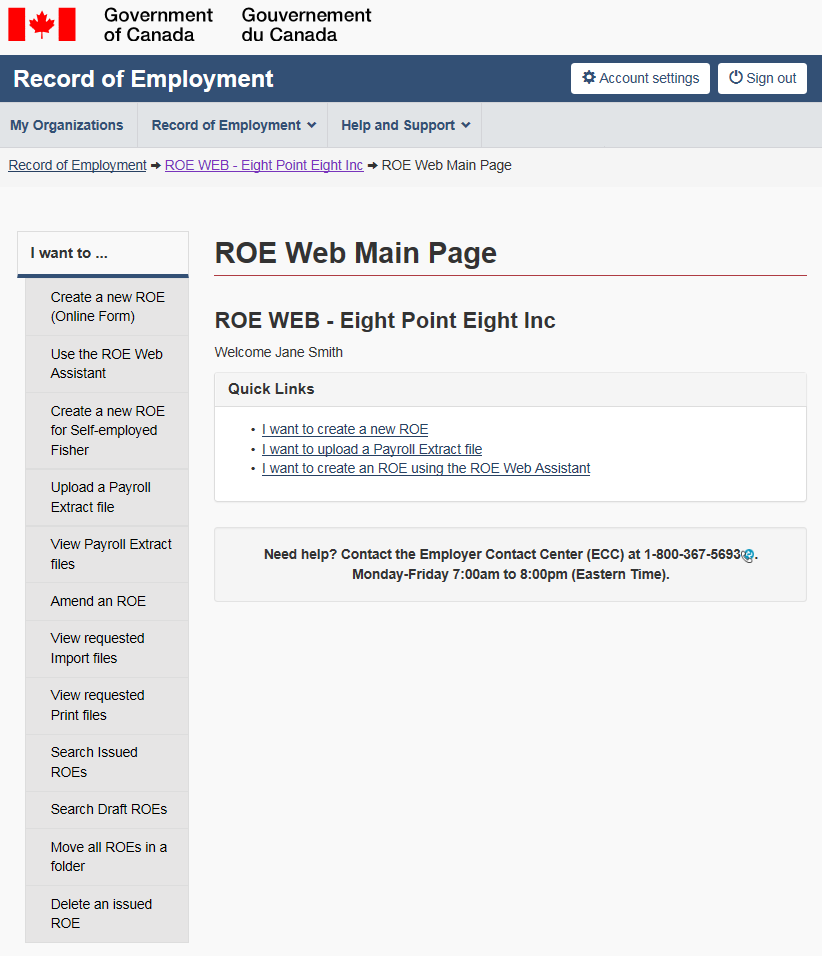
Figure 1 - Text version: ROE web main page
The ROE Web Main Page includes the Quick Links as well as the "I want to…" ROE option menu on the left. The menu at the top of the screen offers My Organization, Record of Employment and Help and Support.
1.1 Top menu
This menu includes the following options:
- My Organizations: redirects you to your Organizations page
- Record of employment: (offers the same options as I want to…)
- Help and support: This menu includes the following options (These options are located outside the secure pages):
- How to complete an ROE
- ROE Web User Guides
- Employer Contact Center
1.2 Side menu – I want to… links
This menu includes the following options:
- Create a new ROE (Online Form)
- Use the ROEWEB Assistant
- Create a new ROE for Self-Employed Fisher
- Upload a Payroll Extract file
- View Payroll Extract files
- Amend an ROE
- View requested Import files
- View requested Print files
- Search Issued ROEs
- Search Draft ROEs
- Move all ROEs in a folder
- Delete an Issued ROE
1.3 Quick links
Three Quick Links options are available from the ROE Web Main Page:
- I want to create a new ROE
- I want to upload a Payroll Extract file
- I want to create an ROE using the ROE Web Assistant
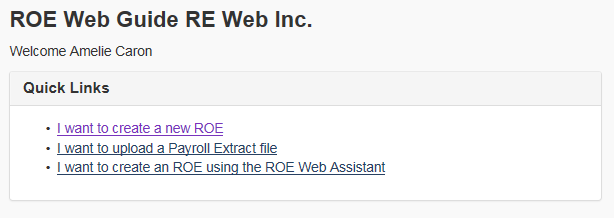
Figure 2 - Text version: Quick links
There are three quick links on the ROE Web Main Page: I want to create a new ROE, I want to upload a Payroll Extract file and I want to create an ROE using the ROE Web Assistant.
Section 2 - Privacy notice statement and security
2.1 Personal Information Collection Statement
ROE Web users are presented with the Personal Information Collection Statement (PICS) when their ROE Web user profile is created. The PICS can be consulted anytime while using ROE Web. The PICS is displayed at the top of each ROE Web page on which personal information is collected from users.
Choosing the PICS link will display the PICS for the ROE Web application.
2.2 ROE Web session
For security reasons, an ROE-Web session can only stay inactive for a maximum of 18 minutes. When there are two minutes remaining in the session, an alert will pop up asking the user to choose the OK button to continue working in ROE-Web. If the user chooses the Cancel button or OK after the 2 minutes has expired, the user will have to log back into the application.Section 3 - Creating a new ROE
3.1 Create an individual ROE
To create an individual ROE select the quick link I want to create a new ROE from the ROE Web Main Page, the Create a new ROE (Online Form) or Use the ROE Web Assistant from the left hand side menu.
3.1.1 ROE Web assistant
The ROE Web Assistant is a guided completion process available for the Regular ROEs. It contains the same rules and validations as the ROE Web Online Form. It is also available in the ROE Web Demo. This function is not available for the Self-Employed Fisher ROE.
It is not mandatory to use the ROE Web Assistant if you are already using the online form or the Payroll Extract file to submit your ROE s electronically. The Assistant was designed to help users who are not familiar with ROE Web to start issuing their ROEs electronically.
The ROE Web Assistant contains enhanced help and automated features and uses plain language that moves away from the ROE terminology. You will notice that instead of using the ROE block numbers, the ROE Web Assistant uses the names of the fields.
3.2 Add new ROE – Step 1
When required, ROE Web will present you with step 1, where you will be asked to choose the business for which you want to issue the ROE, the Folder where you want to file this ROE and the ROE type.
You can select the business by either choosing a Business Number (BN) or a Business Name from the list provided. The list is sorted by Business Number as a default. To search by Business Name, simply click on the Select by Business Name option.
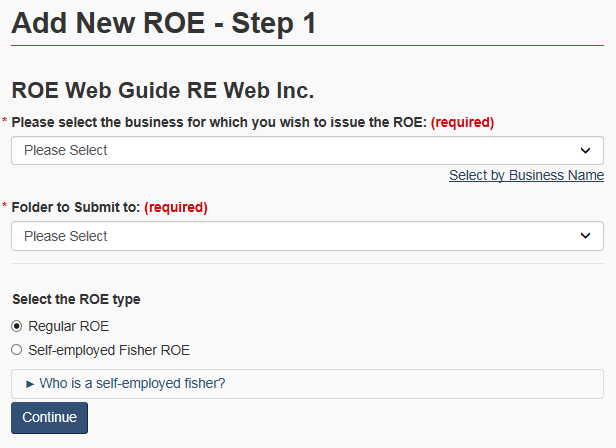
Figure 3 - Text version: Add new ROE – step 1
The first step to adding a new ROE is to provide the Business Number, the Folder information and select the type of ROE to issue.
If available, an option must be selected from the Folder to Submit to drop down menu. When a folder is selected, issued ROE will be saved to it. You may choose the No Folder option or any other folder. The folder information does not appear on the ROE when viewed or printed.
Note:
Folders offer additional flexibility and security when it comes to storing ROE information. A user who does not have access to a folder will be unable to view or amend ROEs that are contained within it, even if they have access to the business number to which the ROE was submitted.
The Folder to Submit to option only appears when folders are created and used by the organization. Folders can be managed from the My Organization menu at the top left menu of the page.
The type of ROE to issue must also be selected from this page; Regular ROE or Self-Employed Fisher ROE. Please refer to section 4 of the guide for more information regarding the completion of an ROE for Self-Employed Fishers.
3.3 Add new ROE – Step 2
Step 2 will display the ROE form in its entirety. The first few questions on the form contain the basic company information, such as the Employer's Name, Canada Revenue Agency (CRA) Business Number, Employer Payroll Reference Number and Employer's Address. This information is pre-filled according to the data provided for your business when it was registered for ROE Web.
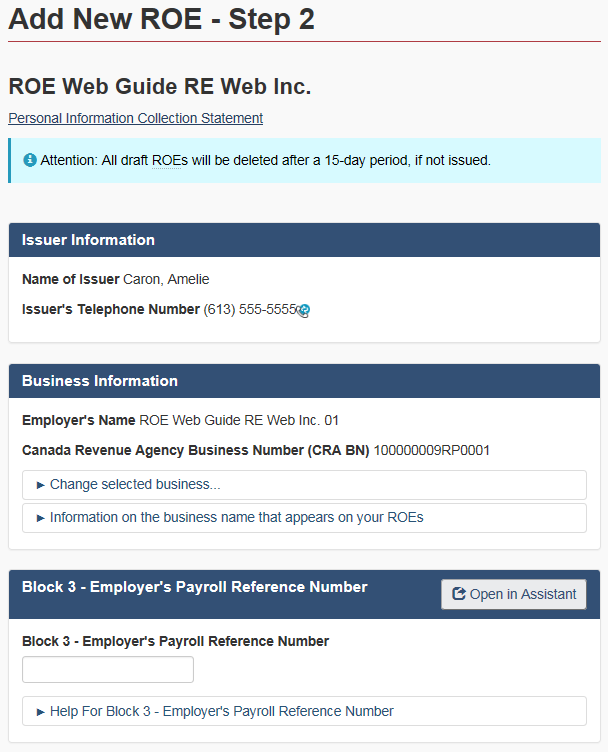
Figure 4 - Text version: Add new ROE – Step 2
Step 2 of the Add New ROE process in the ROE Web application. Users can fill out ROE information, including business information and the employer's payroll reference number.
3.3.1 More than one section or sub-company
If your organization has more than one section or sub-company, and each has a separate BN or name, you can include them all in your ROE Web profile. You can also easily change the business information while you are filling out an electronic ROE by going to the Address field (Block 4) and choosing the appropriate Address from the drop-down menu. You will notice that this will automatically change the Name and the CRA BN, based on the Address you have chosen. If the address you are looking for is not listed in the drop-down menu, you may also enter it directly in Block 4 of the ROE.
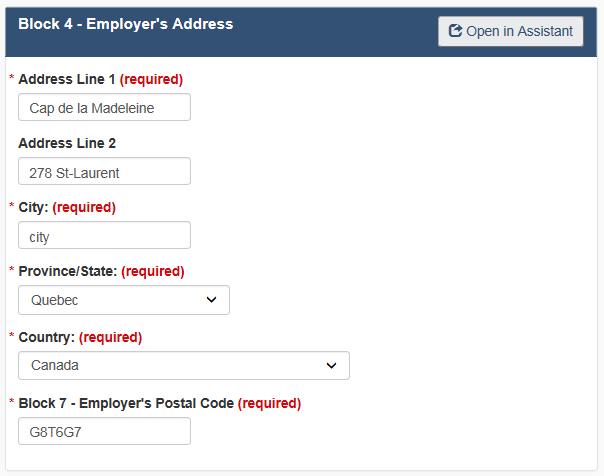
Figure 5 - Text version: Block 4 – Employer's address
In Block 4, employers have to provide their complete address
Note:
Entering an address directly in Block 4 of the ROE will not add this address to your business profile. To add an address to your business profile, select Manage Addresses under the My Organizations option located in the top left of the screen.
3.4 Employee's information
Enter the employee's full name and address in Block 9, their nine digit Social Insurance Number (SIN) in Block 8 and their occupation in block 13 (Optional).
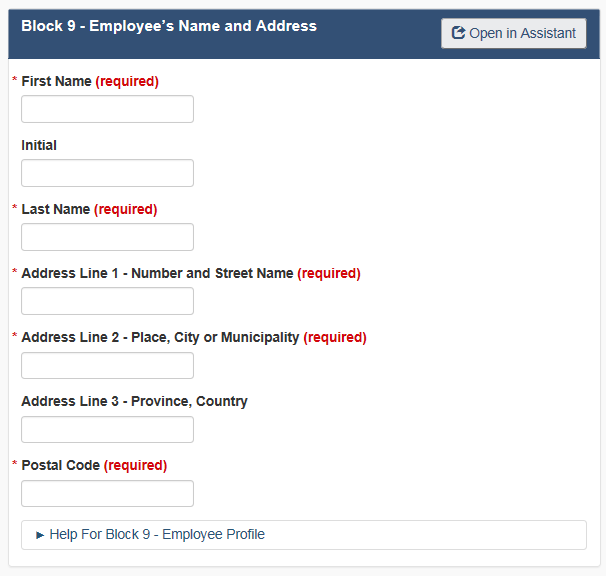
Figure 6 - Text version: Block 9
Employers have to complete Block 9 – Employee's Name and Address
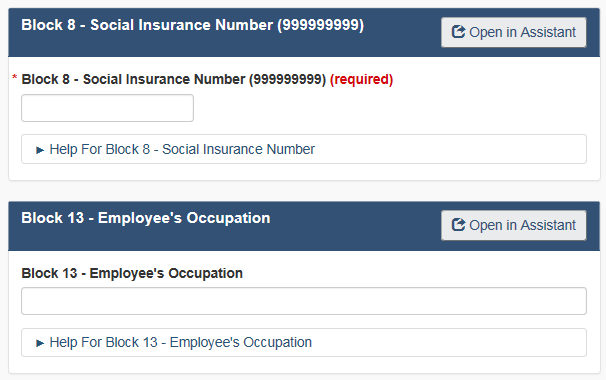
Figure 7 - Text version: Blocks 8 and 13
Employers have to complete Block 8 – Social Insurance Number and may complete Block 13 – Employee's Occupation
3.5 Pay period type
Block 6 has a drop-down menu listing the options for the type of Pay Period used to pay the employee. The options include:
- B - Bi-weekly
- M - Monthly
- O - Monthly non-standard (not the last day of the month)
- S - Semi-monthly
- E - Semi-monthly non-standard (not the 15th of the month)
- H - 13 pay periods per year, and
- W - Weekly
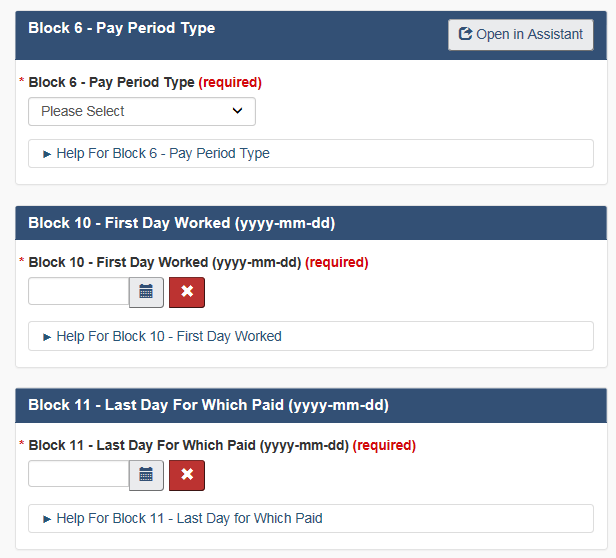
Figure 8 - Text version: Blocks 6, 10, and 11
Employers have to complete Block 6 – Pay Period Type, Block 10 – First Day Worked and Block 11 – Last Day for Which Paid

Figure 9 - Text version: Blocks 12 and 14
Employers have to complete Block 12 – Final Pay Period Ending Date and Block 14 – Expected Date of Recall
3.6 Period of employment
In Blocks 10, 11 and 12, you must enter the information pertaining to the period of employment by completing the following fields:
- First Day Worked;
- Last Day for Which Paid; and
- Final Pay Period Ending Date.
You can enter the dates directly into the fields in the yyyy/mm/dd format or use the Calendar to choose the dates.
Note:
It is essential that you enter the dates in the right sequence. If the Last Day for Which Paid date (Block 11) is before the First Day Worked date in Block 10, an error message will be presented in Block 11. If the Final Pay Period Ending Date (Block 12) does not correspond to the Last Day for Which Paid (Block 11), or the Pay Period Type (Block 6), an error message will also be displayed to that effect.
In addition, the amount entered in Block 15A, Total Insurable Hours must not exceed the smallest of 8904 or (Last Day for Which Paid - First Day Worked +1) multiplied by 24. If the hours exceed the given limitation, an error message is presented.
3.7 Expected date of recall
Block 14 is not a mandatory field and asks if and when the employee is expected to be recalled back to work. Use the radio buttons provided to make your selection. If you choose the third option Y - Recall Date, you must specify the recall date in the Expected Date of Recall box.
Remember that other fields can be affected by the information you have entered in the Dates fields, even if the dates were entered correctly.
3.8 Total insurable earnings
You do not have to complete Block 15B. This field will be automatically completed once you have answered all the questions related to earnings paid or due to the employee.
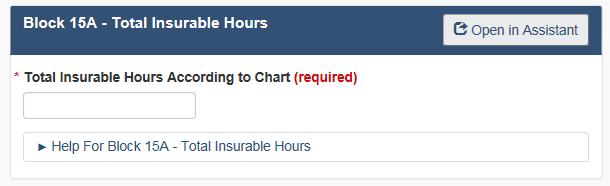
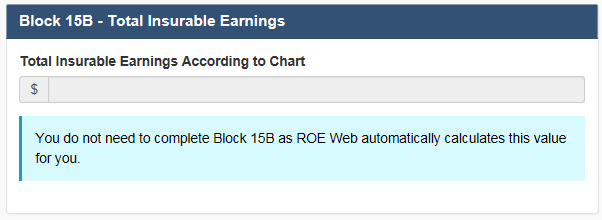
Figure 10 - Text version: Blocks 15A and 15B
Employers have to complete Block 15A – Total Insurable Hours. Block 15B is automatically calculated by ROE Web.
3.9 Insurable earnings by pay period
In Block 15C, Insurable Earnings by Pay Period, ROE Web will only present the Pay Periods that you have to complete, based on the information you have provided in Blocks 6, 10, 11 and 12.
Input the gross amount for Pay Period 1, which is the latest Pay Period that includes the Last Day for Which Paid indicated in Block 11, and either complete the other pay periods manually or input a repeating amount in the Repeat same amount in all pay periods box and choose the Repeat button. ROE Web will automatically populate the necessary Pay Period fields for the period of employment, beginning at Pay Period 2. You may manually change any amount within any pay period directly in the appropriate field if you need to make adjustments.
Note:
You will notice that the total in Block 15B is now automatically updated when values are entered in the Pay Periods of Block 15C.
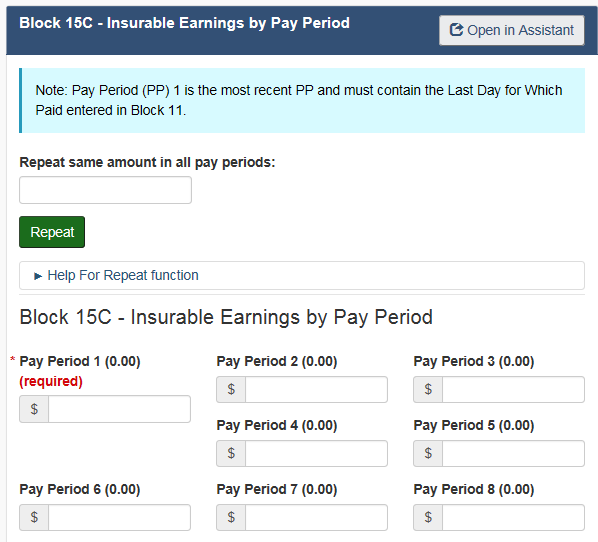
Figure 11 - Text version: Block 15C
Employers have to complete Block 15C – Insurable Earnings by Pay Period
3.10 Reason for issuing the ROE
You must choose the Reason for Issuing the ROE in Block 16.
The different reasons are:
- A - Shortage of Work/End of contract or season
- A - Employer Bankruptcy or Receivership
- B - Strike or Lockout
- D - Illness or Injury
- E - Quit
- E - Quit / Follow spouse
- E - Quit / Return to school
- E - Quit / Health reasons
- E - Quit / Voluntary retirement
- E - Quit / Take another job
- E - Quit / Employer relocation
- E - Quit / Care for a dependant
- E - Quit / To become self-employed
- F - Maternity
- G - Mandatory retirement
- G - Retirement / Approved workforce reduction
- H - Work Sharing
- J - Apprentice training
- K - Other
- K - Other / Change of payroll frequency
- K - Other / Change of ownership
- K - Other / Requested by Employment Insurance
- K - Other / Canadian Forces - Queen's Regulations/Orders
- K - Other / At the employee's request
- K - Other / Change of Service Provider
- M – Dismissal or Suspension
- M - Dismissal / Terminated within a probationary period
- N - Leave of Absence
- P - Parental
- Z - Compassionate Care / Family Caregiver
Note:
A comment (Block 18) must be entered when codes K - Other and K - Other / Canadian Forces - Queen's Regulations/Orders are selected in Block 16.
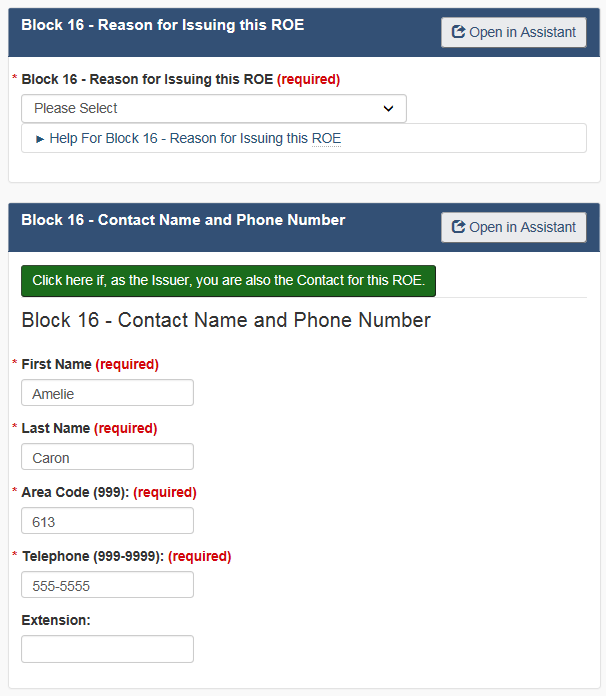
Figure 12 - Text version: Reason for Issuing this ROE
Employers have to complete Block 16 – Reason for Issuing this ROE which includes a Contact's Name and Phone Number
3.11 Contact name and phone number
Just below Block 16, you will find pre-filled information for the First Name, Last Name, and Telephone Number of the person that Service Canada should contact to obtain additional information on the ROE. You can Manage Contacts under My Organizations link at the top of the page.
3.12 Separation payments
Block 17 allows you to report Separation Payments.
3.12.1 Vacation pay
In Block 17A, you can choose the type of vacation pay that the person received.
The four options are:
- Included with each pay
- Paid because no longer working
- Paid for a vacation leave period
- Anniversary (paid on a specific date each year)
You can also enter the Start and End Dates of each payment and the amount, if applicable in the appropriate entry fields.
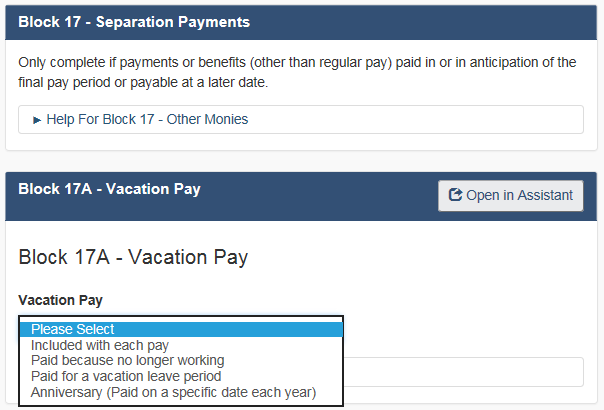
Figure 13 - Text version: Block 17A
Employers may complete Block 17A – Vacation Pay
3.12.2 Statutory holiday
Block 17B allows you to enter the Start Date (dd/mm/yyyy format or by using the Calendar) and the Amount paid for Statutory Holiday Pay. If you need to enter more than one amount, click on the Add More button and another field will be displayed. You can enter up to 10 Statutory Holidays in Block 17B.
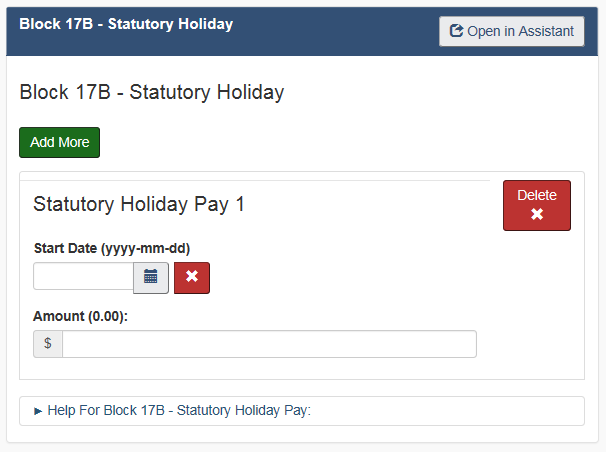
Figure 14 - Text version: Block 17B
Employers may complete Block 17B – Statutory Holiday
3.12.3 Other monies
Block 17C (Other Monies) lets you choose the different types of Other Monies that the individual may have received upon separating from the job.
The options are:
- B - Bonus (Holiday)
- B - Bonus (Production/Incentive)
- B - Bonus (Event)
- B - Bonus (Staying/Contract Complete/End of Season)
- B - Bonus (Separation or Retirement)
- B - Bonus (Closure)
- B - Bonus (Other)
- E - Severance Pay
- G - Gratuities
- H - Honorariums
- I - Sick leave credits
- J - Retroactive pay adjustment
- O - Other
- Q - Profit Sharing
- R - Retiring Allowance/Retirement Leave Credits
- S - Settlement Pay
- T - Payout of banked overtime
- U - SUB Maternity/Parental/ Compassionate Care/Family Caregiver
- U - SUB Layoff
- U - SUB Illness
- U - SUB Training
- Y - Pay in Lieu of Notice
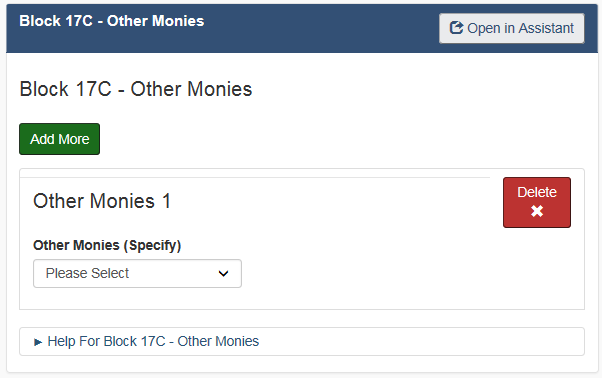
Figure 15 - Text version: Block 17C
Employers may complete Block 17C – Other Monies
Block 17C includes a field where you can enter the Start and End Dates of the payments as well as the Amounts. Start and end dates fields will only be presented when they are required, according to the type of other monies chosen. If you need to enter more than one type of Other Monies, choose the Add More button and another field will be displayed.
Note:
You can enter up to 3 types of Other Monies in Block 17C. If you need to enter more than 3 types of Other Monies, please add a comment to that effect in Block 18.
3.13 Special payments
Block 19 allows you to enter any monies that a person may have received for Paid Sick / Maternity / Parental / Compassionate Care/Family Caregiver Leave or Group Wage Loss Indemnity Payments.
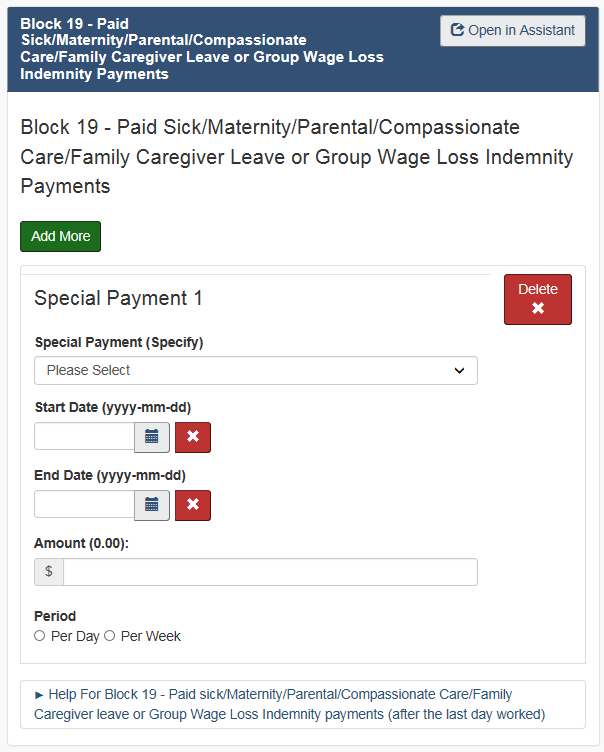
Figure 16 - Text version: Block 19
Employers may complete Block 19 – Paid Sick/Maternity/Parental/Compassionate Care/Family Caregiver Leave or Group Wage Loss Indemnity Payments
Enter the Start Date of the payments and the Amount and indicate whether these payments were made per day or per week.
If you need to enter more than one type of payment, choose the Add More button and another field will be displayed. You can enter up to 3 types of payments in Block 19.
The ROE can be completed with only one of each type of payment. It is possible to have a ROE with 4 special payments reported but only one of each type is allowed.
3.14 Comments
If you need to provide any additional information that you did not submit already on the ROE, you may check the box in Block 18. This will display the Comments section where you can provide that information. Note that this section must be used sparingly as completing Block 18 can prevent the automation of Employment Insurance (EI) claims.
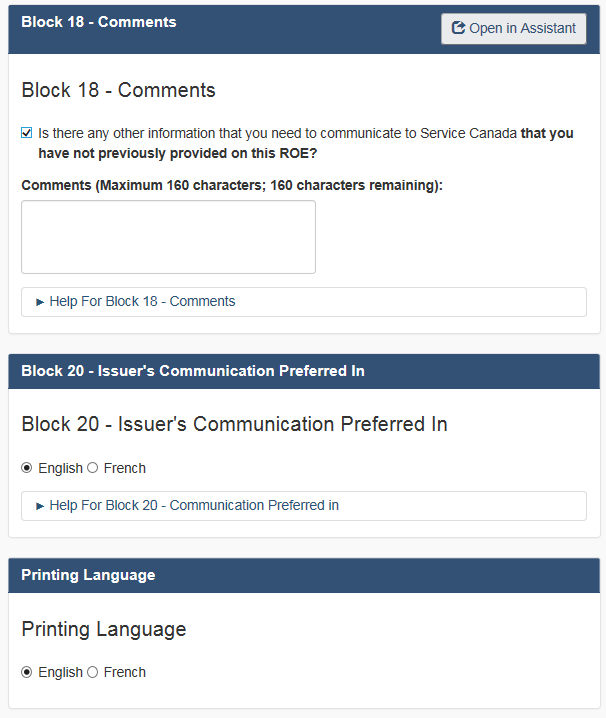
Figure 17 - Text version: Block 18
Employers may complete Block 18 – Comments
Note:
A comment must be entered when codes K - Other and K - Other / Canadian Forces - Queen's Regulations/Orders is selected.
3.15 Issuer's communication preferred in
As the issuer of the ROE, Block 20 lets you indicate in which official language you prefer to communicate with Service Canada.
Note that Blocks 21 and 22 are pre-filled with the telephone number (Block 21) and name of the individual who completed the ROE (Block 22).
You can also choose the language in which you would like to print the ROE. The default printing and communication language is the language in which you are working.
3.16 Declaration
As the issuer of this electronic ROE, you must attest to the trueness of the data, as well as certify that you are the user named in Block 22 by inputting a checkmark in the appropriate box of the block. Read the declaration and only submit if the issuer's name displayed is yours.
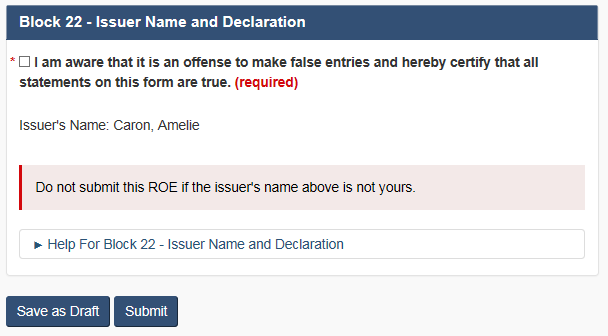
Figure 18 - Text version: Block 22
Employers have to complete Block 22 – Issuer Name and Declaration. Displayed named must be yours.
Section 4 - Creating a new ROE for a self-employed fisher
4.1 Create ROE for a self-employed fisher
To create an ROE for a Self-Employed Fisher, select the Create new ROE for Self-Employed Fisher option from the menu at the left of the screen.
4.2 Add new ROE – Step 1
When required, ROE Web will present you with Step 1 where you will be asked to choose the business for which you want to issue the ROE, the Folder where you want to file this ROE and the ROE type.
You can select the business by either choosing a Business Number (BN) or a Business Name from the list provided. The list is sorted by Business Number as a default. To search by Business Name, simply click on the Select by Business Name option.

Figure 19 - Text version: Add new ROE – Step 1
The first step to adding a new ROE is to provide the business number and Folder information and select the type of ROE to issue
The Folder option only appears when your organization uses folders. When folders are used, the Folder where the ROE will be filed must be chosen from the list available in the drop down menu. You may choose the No Folder option or any other folder. The folder does not appear on the ROE when viewed or printed.
You must select the type of ROE you want to issue; select the Self-Employed Fisher ROE option and click on Continue.
4.3 Complete the ROE for self-employed fisher
This step allows the user to complete and submit a Self-Employed Fisher ROE. The first few questions on the form contain the basic company information, such as the Employer's Name, Canada Revenue Agency (CRA) Business Number, Employer Payroll Reference Number and Employer's Address. This information is pre-filled according to the data provided for your business when it was registered for ROE Web.
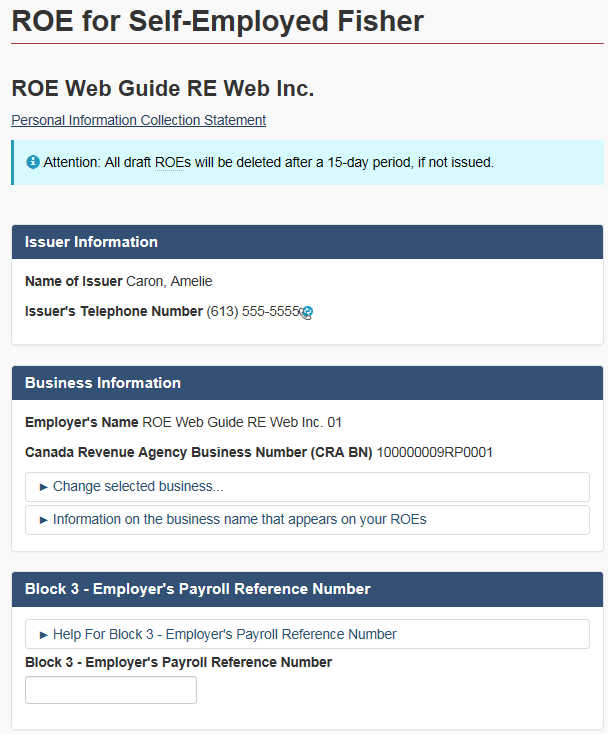
Figure 20 - Text version: ROE for Self-Employed Fisher
Step 2 of the Add New ROE process in the ROE Web application. Users can fill out ROE information, including business information and the employer's payroll reference number.
4.3.1 More than one section or sub-company
If your organization has more than one section or sub-company, and each has a separate BN or name, you can include them all in your ROE Web profile. You can also easily change the business information while you are filling out an electronic ROE by going to the Address field (Block 4) and choosing the appropriate Address from the drop-down menu. You will notice that this will automatically change the Name and the CRA BN, based on the Address you have chosen. If the address you are looking for is not listed in the drop-down menu, you may also enter it directly in Block 4 of the ROE.
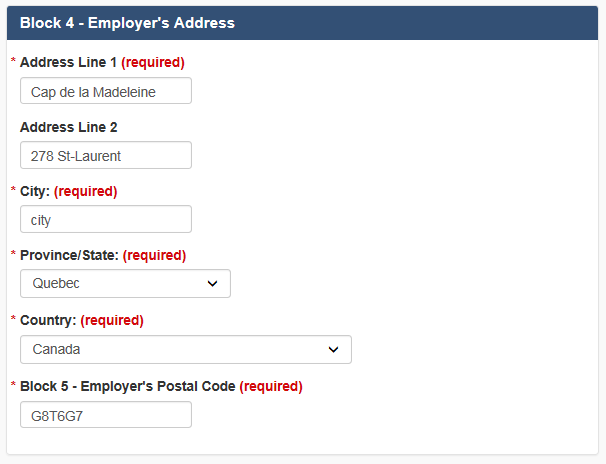
Figure 21 - Text version: Employer's Address
In Block 4, employers have to provide their complete address
Note:
Entering an address directly in Block 4 of the ROE will not add this address to your business profile. To add an address to your business profile, select Manage Addresses under My Organizations located at the top of the screen.
4.4 Insurable earnings
In Block 6, provide the information for each trip by completing the Start date (optional), End date and Share of Insurable earnings.

Figure 22 - Text version: Insurable Earnings
Block 6 of the Self-Employed Fisher ROE details each trip by Start Date, End Date and Share of insurable earnings
Note:
The ROE will only display 4 trips by default. If more than 4 trips need to be completed, click on the Show Additional Trips at the bottom of Block 6.
4.5 Self-employed fisher's information
Enter the self-employed fisher's full name and address in Block 8, their nine digit Social Insurance Number (SIN) in Block 9 and the Commercial Fishing Vessel Number (CFVN) in Block 10 (Optional).

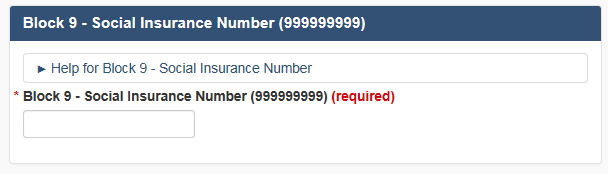
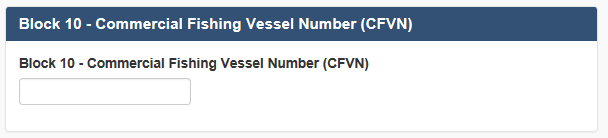
Figure 23 - Text version: Employee's information
The figure displays the information of Blocks 8, 9 and 10 on the ROE
4.6 Reason for issuing this ROE
You must choose the Reason for Issuing the ROE in Block 11.
The different reasons are:
- A – End of Fishing
- A – Requested by Fisher
- B – Other
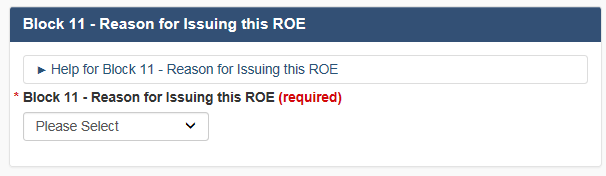
Figure 24 - Text version: Reason for Issuing this ROE
The figure displays Block 11 where a reason for issuing the ROE must be selected via the drop down menu
Note:
A comment must be entered in Block 12 when code B – Other is selected in Block 11.
4.7 Comments
If you need to provide any additional information that you did not submit already on the ROE, you may check the box in Block 12. This will display the Comments section where you can provide that information.
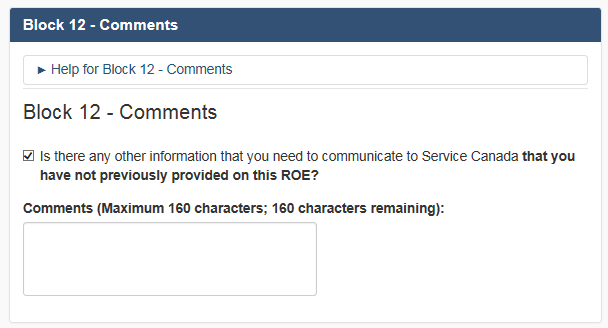
Figure 25 - Text version: Comments
Displays Block 12 which allows the capture of additional information
Note:
This section must be used sparingly as completing Block 12 can prevent the automation of Employment Insurance (EI) claims.
4.8 Communication and printing language
Block 13 lets you indicate which official language you would like Service Canada to communicate with you in, as well as the option to select in which language the ROE will be printed. The default printing and communication language is the language in which you are working.
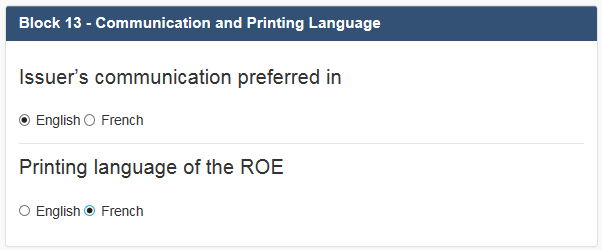
Figure 26 - Text version: Communication and Printing Language
Displays a set of radio buttons which allows the user to select the language in which they would prefer to be contacted by Service Canada, as well as the language in which the ROE will be printed.
4.9 Issuer's name and certification
The Certification Block will be pre-filled with the name of the individual who completed the ROE. As the issuer of the electronic ROE, you must attest to the trueness of the data, as well as certify that you are the user named by inputting a checkmark in the appropriate box of the Block. Read the declaration and only submit if the issuer's name displayed is yours.
Figure 27 - Text version: Certification
Displays the Certification statement and the checkbox that needs to be completed in order to save or submit the ROE
Section 5 - Submitting the ROE
5.1 Submit button
When the ROE is completed without errors and you have attested to the trueness of the data, as well as confirmed that you are the user named in Block 22 of the ROE, choose the Submit button at the bottom of the screen to submit the ROE.
After choosing the Submit button, the screen below will appear. You may choose the Create Report / Print ROEs button to save and print the ROE(s) you have just submitted. You can now also Import the ROE you have just submitted from the ROE Confirmation Status page. The import feature is not currently available for Self-Employed Fisher ROE.
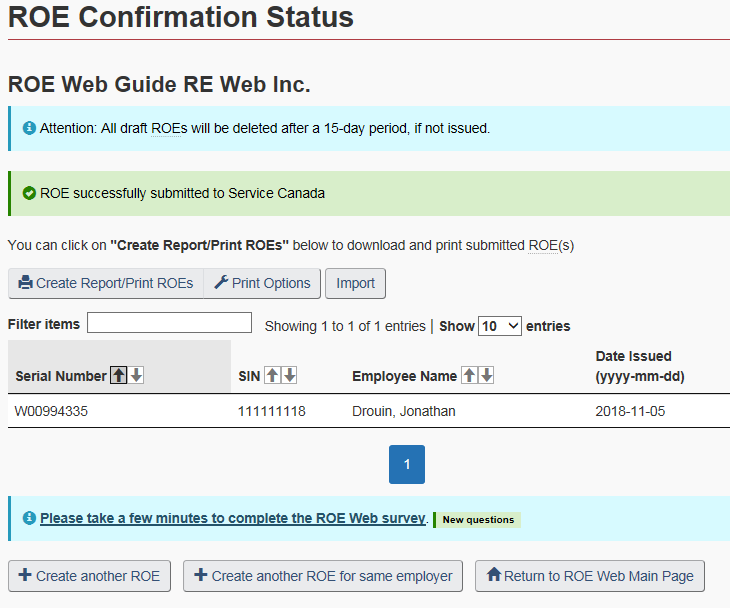
Figure 28 - Text version: ROE Confirmation status page
The ROE Confirmation Status Page displays the serial number assigned to a newly issued ROE. Choosing the Create Report / Print ROEs link will display the File Download window. Select Open to view the ROEs in a PDF format. You may also save the ROEs on your computer or cancel the action. An information box on this page states that draft ROEs will be deleted after 15 days if not issued. Another box on this page will confirm if your ROE was successfully submitted to Service Canada.
Note:
Regular ROEs issued using ROE Web are assigned a serial number starting with the letter "W" or "M", while Self-Employed Fisher ROE are assigned a serial number starting with the letter "Y".
The ROE(s) is submitted directly to Service Canada. Employers therefore no longer need to mail a printed copy of the ROE to Bathurst.
Section 6 - Saving the ROE as a draft
If for any reason you have completed an ROE but do not yet wish to submit it, choosing the Save as Draft button at the very bottom of the screen will save the draft ROE in the ROE database for 15 days. If not submitted in that period, the draft will be deleted. No serial number is assigned to the ROE until it has been submitted to Service Canada and passed the edits.
Section 7 - Help information for the blocks on the form
7.1 Help for block
Each block of the ROE Online Form contains a Help feature. To activate the Help, simply choose the "Help for Block…" link next to a particular block. A description of the block will be displayed along with help on how to complete it.
Section 8 - Correcting the ROE
8.1 Errors
All the ROE fields that failed the ROE validations will be marked in red at the top of the ROE online form itself.
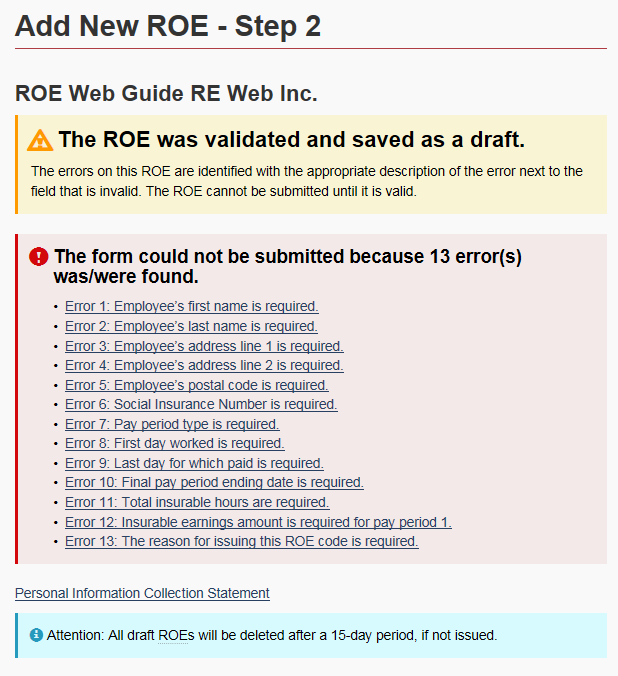
Figure 29 - Text version: Errors on the ROE
ROE Web lists all errors on an ROE.
8.2 Errors in specific blocks
Choosing the link of one of the errors will bring you directly to the field containing the error. Details of the error will appear in the box itself.
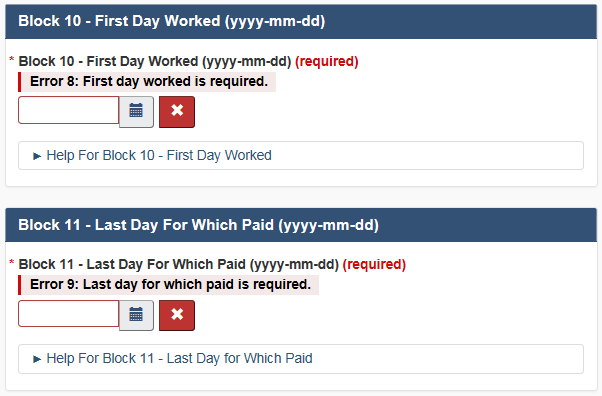
Figure 30 - Text version: Errors in specific blocks
The errors are also shown in the specific blocks of the ROE
8.3 After correcting the errors
After correcting the errors and confirming your identity to Service Canada by completing Block 22, choose the Submit button at the bottom of the page. If the ROE successfully passes all the validations, a serial number will be assigned to the ROE.
Section 9 - How to search for ROE(s)
9.1 Viewing and printing
ROE(s) with or without a serial number can be retrieved for viewing and printing purposes. When searching for an ROE, you may choose either a draft ROE or a previously issued ROE by choosing the Search Draft ROEs or Search Issued ROEs option available on the left hand side menu.
Note:
The serial number assigned to an ROE confirms that ROE has been submitted to Service Canada.
9.2 Search draft ROEs screen
The following search criteria are available on the Search Draft ROEs screen:
- SIN: Social Insurance Number
- Date Saved (From and To): Date the ROE was last saved as draft
- Employee Last Name: The employee's last name
- Employee's Payroll Reference no.: The Payroll Reference number used by your business
- CRA Business Number: The 15-character number assigned by the CRA
- Folder Name: The name of the Folder in which the ROE was filed
Note:
For each search criteria, excluding by SIN and Date Saved, you have three options (drop down menu) when using a specific search criteria: Exact, Begins With, and Ends With.
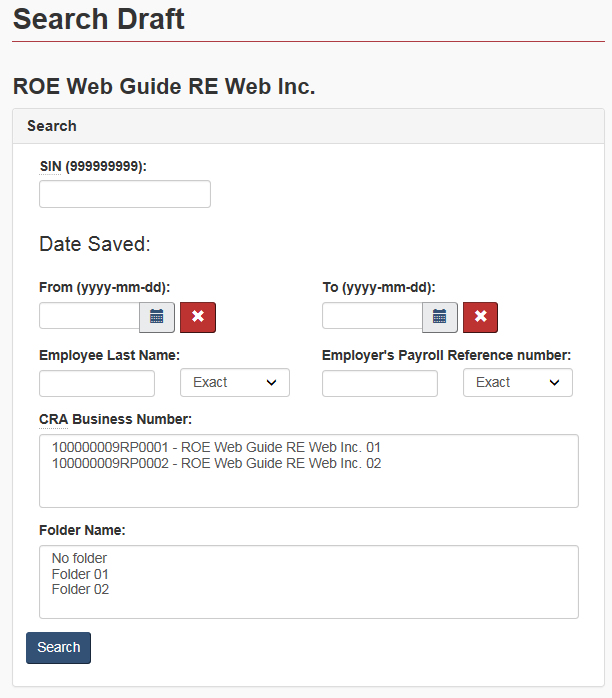
Figure 31 - Text version: Search draft ROEs page
The Search Draft ROEs page allows users to search for ROEs that were saved in Drafts.
9.2.1 Folder name
Users will only see the Folder Name criterion if they have access to at least one folder in their user profile. Only those users who have access to at least one folder will be able to view, open and search for ROEs in that folder.
An ROE within a folder will come up in search results only if the user has access to it. If a user has the authority to manage folders, but does not have access to a specific folder, the user will be able to create, delete and modify folders but will not see the content of the specific folder as the user does not have access to.
If an ROE is saved under a BN the user has access to but in a folder the user does not have access to, the user will not see the ROE when performing a search.
Once you have provided the search criteria, choose the Search button at the bottom of the screen. ROE Web will search the database and will display a list of all the ROEs that meet the criteria you entered to perform your search.
9.3 Draft search results screen
The Draft Search Results screen will display all the Draft ROEs that meet the criteria entered to perform your search. The following information on the ROEs is displayed:
- SIN
- Employee Name
- Date Saved: Date the ROE was last saved as draft
- Folder (if applicable and if user has access to the folder)
- Number of Errors: The number of errors, if applicable is displayed in this column
- I would like to...this Draft: Contains the actions that can be performed on the Draft (Edit and Verify)
You may also change your search criteria by choosing the Change Search Criteria button. This will bring you back to the Search Draft ROEs screen.
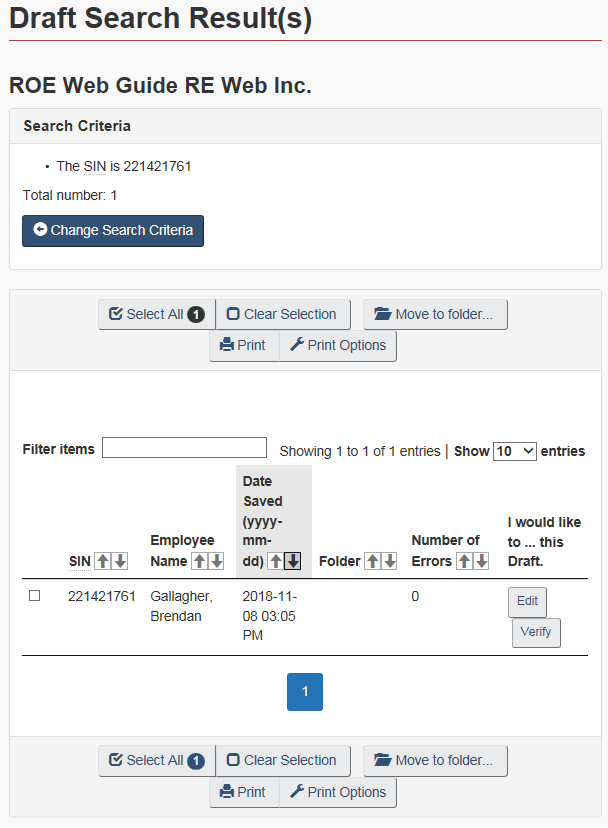
Figure 32 - Text version: Draft search result(s) screen
The Draft Search Result(s) screen displays the Draft ROEs meeting the search criteria entered by the user
9.3.1 Actions that can be performed on the draft search draft result(s) screen
The following Action buttons are available directly from the draft search results screen:
- Select All: Allows you to choose all the ROEs on the page by inputting a checkmark beside the ROEs
- Clear Selection: Clears the boxes you have selected
- Move to Folder...: Allows you to move ROEs from one folder to another
- Print: Allows you to print single or multiple ROEs
- Print Options: Allows you to select the language of the ROE(s) to be printed as well as the information found on page 2 of the ROE. This page contains useful information for people applying for Employment Insurance (EI) benefits
- Edit: This option will open the ROE in the online form which will allow you to amend the draft ROE
- Verify: This option will allow you to see a summary of the ROE. Will only be available if the draft ROE contains no error
- Submit Selected: Allows you to submit Draft ROEs
9.3.1.1 Verify draft ROE
The Verify option will open a summary of the current information contained on the draft ROE which allows you to review the information captured and submit the ROE.
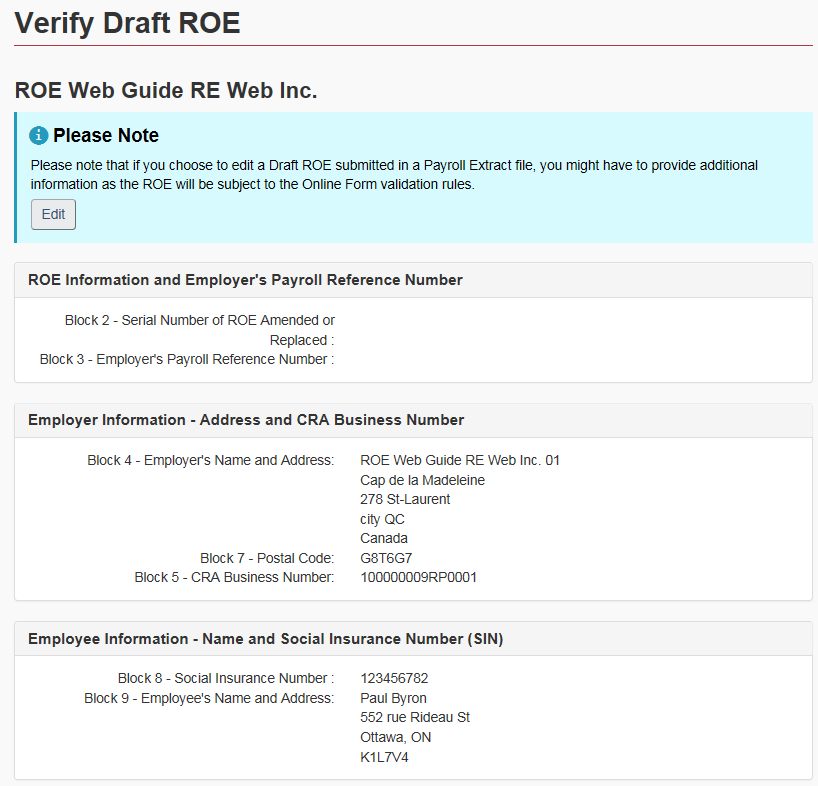
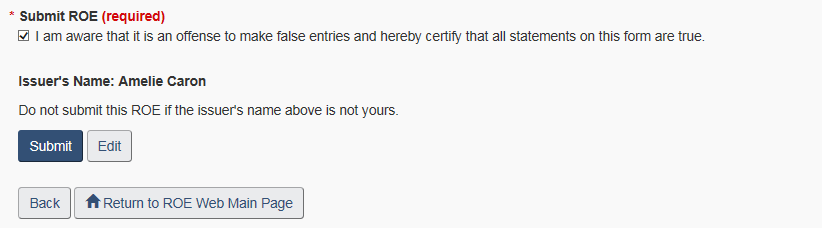
Figure 33 - Text version: Verify ROE
Displays a sample of the information presented on the Verify Draft ROE page.
If any of the information needs to be modified before submitting the ROE, click on the Edit option at the top or bottom of the page. The Edit option will open the ROE form and the information will be modifiable.
You may submit the ROE directly from this page if the information is accurate and doesn't require any modifications.
9.3.1.2 Moving ROEs
The Move to folder option allows you to move ROEs from one folder to another. Note that only users who have access to at least one Folder in their organization will see this action button.
Once you have selected the ROE(s) to be moved, choose the Move to Folder... button.
The Move Draft ROEs screen will appear where you can select the Destination Folder from the drop down menu presented.
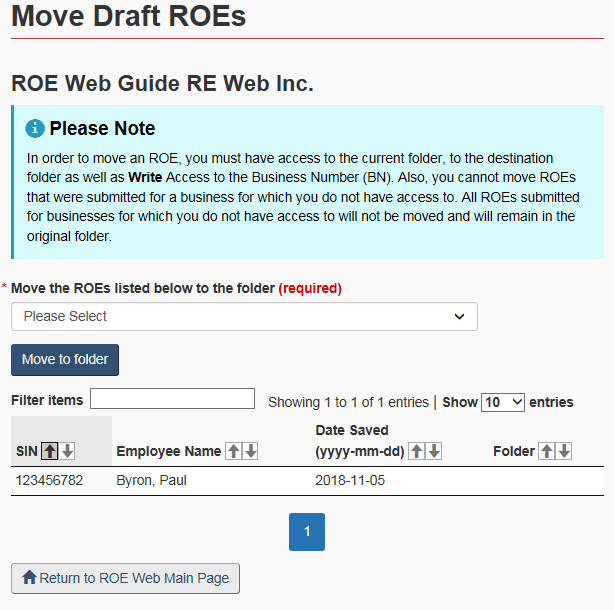
Figure 34 - Text version: Move draft ROEs screen
The Move Draft ROEs screen allows the user to move Draft ROEs from one folder to another.
Choose the Move to Folder button another time to start the move. The Move Draft ROEs - Confirmation screen will appear.
Note:
As indicated on the Move to Folder screen, in order to move an ROE, you must have access to the current Folder, the destination Folder as well as Write Access to the BN. Also, you cannot move ROEs that were submitted for a business to which you do not have access. Those ROEs will not be moved and will remain in their current folders.
9.3.1.3 Moving all ROEs
You may also choose the option Move all ROEs in a folder from the left hand side menu. This option allows you to move all ROEs from a Folder to another.
Select the Originating Folder as well as the Destination folder and choose the Move to Folder button to move the ROEs.
9.3.2 Printing ROEs
You can print ROEs whether they have a serial number or not.
You may choose individual ROEs or choose all ROEs by placing a checkmark in the first column on the left of the table. Choose all the ROEs you wish to print from the Search Results screen and choose Print button. You now have the ability to select ROEs from different pages and you can also select more than 50 ROEs to print at a time.
After selecting the ROEs you wish to print, choose the Print Options button if you wish to select the language in which the ROE(s) will be printed or if you wish to print the back page of the ROE.
The File Download window will appear. Select Open to view the ROEs in a PDF format. You may also select Save the ROEs on your computer or Cancel the report.
The PDF version of an ROE looks exactly like the paper form ROE and all the selected ROEs will appear in PDF on the same screen. Choose the Print icon on the toolbar at the top of your screen to print the ROEs.
As indicated in Section 4 above, if you have just issued a single ROE and you want to print it right away, you do not have to search for the ROE as described in this section. You can simply choose the Create Report / Print ROEs hyperlink which allows you to download and print the ROE.
9.4 Search issued ROEs screen
The following search criteria are available on the Search Issued ROEs screen:
- Serial Number: If you know the Serial Number of the ROE you are looking for, enter it in the appropriate field and choose the Search by Serial Number blue button right under this field
- SIN
- Date Issued (From and To): Date the ROE was issued
- Employee Last Name: The employee's last name
- Employee's Payroll Reference no.: The Payroll Reference number used by your business
- CRA Business Number: The 15-character number assigned by the CRA
- Folder Name: The name of the Folder in which the ROE is filed
Note:
For each search criteria, excluding by SIN and Date Issued, you have three options (drop down menu) when using a specific search criteria: Exact, Begins With, and Ends With.
If you are using any criteria (or a combination of criteria) other than the Serial Number, enter your criteria in the appropriate field (s) and choose the Search button at the bottom of the screen.
Tip:
To obtain optimal results, search only by SIN or Serial Number. If those criteria are not available, we recommend that you limit your criteria.
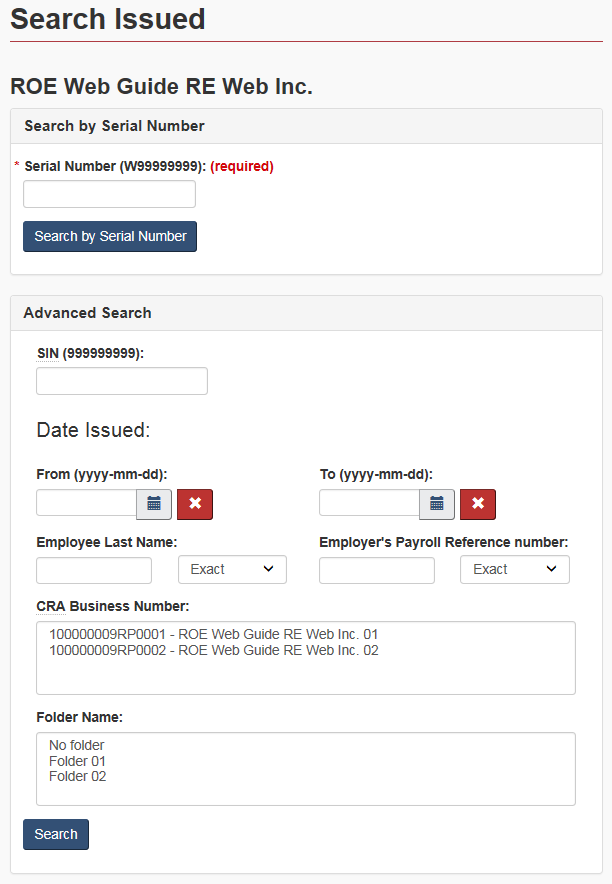
Figure 35 - Text version: Search issued ROEs screen
The Search Issued screen allows users to search for issued ROEs. The Issued Search Result(s) screen will display all the issued ROEs that meet your search criteria.
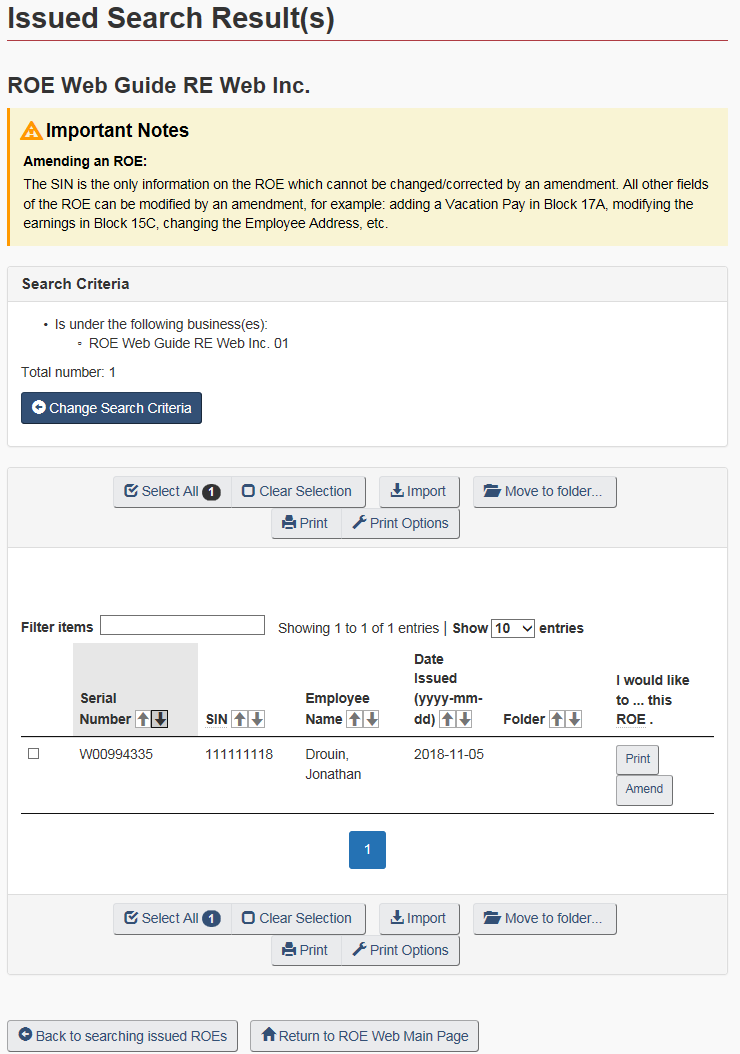
Figure 36 - Text version: Issued search result(s) screen
The Issued Search Result(s) screen displays the issued ROEs meeting the search criteria entered by the user. The following ROE information is displayed:
- Serial Number
- SIN
- Employee Name
- Date Issued
- Folder (if applicable and if user has access to the folder)
- I would like to...this ROE: Contains the actions that can be performed on the issued ROE. (Print and Amend).
You may also change your search criteria by choosing the Change Search Criteria button. This will bring you back to the Search Issued ROEs screen. A note box states that the SIN is the only ROE information that cannot be changed with an amendment.
9.4.1 Actions that can be performed on the issued search results screen
The following Action buttons are available directly from the Issued Search Results screen:
- Select All Current: Allows you to choose all the ROEs on the page by inputting a checkmark beside the ROEs
- Clear Selection: Clears the boxes you have selected
- Import: Allows you to import the ROEs on your computer
- Move to Folder...: Allows you to move ROEs from one folder to another
- Print: Allows you to print single or multiple ROEs
- Options: Allows you to select the language of the ROE(s) to be printed as well as if the information found on page 2 of the ROE should be printed or not. The back page of the ROE contains useful information for people applying for EI benefits
- Amend: Allows you to amend issued ROE
Note:
The import feature is not currently available for Self-Employed Fisher ROE
9.4.2 Moving ROEs
Please refer to Section 8.3.2 above for information on how to move ROEs from one folder to the other.
9.4.3 Importing ROEs
The Import feature helps users amend any ROE they have already submitted if the payroll software they use enables them to do so. With the Import feature, users can see the details of any ROE(s) they've submitted, whether it was issued a serial number or saved as a draft. Those that have a serial number can be reviewed so the user can go back in the software and make the necessary amendments. Choose all the ROEs you wish to import from the Search Results screen and choose the Import button. The File Download window will appear. Select Open to view the ROEs in a PDF format. You may also select Save the ROEs on your computer or Cancel the report.
Once you've opened the link, the XML file of the ROE will appear.
This example shows an ROE that have been issued, so the Issued Count equals "1". It also shows eight pieces of information from the ROE, including: Serial Number, Date Issued, Business Number, SIN, First Day Worked, Last Day for Which Paid, Final Pay Period End Date and Total Insurable Earnings.
How this information is used depends on if the type of payroll software you use allows you to amend uploaded ROEs via the ROE Payroll Extract function.

Figure 37 - Text version: XML file of the ROE
A sample of an XML code file. Importing an ROE generates an XML file.
Note:
Even though Version 2.0 of the Payroll Extract file is used, the Import file still shows Version 1.0 of the XML. This will be corrected in a future release of ROE Web. This function is currently not available to import ROEs for Self-Employed Fishers.
Section 10 - How to amend a ROE
To amend an existing ROE, choose the Amend button for the appropriate ROE on the Issued Search Result(s) screen. Only ROEs for which a serial number was assigned can be amended. You may also use the Amend an ROE option available in the left hand-side menu which will direct you to the Search ROE Issued page where you can search for the ROE you wish to amend.

Figure 38 - Text version: Issued search result(s) screen
The Issued Search Result(s) screen displays the issued ROEs that met your search criteria. You can select an ROE from the search results to print or amend it. This screen also contains options to Select All, Clear Selection, Import, Move to Folder and Print.
The ROE form for the chosen ROE will be displayed.
After making the necessary modifications to the ROE, choose the Submit or Save as Draft button as required. Remember that you must attest to the trueness of the data and confirm your identity before you can submit an ROE.
The Serial number of the original ROE has moved to Block 2, Serial Number of ROE Amended or Replaced and a new SN has been assigned to the amended ROE (Block 1).
Note:
If employers need to amend ROEs submitted in formats that have been decommissioned, they will have to do so using the 53-week Online Form, the 53-Week ROE Web Assistant or Version 2.0 of the Payroll Extract file. This means that employers will have to provide the equivalent of 53 weeks of pay period information in Block 15C of the ROE.
ROE Web now allows users to amend ROEs issued in the last 12 years.
Section 11 - How to delete an issued ROE
11.1 Introduction
ROE Web now provides users with the ability to delete ROEs meeting the following criteria:
- ROEs issued by ROE Web
- ROEs that have not been used in the calculation of an EI claim
- Original ROEs that have not been amended or ROEs that are not amendments
- ROEs that have not been corrected by Service Canada
- ROEs that have been issued within 3 months of performing the search to delete the ROE; and
- Only the user who submitted the ROE to be deleted can delete it
11.2 Search for a ROE to delete page
In order to delete an ROE, select the Delete an Issued ROE option from the left-hand side menu. The Search for an ROE to Delete page will appear.

Figure 39 - Text version: Search for an ROE to delete page
The Search for an ROE to delete page allows users to input the Serial Number and the SIN of the ROE they wish to delete
Once the Serial Number and SIN of the ROE to delete is entered and the user has selected the Search button, ROE Web will present the ROE to the user if it meets all of the criteria outlined above.
The user can then review the ROE information to ensure that it really must be deleted. A reason must be selected from the drop down menu at the bottom of the page. The reasons available are:
- The ROE was submitted with the wrong SIN
- The ROE was submitted in error
- The employee has a new SIN; and
- Other (please enter the reason)
If the user selects "Other", a reason must be entered in the text box provided to that effect.
Note:
Deleting an ROE can have serious consequences on EI claims. Therefore, if you need to modify information on the ROE, ensure that you are amending the ROE instead of deleting it.
11.3 Meeting the criteria for deleting a ROE
ROE Web will delete the ROE if it meets the criteria listed above. If the ROE does not meet one or more of the criteria listed above, the user will be presented with a message informing him that the ROE cannot be deleted and that they can contact the Employer Contact Centre (ECC) should they wish to obtain additional information.
Section 12 - Looking for newer versions of stored pages
When a Web page is viewed, data is cached in the Temporary Internet Files folder. This determines how Internet Explorer checks whether it has the latest version of a cached file when the user returns to a previously viewed page. If a user experiences problems printing an ROE or if old information is displayed while preparing an ROE, the user must look for newer versions of stored pages.
The procedure will depend on which browser version is used.
12.1 Internet Explorer 9 or higher
- On the menu bar, click on Tools and select Internet Options
- On the General tab of the Internet Options dialogue box, click on the Settings button in the section Browsing history
- On the next dialogue box, select the option Every visit to the web page
- Click on OK and on OK again