
General Guidelines
- To calculate the number of pixels per inch (PPI) for a standard 8 X 10 image at 300 ppi, use the following formula:
3000 ÷ greatest length (in inches) = number of ppi, and digitize at 100%.
Note: that it is the original document which measures 8 x 10, not the final digital file.
Examples:
- The main file formats used at the CMCC are:
- At the CMCC, the dimensions of image files in JPEG format will vary, depending on the needs of the Archives or Collection Management Systems, or based on web requirements. The usual standards are:
- For text and photographic documents, the image is saved at n x 768 pixels.
- For documents with small characters, the image is saved at n x 1130 pixels.
JPEG files are saved at 72 ppi, with the lower level of compression (level 12).
Note: The empty space, represented by the underlined blank (e.g., n x 768 pixels) is left open to accommodate variations in size. The number of pixels - 768 or 1130 - refers to the longest measurement of the document being digitized.
- When burning images onto CD for deposit in the Archives:
- a) Use a good quality CD: CD-R, rather than CD-RW, with a reflective gold coating (e.g., MAM-A CD-R Gold).
- Burn the CD at a slower speed (4X) to ensure a "deep" impression.
- Check that the information burned into the CD has been effectively transferred.
- Use water-based ink markers.
- When calibrating the white, grey and black areas, refer to the adjacent grid to comply with the levels used at the CMCC.
Furthermore, to secure RGB variance on Kodak Q-14 colour and grey scales:
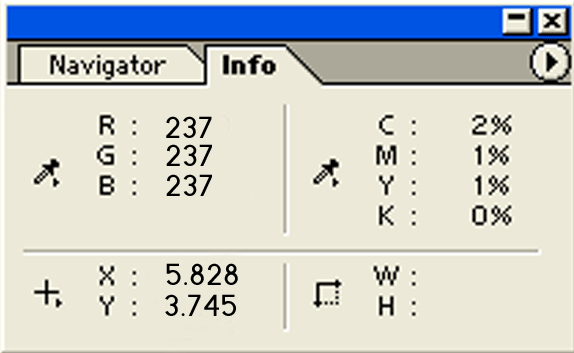
- The reading of white from the Kodak scales must be made within a range of 5 pixels.

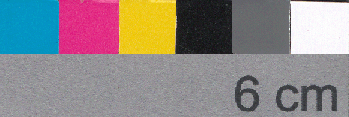
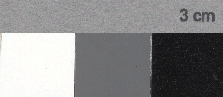
KODAK Q-14 colour scale 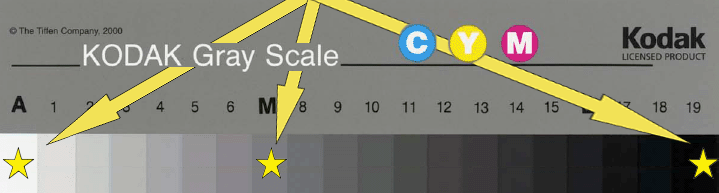
KODAK Q-14 grey scale Table of Reference Levels White Neutral grey (M) Black Reference Levels 237-237-237 102-102-102 23-23-23 Recommended Levels 233 to 248 98 to 106 19 to 27 Levels Used for CMCC Collections 233 to 248 145 to 155 30 to 40 - The data for each of the RGB channels must not vary by more than 3%.
Scales are useful for correcting a poor-quality digital image, or for batch digitization.
Note: When correction is necessary, do not save your changes on the original image. Instead, create a duplicate digital file and work on that version.
- The reading of white from the Kodak scales must be made within a range of 5 pixels.
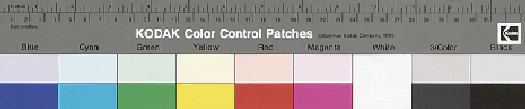
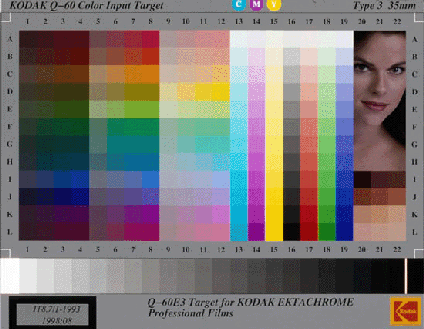
- Scale samples used at the CMCC are:
- The Kodak Q-14, mainly used alongside the material being digitized or photographed.
- The Kodak Q-60, used primarily for reference purposes.
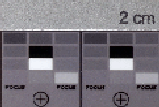
- A homemade scale, based on the squares of the Kodak Q-14 scale, is also used for smaller objects in the CMCC collection. It is important that the squares be identical in size to one another (squares of 1 cm 2 are recommended), and it is useful to include a reference measurement.
- A small commercial white-grey-black scale, used for macro photography of artifacts.
Notes:
- For reliability purpose, the scales used must be clean - without dust or stains.
- The use of a detailed colour scale, such as MacBeth digital colour checkers, may come in handy when working with specific types of media.
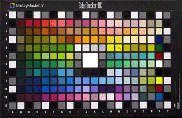
Examples of MacBeth scales 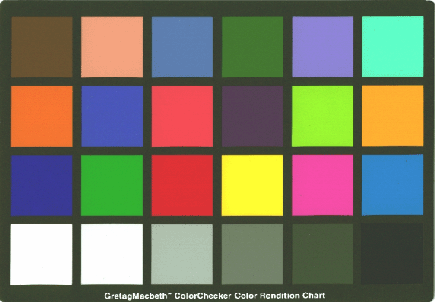
- The Kodak Q-14, mainly used alongside the material being digitized or photographed.
- During digitization, it is important to check the histogram to ensure that the image is neither overexposed nor underexposed:
The histogram shows the distribution of colour levels between the two extremes - pure black (level 0) and pure white (level 255).
It is sometimes necessary, before saving the final digital image, to work with cursors within Photoshop® to optimize quality at both the black and white levels.
Note: It is best to make any corrections to the image on a duplicate digital file.
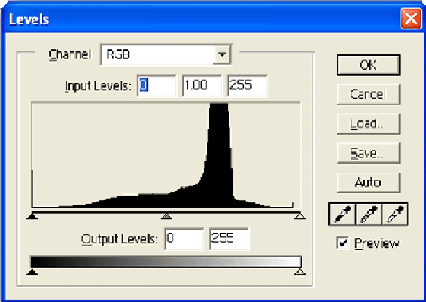
Histogram Indicating a Balanced Exposure 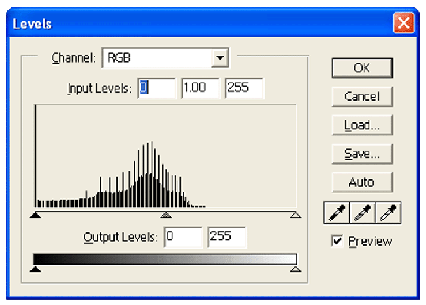
Histogram Indicating a Poor Exposure - In some instances, batch processing can be carried out. It is used mainly:
- When the quality of the original material being digitized is of less importance;
- For consultative and visual reference purposes; and
- To correct a group of images with similar issues or problems.
Note: Should this method be used, it is important to remember that this process cannot provide an optimal digital rendering of each individual image.
If you opt for batch digitization, follow the steps below.
- When scanning or photographing any material, the minimal requirements for working areas are:
- Hardware (scanner, camera, monitor, etc) must be calibrated on a regular basis.
- Room wall colours should be neutral.
- Room lighting should be kept at the lowest level.
- Monitor should be protected from direct light to avoid reflections.
- Working area kept as dust-free as possible.
- When photographing artifacts, general procedures require:
- Using a regular lens (unless otherwise specified).
- Using a professional studio flash set-up, not the camera flash.
Contact information for this web page
This resource was published by the Canadian Heritage Information Network (CHIN). For comments or questions regarding this content, please contact CHIN directly. To find other online resources for museum professionals, visit the CHIN homepage or the Museology and conservation topic page on Canada.ca.