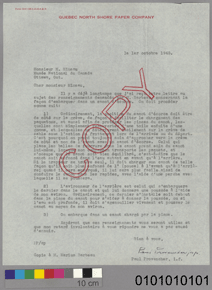
Printed Materials with Photographs and/or Annotations
Type of Document
These documents are similar to those described previously, but have distinctive markings that may be useful to see in colour.
Examples:
- Book whose aging you want to show
- Book with colour or lead pencil annotations
Remarks
For this type of document, digitization can be combined by alternating use of the grey and colour scales.
For example, in a book having text pages with illustrations or photos, digitize the text pages using the guidelines for greyscale, and digitize the pages with illustrations using the guidelines for RGB.
- Keep a border around the document to allow reframing of the document as well as later modifications (e.g., removing the scale and document number).
- Batch digitization enhances productivity, but does not offer optimal rendering of individual images.
- For documents larger than the surface of the digital scanner use the instructions for normal-sized artifact photography.
- For documents with several pages, consider producing a PDF document from the originals, or from black-and-white copies.
Recommendations
- 300 ppi, with a minimum of 3,000 pixels for the longest dimension (8 x 10, or 1:1 for formats larger than 8 x 10).
- Refer to the general guidelines to calculate the number of ppi required for a given dimension.
Note that it is the original document which measures 8 x 10, not the final digital file. - Digitize in reflective mode.
- Select 48-bit mode on the scanner to capture the maximum number of colours. If this option is not available, 24-bit mode is acceptable.
- For reference purposes, digitize a colour scale (Kodak Q-14 or Q-60) before each digitization session.
- Use a grey background.

CD2005-0957-E2005-02445 - Digitize the document with a grey or colour scale and, depending on available space, always place it in the same location (ideally lower left).
- Colour-balance each image as indicated in the general guidelines. If there is no greyscale reference, balance the levels of white in the brightest zone (D-Max), then balance the black in the darkest zone (D-Min).
- Enlarge the frame by one inch at the bottom, and type the document number in black at the lower right (font: Arial, 40 pts.).
- Flatten the image (i.e., flatten layers).
- Convert in Adobe RGB 1998 profile, 8 bits per channel (total 24 bits).
- Save the image as an uncompressed TIFF, named to standards established by the Corporation's Photo Archives.
- Produce a JPEG version as described in the general guidelines.
Contact information for this web page
This resource was published by the Canadian Heritage Information Network (CHIN). For comments or questions regarding this content, please contact CHIN directly. To find other online resources for museum professionals, visit the CHIN homepage or the Museology and conservation topic page on Canada.ca.