Small Artifacts
Type of Artifact
Examples:
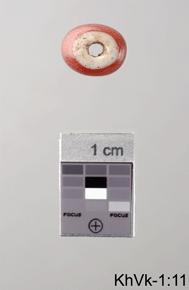
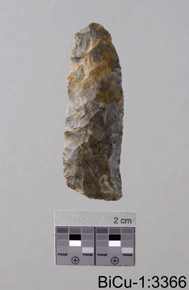
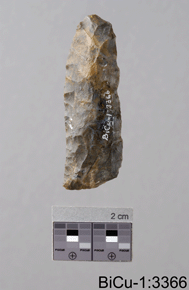
- Artifact from archaeological digs
- Glass bead
- Coin
- Other

Mandatory
- Black or neutral grey background
- Artifact catalogue number
- Colour or white-grey-black scale
- Artifact placed straight
- Ensure that the catalogue number and scale can be excluded if necessary.
Procedures
- For tiny objects, a macro lens is required, in order to enlarge the object as much as possible and capture details.
- The artifact must fill the frame as much as possible.
- Use a digital camera capable of capturing a minimum of 3,000 pixels for the longest measurement (8 x 10, 300 ppi), in either RAW or TIFF.
Optional
To eliminate shadows: Raise the artifact by placing it on a showcase raised approximately 20 cm above the grey background. This will eliminate shadows.
Place a lamp/flash on each side of the showcase, each facing the artifact at a 45° angle to the bottom.
Recommendations
In the Studio
- At the beginning of each session with new lighting, adjust the camera's white balance and for reference purposes, photograph a Kodak Q-14 colour scale.
- Import the image into image-processing software (e.g., Photoshop) and adjust the "levels" on the colour scale with the points of reference as indicated in the general guidelines.
- Save the data in ALV format, since this information will apply to all photos taken during the same photography session.


Taking the Picture
- Photograph the artifact with a small white-grey-black scale measuring 1 cm, 2 cm or 3 cm. Save space on the bottom right to record the object's catalogue number.
- Photograph the object twice with the scale: one front view and one back view.
At the Computer - Image-Processing Software
- Apply the ALV information to all images within the same studio session.
- Works well for batch digitization and improves productivity, but does not offer optimal rendering of individual images.
- Type the artifact's catalogue number in the lower right - in white if the background is black, and in black if the background is neutral grey (font: Arial, 40 pts.).
- Flatten the image (i.e., flatten layers).
- Convert in Adobe RGB 1998 profile, 8 bits per channel (total 24 bits).
- Save the image as an uncompressed TIFF, named to standards established by the Corporation's Photo Archives.
- Produce a JPEG version as described in the general guidelines.
Contact information for this web page
This resource was published by the Canadian Heritage Information Network (CHIN). For comments or questions regarding this content, please contact CHIN directly. To find other online resources for museum professionals, visit the CHIN homepage or the Museology and conservation topic page on Canada.ca.