
How to Plate Silver onto Copper Alloys Using Chemicals – Canadian Conservation Institute (CCI) Notes 9/12
List of abbreviations
- μm
- micrometre
- E.P.
- electroplated
- ICOM-CC
- International Council of Museums, Committee for Conservation
- M
- molarity
- nm
- nanometre
- w/v
- weight per volume
Introduction
A traditional technique for plating a thin layer of silver onto copper or brass is the application of a paste containing a silver salt. The process is called silvering (Birnie 1993), depletion silvering (La Niece 1993) or electrochemical replacement silvering (Beentjes 2007) in the conservation literature. This silvering method was used in the past to make reflectors for lanterns and to plate silver on clock dials, on hardware for coffins and furniture, and on instrument parts for thermometers and barometers (Beentjes 2007, Birnie 1993). On a clock, compass dial or scale, the silver plating provides a contrasting background for the engraved numbers, letters or marks.
This CCI Note describes how to make a silvering paste and the procedure to follow in order to produce a thin silver layer on copper and copper-based alloys such as brass. Copper coupons are used as examples in the procedure. A silvering paste is prepared by first mixing together silver chloride, sodium chloride and potassium hydrogen tartrate (also known as cream of tartar) and adding a small amount of water to form a slurry. Then, using a dampened tissue, the silvering paste is rubbed on the copper until a very thin layer of silver is formed. Finally, a slurry of potassium hydrogen tartrate is rubbed over the newly formed silver layer to brighten it.
This procedure can be used by conservators to repair silver-plated objects when a copper-containing base metal is exposed by slight defects, damage or loss due to repeated polishing. It can also be used to plate silver onto a replacement part made of copper or brass if the original part is not available in silver. Prior to using this procedure on an object, it is recommended that repeated applications be made to small copper coupons to gain enough experience to achieve the desired uniform silver finish.
For more information on silvering and on the components of the silvering paste, consult The science behind plating.
Procedure: plating silver onto a copper alloy
Prior to carrying out the procedure for silvering, consult the safety data sheet for each chemical to be used. Wear recommended personal protective equipment such as eye protection, disposable gloves (for example, nitrile) and protective clothing. If possible, use a fume hood when working with nitric acid. Always wear disposable nitrile gloves when working with the silvering paste, because it will stain bare skin.
Equipment and materials required for plating silver onto copper
- Precipitated calcium carbonate or 1 μm aluminum oxide (alumina, Al2O3)
- Lint-free cotton pads for polishing
- Spatulas
- Balance
- Sodium chloride (NaCl)
- Silver chloride (AgCl)
- Potassium hydrogen tartrate (KC4H5O6)
- Mortar and pestle for grinding silvering mixture
- Brown glass container for storing silvering powder (or clear glass container wrapped in aluminum foil)
- Water (distilled or deionized)
- Lint-free tissues, such as Kimwipes (11 cm × 21 cm), or 10-cm squares of washed cotton sheets or washed cotton muslin
- Disposable nitrile gloves
- Small shallow glass container for preparing the slurries (watch glass, weighing boat or Petri dish)
- Copper or brass; in the examples below, copper coupons are used (5 cm × 2.5 cm or 2.5 cm × 2.5 cm)
- Double-sided tape to hold small coupons in place
- Glass rods for stirring
- Optional: acetone, if needed, to degrease the copper coupons
- Optional: clear lacquer to protect the silver
Preparation of the silvering powder
- Work in a darkened room to minimize the exposure of the silver chloride to light.
- Use spatulas and a balance to weigh out one part by weight of silver chloride, two parts by weight of potassium hydrogen tartrate and three parts by weight of sodium chloride (such as 1 g, 2 g and 3 g, respectively).
- Transfer the three compounds to a mortar and pestle and grind until the powder is fine and well mixed.
- Transfer the powder to a brown glass container or a clear glass container covered with aluminum foil for temporary storage.
- Rinse out the mortar as soon as possible, and soak it in the dark with deionized or distilled water. Replace the rinse water frequently. This should minimize staining of the mortar by residual silver chloride.
Optional: silver chloride can be made from silver nitrate; consult Preparation of silver chloride from silver nitrate and sodium chloride.
Preparation of the metal surface and the tartrate slurry
- Prepare an abrasive slurry of precipitated calcium carbonate or 1 μm aluminum oxide and water. This slurry will be used to prepare the copper coupons and can also be used to prepare the metal surface of objects to be silvered. For more detailed preparation instructions, consult CCI Note 9/11 How to Make and Use a Precipitated Calcium Carbonate Silver Polish.
- Remove the surface layer of oxide from a copper coupon using the abrasive slurry and a lint-free cotton pad. (Optional: degrease with acetone first, if necessary.)
- Rinse the copper coupon with water and dry with a lint-free tissue.
- Prepare a slurry of potassium hydrogen tartrate by placing some (for example, 0.5 g) potassium hydrogen tartrate powder in a suitable container and adding enough water to produce a thin cream-like consistency. Stir with a glass rod to mix until homogeneous. This slurry will be used in the final step of silvering.
Procedure for silvering
For the following steps, it is not necessary to work in a darkened room. The surface of the silvering powder may turn slightly purple, but this will not affect the procedure. When testing this procedure on copper coupons, cut a small piece of double-sided tape and use it to hold a copper coupon in place on the work surface. (The smaller the piece of tape, the easier it will be to remove the coupon after plating.)
- Just prior to silvering, make a slurry with the silvering powder. Transfer a small amount (for example, 0.3 g will silver an area of about 6 cm2) of the silvering powder to a shallow container such as a watch glass. Add enough water (a few drops should be enough) to wet the powder and make a creamy slurry; stir with a glass rod gently to mix. Wait for about two minutes, stirring occasionally, to allow some of the salts to dissolve. (Note: not all of the salts will dissolve.)
- Dampen all of the lint-free tissue, such as the Kimwipes used in this procedure, with water, wrap it around a gloved finger and dip the finger in the silvering slurry. The dampened tissue will wick up water from the slurry, turning the silvering slurry into a thick silvering paste. Make sure some of the paste is on the tissue.
- Gently rub the tissue coated in silvering paste over the entire surface of the copper coupon or area on the object to be silvered. Rub quickly, and while rubbing, keep going over the entire area to be plated so that the area does not dry. Do not rub too much, or else the surface may darken and the silver plating may become uneven. As well, do not rub too hard, or else the surface of the copper or the plating may be scratched. Pick up more silvering paste as needed on the tissue. Keep applying paste until all the copper in the area to be plated is covered with silver.
- While the surface is still wet, and without rinsing, transfer some of the potassium hydrogen tartrate slurry onto the surface (for small areas, a pipette, an eyedropper or even a clean gloved finger works well). Briefly rub the tartrate slurry over the surface with the same tissue. Any dark precipitate should dissolve. (This should normally be done after the silvering step but can be done before silvering is finished if the silvered surface appears to be getting darker.)
- Rinse the silvered surface with water and dry.
- If necessary, repeat the silvering step (step 3), the tartrate step (4) and the rinsing step (5). If there is enough of the silvering paste left, it can be used, provided the tissue used the first time is used again. (This tissue will contain dissolved salts from the silvering slurry.) Otherwise, make a new slurry from the silvering powder and use a fresh dampened lint-free tissue.
It takes practice to get a uniform layer. The key is to rub evenly and quickly over the entire surface, with gentle pressure. Because this layer of plated silver is thin, it is easily removed by polishing, so it is advisable to apply a clear lacquer to minimize tarnishing.
Results of this procedure
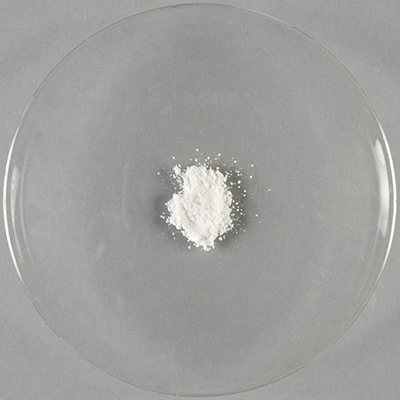
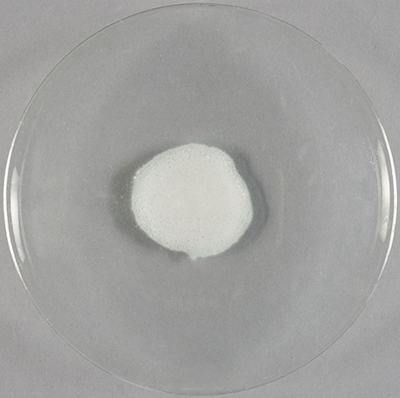
Figure 1a shows a small amount (about 0.3 g) of the silvering powder in a watch glass before any water has been added. Silver chloride is light sensitive, so the powder may become slightly purple when exposed to light. Figure 1b shows the silvering powder in the watch glass after enough water has been added to wet the powder and form a thin slurry with the consistency of cream. The mixture has been well stirred with a glass rod to encourage the salts to dissolve.
© Government of Canada, Canadian Conservation Institute. CCI 128945-0005
Figure 1a. A transparent watch glass (10 cm diameter) with a small amount of the white silvering powder in the centre. The silvering mixture has been ground into a fine powder with the mortar and pestle.
© Government of Canada, Canadian Conservation Institute. CCI 128945-0006
Figure 1b. The silvering powder from Figure 1a after enough water has been added to make a white slurry.
Figures 2a and 2b show the lint-free tissue before and after being dipped in the silvering slurry.
© Government of Canada, Canadian Conservation Institute. CCI 128945-0007
Figure 2a. A white lint-free tissue dampened with water and wrapped around a gloved index finger is about to be dipped into the slurry of silvering powder lying at the centre of the watch glass.
© Government of Canada, Canadian Conservation Institute. CCI 128945-0008
Figure 2b. The tissue from Figure 2a has just been dipped into the slurry of silvering powder. Most of the liquid in the slurry has wicked into the tissue, leaving a damp paste.
Figure 3 shows the paste on the tissue.
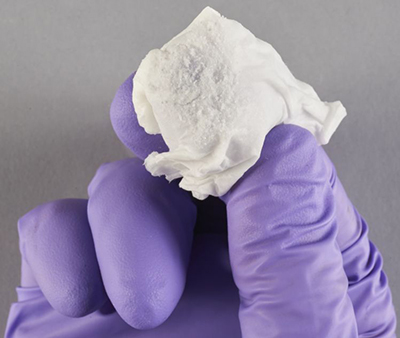
© Government of Canada, Canadian Conservation Institute. CCI 128945-0010
Figure 3. The tissue from Figure 2b, with some silvering paste stuck to the surface. The paste has turned slightly lavender in colour.
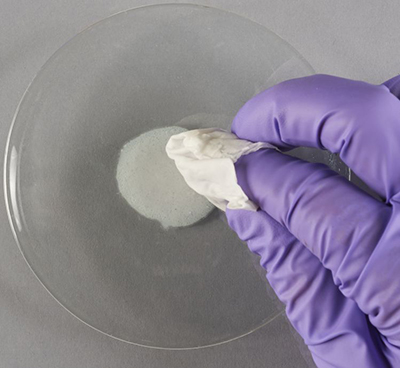
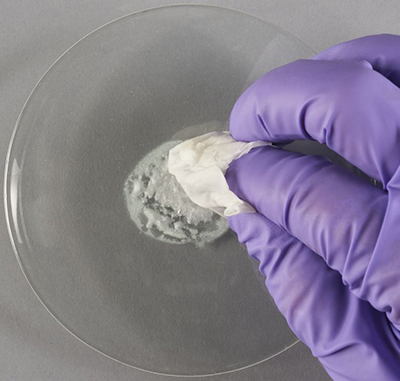
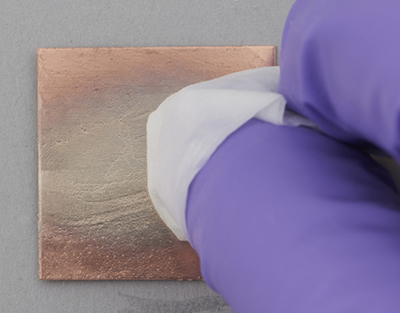
Figure 4a shows the application of the silvering paste to the copper coupon using the wet tissue. For the photograph, the paste was rubbed back and forth only over the centre portion of the coupon. In practice, it is better to rub over the entire surface. Figure 4b shows a close-up after more rubbing. The surface is darkening compared to Figure 4a. Rubbing with the tartrate slurry should remove most of this darkening. The darkening is less likely to develop if the entire surface is silvered at once.

© Government of Canada, Canadian Conservation Institute. CCI 128945-0013
Figure 4a. Application of a silvering paste by gently rubbing it over the centre of a pure copper coupon.
© Government of Canada, Canadian Conservation Institute. CCI 128945-0014
Figure 4b. A pure copper coupon after the second application of a silvering paste over the centre.
Figure 5a shows a copper coupon before silvering and Figure 5b shows a copper coupon after silvering.
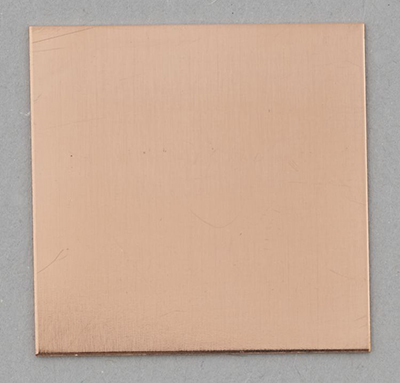
© Government of Canada, Canadian Conservation Institute. CCI 128945-0012
Figure 5a. A pure copper coupon (2.5 cm × 2.5 cm) before silvering. The coupon has a uniform salmon-pink colour.
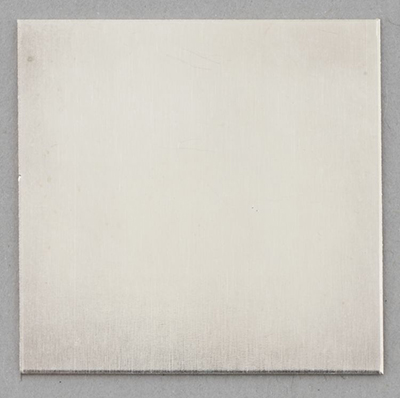
© Government of Canada, Canadian Conservation Institute. CCI 128945-0015
Figure 5b. A pure copper coupon after silvering. The coupon now has a uniform silver colour.
Additional information
Chemicals
Use chemicals purchased from a chemical supplier rather than commercial products sold in grocery stores. For example, use sodium chloride rather than table salt, which may contain other ingredients, such as calcium silicate, potassium iodide and sodium thiosulfate, in addition to sodium chloride. Cream of tartar sold for cooking may be pure potassium hydrogen tartrate, or it may contain calcium sulfate, monocalcium phosphate, fumaric acid and corn starch with no potassium hydrogen tartrate at all. These other ingredients might have unintended consequences that alter the silvering process.
Abrasive cleaning
Before plating, it is essential that most of the oxide film is removed from the copper (La Niece 1993). Abrasives are often used to do this. Alternatively, some recipes call for rubbing the surface with a paste of sodium chloride immediately before the silvering paste is applied (Birnie 1993). Although it is traditional to use sodium chloride, in the present Note, only calcium carbonate or aluminum oxide is used as an abrasive before silvering to remove the oxide. Any remaining oxide film should be removed by the salts in the silvering paste.
Traditional and alternative recipes
The recipe in this Note uses silver chloride, cream of tartar and sodium chloride in the ratio of 1:2:3 by weight, as given by De Carle (1983). A traditional recipe with these same ratios dates back to at least 1876 (Society of Gilders 1990). A recipe from 1905 uses the same ingredients, but in the ratio 1:1:1 by volume (Goodrich 1905). A more recent recipe also uses the ratio 1:1:1, although it was not specified whether this was by weight or by volume (Birnie 1993). (It was found in preparing this Note that the recipe 1:1:1 by weight produces dark streaks more readily than 1:2:3 by weight.) Some traditional recipes use silver nitrate rather than silver chloride (Phin 1879).
Commercial silvering powders exist, but none were tested for this Note.
Practical examples
While conservators at CCI were working on a wooden presentation box decorated with sterling silver, they discovered that some small sterling silver pins were missing. They decided to replace the missing pins with silvered brass ones. They used a procedure similar to the one in this Note. However, the components in the silvering powder were in the ratio of 1:1:1 by weight. To protect the thin layer of plating, the silvered pins were coated with 5% (w/v) Paraloid B-72 in acetone.
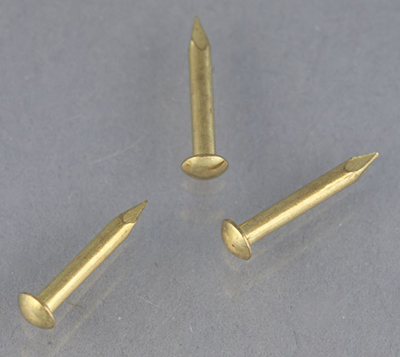
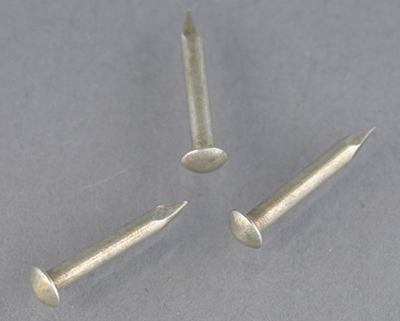
Figure 6a shows examples of pins before plating, and Figure 6b shows pins after plating. (These are called brass escutcheon pins and are used for securing brass hardware to furniture and wooden objects.) For the plating in Figure 6b, a 1:1:1 mixture by weight was used and applied twice. During the second application, a tiny plastic brush was used to apply the silvering paste under the heads of the pins.
© Government of Canada, Canadian Conservation Institute. CCI 128945-0017
Figure 6a. Three yellow-coloured brass escutcheon 1/4 in. pins (0.64 cm long) before being plated with silver.
© Government of Canada, Canadian Conservation Institute. CCI 128945-0018
Figure 6b. The three brass escutcheon pins after being plated with silver using a silvering paste. The pins are now silver coloured.
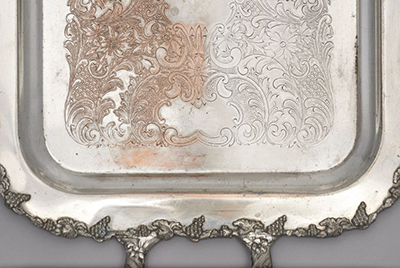
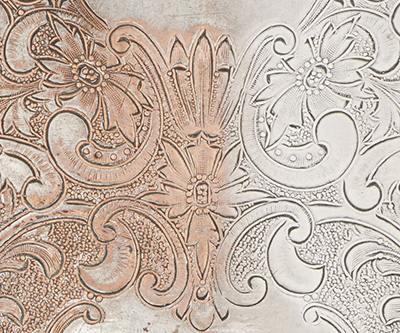
Another example of the use of silvering paste is the silver-plated copper tray shown in Figure 7a. The copper tray had originally been electroplated with silver, but after years of abrasive polishing, large areas of copper were showing through the plating. The right side of the engraved area on the tray has been silvered with silvering paste; a close-up view is shown in Figure 7b. In the newly silvered area on the right, regions that had worn down to bare copper appear darker than regions where some electroplated silver had survived. This demonstrates an advantage of this silvering technique: silver does not plate over the existing silver so the original silver plating is not altered.
© Government of Canada, Canadian Conservation Institute. CCI 128945-0020
Figure 7a. Silver-plated copper tray (labelled “E.P. copper” on the back). The left side shows a flat part of the tray where past abrasive polishing has removed enough silver to uncover large areas of copper. The right side shows the flat part of the tray where a silvering paste has been applied.
© Government of Canada, Canadian Conservation Institute. CCI 128945-0020
Figure 7b. Detail of Figure 7a.
The tray shown here was a didactic piece with no historic value. A decision to plate an object should be made jointly by a conservator and a curator. Similar considerations apply to removing tarnish from an object; consult CCI Note 9/11 How to Make and Use a Precipitated Calcium Carbonate Silver Polish.
The surface after plating
The silvering process does not cover over flaws in the original surface. A silvered surface will be reflective if the surface is highly polished before silvering, but a matte surface will remain matte. For example, clock dials are usually given a direction or grain by abrasively polishing with 400 or 600 grit sandpaper before silvering. As a result, the surface after silvering has a frosted appearance, which is the intent for clock dials (De Carle 1983).
If a matte surface is not the intent, the surface after silvering can be made more reflective by burnishing, as discussed by Clare and Lins (no date). In burnishing, a smooth hard object is rubbed over the surface of the metal to smooth out irregularities. Agate tools, frequently used for burnishing silver and gold leaf, can be used. Burnishing does not remove material from the metal surface but rather distributes the metal from high points to low points. If the burnishing tool is pushed too hard into a silvered copper surface, it can damage the underlying soft copper.
Preparation of silver chloride from silver nitrate and sodium chloride
If a bottle of silver nitrate is readily available, and there is also sodium chloride (not table salt) on hand, then these salts can be used to make silver chloride. A simple procedure is described by Vogel et al. (1978).
The science behind plating
Electrochemical replacement silvering
The plating process described in this Note occurs by an electrochemical reaction. When the silvering paste is applied to a clean copper surface, two electrochemical half-reactions occur. Silver ions in solution coming from silver chloride are reduced to silver metal that is well adhered to the copper surface. At the same time, the copper metal is oxidized (it corrodes) to form copper ions in solution. This is a galvanic effect where the more active metal (copper) is oxidized and the ions from the more noble metal (silver) are reduced. Because the copper causes the silver ions to be reduced, the copper is said to act as the reducing agent. The simplified form of the overall reaction can be written as follows:
Ag+ + Cu0 → Ag0 + Cu+
(In the recipe used in this Note, almost all of the positive ions in solution will have formed complexes with chloride or tartrate ions, so the actual reactions will involve these complex ions.) When the silver layer covers the copper so that no more copper is exposed to the silvering paste, the plating will stop.
The plating industry has various names for this process, such as electrochemical replacement plating, immersion plating, displacement plating or galvanic deposition (Paunovic 2006). In metallurgy, it is called cementation. The plating process can occur whenever a metal is placed in a solution that contains ions from a less active metal. For example, iron is more active than copper, so if iron is placed in a solution containing copper(II) ions, copper will plate onto the iron.
Electrochemical replacement plating can sometimes be a problem. For example, after a silver dip is used to clean tarnished silver, the silver dip contains silver ions in solution as soluble silver-thiourea complexes. If the silver dip is reused on an object with bare copper regions, silver ions from the dip will then plate onto the copper.
Another problem with electrochemical replacement plating can occur if the silvering paste is applied non-uniformly over the copper surface, as shown in Figure 4b. There, the surface is darkening compared to Figure 4a, because the unsilvered copper is corroding and corrosion products are being rubbed onto the silvered surface.
Role of the ingredients
Sodium chloride (NaCl) has the highest solubility of the three ingredients in the silvering powder, specifically, 35.9 g NaCl in 100 g of water at 20°C (Lide 1998). When water is added to the dry ingredients to make a slurry, the water will dissolve the sodium chloride to produce a high concentration, probably a saturated solution.
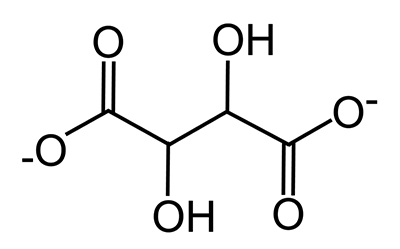
Potassium hydrogen tartrate (KC4H5O6), also called potassium bitartrate or cream of tartar, is the salt of the tartrate ion (C4H4O62-) with hydrogen and potassium. The chemical structure of the tartrate ion is shown in Figure 8. Potassium hydrogen tartrate has a solubility of 0.5 g in 100 g of water at 20°C (Dean 1992), or 0.027 M. When dissolved in water, it separates into potassium ions (K+), hydrogen ions (H+) and tartrate ions (C4H4O62-). It acts as a buffer, holding the pH of a solution near a constant value, in this case about 3.6. It forms complexes with copper(II) ions; that is, it binds to Cu2+ ions in solution to form complex ions such as [Cu(C4H4O6)2]2-.
© Government of Canada, Canadian Conservation Institute. CCI 128945-0021
Figure 8. Chemical structure of the tartrate ion.
Silver chloride (AgCl) has a low solubility in pure water, about 0.19 mg per 100 g of water, or 1.3 × 10⁻⁵ M (calculated from the square root of the solubility product 1.77 × 10⁻¹⁰ M2, given in Lide [1998]). But in solutions with high concentrations of chloride ions, the solubility increases because the silver ions form complexes with chloride ions, such as [AgCl2]-, [AgCl3]2- and [AgCl4]3-. For example, at a concentration of 5 M NaCl, the solubility of silver chloride is about 86 mg per 100 g of water, or 6 × 10⁻³ M (Lin et al. 2013). This is almost 500 times higher than in pure water. One role of the sodium chloride in the recipe is to increase the concentration of silver ions in solution in the form of chloride complexes.
Both copper(I) and copper(II) ions also form complexes with chloride ions, such as [CuCl2]- and [CuCl3]2- for copper(I) and CuCl+ for copper(II) (Smith and Martel 2004). As already mentioned, copper(II) ions also form complexes with tartrate ions. Hence, another role of both the chloride and tartrate ions is to hold copper ions in solution during the electrochemical exchange reaction. Tartrate and chloride ions also help to dissolve corrosion products, such as copper oxide, on the surface of copper objects. In fact, a paste of sodium chloride and potassium hydrogen tartrate cleans the dark tarnish from a copper penny faster than pastes of either chloride or tartrate used alone.
Light sensitivity of silver chloride
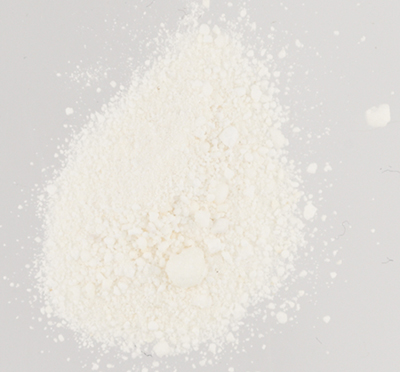
Silver chloride is light sensitive (Vogel et al. 1978). When exposed to ultraviolet (UV) or blue light with wavelengths less than about 410 nm, the silver chloride decomposes and forms silver metal and chlorine gas (West and Gilman 1977). The particles of metallic silver are dispersed in the silver chloride, giving it a purple colour. Although the colour change is dramatic, only a small amount of silver chloride is converted to silver unless the silver chloride powder is exposed to direct sunlight and stirred frequently.
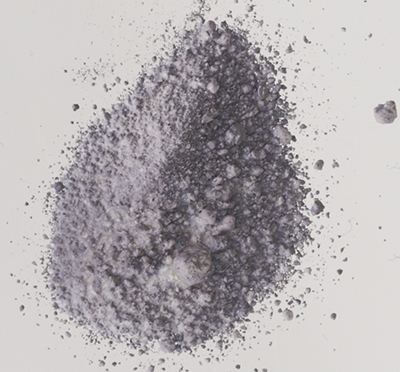
Figure 9a shows the white colour of pure silver chloride. Figure 9b shows the lavender colour formed when pure silver chloride is exposed to a UV lamp at 365 nm for 50 seconds.
© Government of Canada, Canadian Conservation Institute. CCI 120260-0048
Figure 9a. White silver chloride powder.
© Government of Canada, Canadian Conservation Institute. CCI 120260-0050
Figure 9b. Dark lavender colour formed on the surface of silver chloride powder after exposure to a UV lamp at 365 nm for 50 seconds.
Acknowledgements
Special thanks to Lucy ‘t Hart and Jacqueline Riddle, former CCI interns, for their help in developing this Note.
Suppliers
Note: the following information is provided only to assist the reader. Inclusion of a company in this list does not in any way imply endorsement by CCI.
Chemicals
Chemicals are available from chemical supply companies, such as Fisher Scientific.
Copper alloys
Thin sheets of copper are available from chemical suppliers, such as Sigma-Aldrich. Thin sheets of brass (shim stock) are available from hardware suppliers, such as Lee Valley Tools. Copper and copper alloys are also available from metal suppliers, such as Metal Supermarkets.
Bibliography
Beentjes, T.P.C. “An Introduction to Silver Plating in 18th-century Europe.” In C. Degrigny, R. van Langh, I. Joosten and B. Ankersmit, eds., Metal 07: Proceedings of the Interim Meeting of the ICOM-CC Metal Working Group, vol. 1, Amsterdam, 17–21 September, 2007. Amsterdam, the Netherlands: Rijksmuseum, 2007, pp. 17–21.
Birnie, L. “Special Finishes on Non-ferrous Metals at the National Maritime Museum.” In S. La Niece and P. Craddock, eds., Metal Plating and Patination: Cultural, Technical and Historical Developments. Oxford, UK: Butterworth-Heinemann, 1993, pp. 148–154.
Clare, T.L., and A. Lins. Finishing Techniques in Metalwork. Philadelphia, PA: Philadelphia Museum of Art, n.d.
Dean, J.A. Lange's Handbook of Chemistry, 14th ed. New York, NY: McGraw-Hill, 1992.
De Carle, D. Watch and Clock Encyclopedia, 3rd ed. Ipswich, UK: NAG Press, 1983.
Goodrich, W.L. The Modern Clock: A Study of Time Keeping Mechanism; Its Construction, Regulation and Repair. Chicago, IL: Hazlitt and Walker, 1905, pp. 434–435.
La Niece, S. “Silvering.” In S. La Niece and P. Craddock, eds., Metal Plating and Patination: Cultural, Technical and Historical Developments. Oxford, UK: Butterworth-Heinemann, 1993, pp. 201–210.
Lide, D. R., ed. CRC Handbook of Chemistry and Physics, 79th ed. Boca Raton, FL: CRC Press, 1998.
Lin, H., G.S. Frankel and W.H. Abbott. “Analysis of Ag Corrosion Products.” Journal of The Electrochemical Society 160,8 (2013), pp. C345–C355.
Paunovic, M., and M. Schlesinger. Fundamentals of Electrochemical Deposition, 2nd ed. New York, NY: Wiley, 2006, pp. 169–175.
Phin, J., ed. The Amateur’s Handbook of Practical Information for the Workshop and the Laboratory, 2nd ed. New York, NY: The Industrial Publication Co., 1879, p. 29.
Selwyn, L. How to Make and Use a Precipitated Calcium Carbonate Silver Polish. CCI Note 9/11. Ottawa, ON: Canadian Conservation Institute, 2016.
Smith, R.M, and A.E. Martell. NIST46 Critically Selected Stability Constants of Metal Complexes: Version 8.0. Gaithersburg, MD: National Institute of Standards and Technology, 2004.
Society of Gilders. The Gilder’s Manual: A Complete Practical Guide to Gilding in All Its Branches. Washington, D.C.: Society of Gilders, 1990, pp. 75–76 and p. 91. (Reprint of the manual published in 1876.)
Vogel, A., J. Bassett, R.C. Denney, G.H. Jeffery and J. Mendham. Vogel’s Textbook of Quantitative Inorganic Analysis, Including Elementary Instrumental Analysis, 4th ed. Essex, UK: Longman Scientific & Technical, 1978, p. 433.
West, W., and P.B. Gilman. “Spectral Sensitivity and the Mechanism of Spectral Sensitization.” In T.H. James, ed., The Theory of the Photographic Process, 4th ed. New York, NY: Macmillan, 1977, pp. 251–290.
By Lyndsie Selwyn
© Government of Canada, Canadian Conservation Institute, 2019
Cat. No.: NM95-57/9-12-2019E-PDF
ISSN 1928-1455
ISBN 978-0-660-28431-6