
How to use the Authorized Paid Representatives Portal
As an authorized paid representative, use the Authorized Paid Representatives Portal to prepare, submit, link and pay for online applications on behalf of clients. You can also link to certain paper applications.
On this page
- Access the Authorized Paid Representatives Portal
- Changes to login details
- Account home page
- Visitor visa, study and work permit applications
- Express Entry applications
- International Experience Canada (IEC) applications
- Electronic travel authorization (eTA) applications
- Interim Federal Health Program (IFHP) applications
- Link an application to your account
- Remove a third party representative from an IRCC application
- How to close an Authorized Paid Representatives Portal account
- Glossary
Access the APR Portal
To create an account, follow the instructions in the Enrolment Guide.
To access the APR Portal, you’ll need to sign in using the secure credential option you used to create your portal account (Sign-In Partner or GCKey).
If you need help signing in, find more information about accessing online services.
Note: Ensure you access the APR Portal instead of the client Self-Service Online Portal (used by clients submitting their own applications).
Portal navigation tips
In the portal, move between sections with the navigation buttons:
- Back
- Next
- Return to previous page
There are 2 ways to change your information during the application process:
- Click Start again at the top of the screen
- Modify your answers at the end of the questionnaire
To save and sign out, click Exit Questionnaire.
Help and support
Click the blue question mark icon  for information to help you complete a form field.
If you can’t find the answer to your question, you can contact us:
- using this web form for case-specific or technical questions
- using the Immigration Representatives mailbox for general questions
We have modified the look and organization of the account home page.
Changes to login details
Forgotten username or password
If you’ve forgotten your GCKey password
- go to the sign-in page for GCKey through the Authorized Paid Representatives Portal page
- click “Forgot your password?”
- you can create a new password after you answer your password recovery questions

If you’ve lost your GCKey username, you must create a new GCKey. After you create a new GCKey, you can access any existing applications by linking them to your new account.
Change password
To change your password
- log in to your account and click “Change your password” on the welcome page
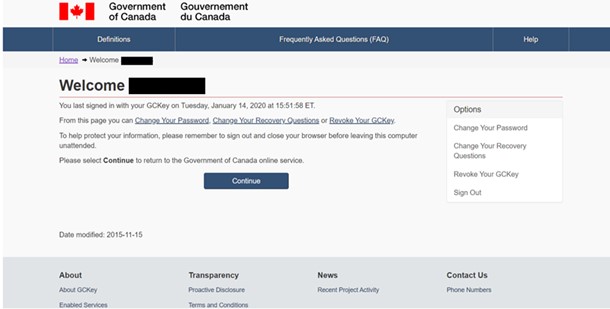
- you must enter your current password, then create and confirm a new password
It must
- be between 8 and 16 characters
- have at least
- 1 uppercase letter
- 1 lowercase letter
- 1 number
- not have 3 or more consecutive characters from your username
Name change
To change the name on your account, submit a request in the Authorized Paid Representatives Portal using the Web form:
- On the Web form page, you will be asked to specify the type of application or enquiry you are submitting.
- Select “Technical difficulties” from the drop-down list.
- In the request, provide proof of the name change.

Account home page
Here you can
- access your profile information
- access the help feature
- log out
- search for applications
- start new applications
- delete applications
- continue in-progress applications
- view previously submitted applications
- link applications to your account
- view messages received about submitted applications
Account profile
To see the information you gave us when you enrolled, click Account profile at the top right of the home page. You can update your
- email address
- language preference
- security questions
Updating personal or business information
You’ll need to submit a new enrolment request in the Authorized Paid Representatives Portal to update personal or business information. In the request, you must write that you have an existing Portal account. This allows our technical team to merge the new account with the existing one. This won’t impact any of the files in your Portal account.
Follow the steps below to re-enrol:
- Create a new GCKey. Do not use your existing GCKey credentials.
- Submit a new Portal enrolment request (find out how using our enrolment guide) with your updated business information.
- When you complete the enrolment form, select “yes” for the question that asks if you had a previous successful enrolment in the Authorized Paid Representatives Portal that resulted from a past application.
Continue an application you have not submitted
This section lists all the applications that you’ve started but haven’t yet submitted. You can either continue with an application or delete it.
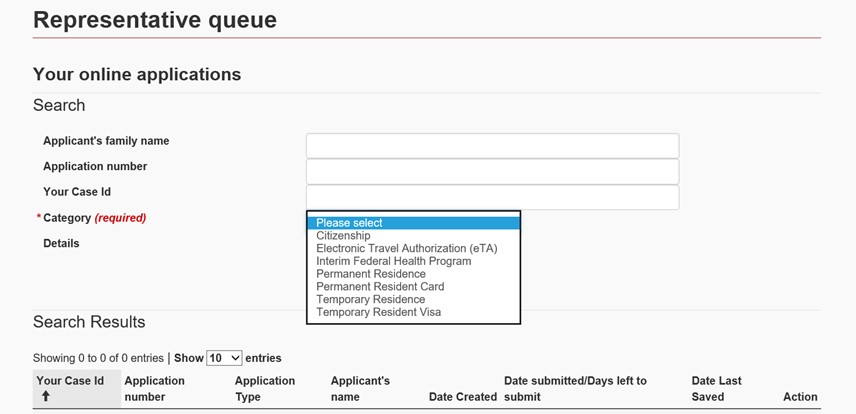
Search submitted applications
Once you submit an application, it no longer appears in the Continue an application you haven’t submitted section. You must search for it.
- Enter the information about the application you are looking for.
- Click Search all applications.
The search results appear in a table.
The entry for each application in the Search results table has an Action column. Click Check full application status to go to the Application status and messages page.
If you can’t find an application you submitted, remove the application number and search with only the application category. Your application should be displayed below.
Application status and messages
Note: This page is also called
- Express Entry profile status for Express Entry submissions
- International Experience Canada profile status for International Experience Canada submissions
In this page, you can find:
- the current status of your client’s application (or profile)
- a link that allows you to view the submitted application or upload documents to it
- information about your client, including their UCI, application number, the date we received the application and biometrics (if available).
- There’s also a link, if the application you submitted for your client includes dependants, where you can view this information about your client’s dependants.
- a processing times bar showing the estimated remaining processing time for the application. (The second message appearing in the Application status section relates to the progress along the processing time bar.)
- details about the status of the application, including the:
- steps involved in processing the application
- current status of your client’s submitted documents
- messages about the application
- a table (when your client’s application is closed) that shows information about the document issued by us, including the date it was issued.
Account messages
This is your personal message inbox. This inbox does not list the messages you receive as part of a client’s application.
For example, you might receive a request for additional documents as part of the Portal enrolment process. You also receive a message in this inbox when you link an application to your account. Click a message to view it.
We will send you an email to let you know when you have a new message.
To view a message, log in to your Authorized Paid Representatives Portal account and click the “Account messages” section at the bottom of the page. Go to the “Representative queue” and search using the “Category” and “Details” fields. “Details” will indicate either of the following: “Application/profile updated” or “Your action is required”.
Visitor visa, study and work permit applications
- On the account home page, click Apply for a visitor visa, study or work permit.
- When prompted, enter your client’s case ID. The case ID is a number that you use to manage your applications. We don’t use this number.
- Select the number of applicants who will be included in this online submission.
If you are applying for a group, you must submit an application and documents for each client.
- Click Next.
- Enter the Information for your Client, including:
- their full name
- type of application
- whether the applicant is a minor
- Click Next. Once you enter all the mandatory information for a client, you’ll see the Information for Client page.
At the top of the page is a list of the documents you have to submit. This list varies depending on the type of application.
- Do one of the following:
- Select the documents you are submitting on behalf of your client
- Select No additional document required for this client
- Click Next.
- Select the fee types that apply to this application.
- Click Next.
Pay the fees with a credit card or Interac Online on behalf of your clients when you submit the application.
Understand the fee options
- Single or Multiple Entry
- All visa applicants are automatically considered for a multiple entry visa. Learn more about the difference between a single and a multiple entry visa.
- Family Rate
- If the application is for a family or group of three (3) or more applicants, select this option for the primary applicant (Client 1). Only the primary applicant pays this fee.
- Fee Exempt
- Select this option if the applicant is exempt from paying the processing fee.
- Family Rate – Fee Exempt
- Select this option for family members where the primary applicant (Client 1) is paying the “Family rate” fee. If you don’t select this option, you’ll over pay.
Biometrics fees
If applicants need to submit biometric information, select one of the following options:
- Biometrics
- Select this option if the client needs to pay the processing fee and provide biometrics (photographs and fingerprints).
- Biometrics – Fee Exempt
- Select this option if the applicant is fee exempt but needs to provide biometrics.
- Biometrics Family Rate
- If the application is for a family or group of three or more applicants and they need to provide biometrics, select this option for the primary applicant (Client 1). Only the primary applicant pays this fee.
- Biometrics – Family Rate – Fee Exempt
- Select this option for family members where the primary applicant (Client 1) is paying the “Biometrics Family Rate” fee.
For more information about fees:
- Read the Pay your fees section of the visitor visa application guide
- Find out who needs to give biometrics
- When asked whether your client needs to give their biometrics, select Yes or No.
- Click Next.
- In the Review your answers page, you can change your answers by:
- clicking the Start Again button at the top of the page or
- clicking the pen icon next to the answer you want to change.
Do not use the browser’s Back button to edit your answers.
- Click Continue.
- Read the instructions and click Continue.
The Your document checklist page appears. This is where you upload the required documents and see what fees you’ll need to pay.
- Upload the documents.
- Click Next.
You’ll see the Your Declaration and Electronic Signature page, which includes the:
- document checklist
- summary of fees
- notice regarding personal information
- Select I agree, fill in your given and last names, and answer the security question.
- Click Sign.
In the Your document checklist page, you see your client’s information and a warning that your client’s application has not yet been submitted.
- In the Signature page, click one of the following:
- Transmit
- Transmit and Pay if fees apply
The Summary of Fees page outlines the details of the fees you need to pay.
- If you have to pay fees, Click Transmit and Pay. The system takes you to an external website where you can make a credit card or Interac Online payment.
- To pay:
- by credit card, fill in the credit cardholder name, card number, expiry date and card security code. Click Process Transaction.
- by Interac Online, click Proceed to Online Banking. In the Interac Online site, follow the instructions to complete the transaction.
- Print the Transaction Approved – Thank You page as your receipt and keep it for your records.
- Click Return.
- Carefully review the Congratulations! You have successfully submitted your application or profile page. This page tells you what happens next.
- Click Exit Questionnaire.
Express Entry applications
There are 2 steps to Express Entry applications:
- Step 1 – Checking your client’s eligibility, and if eligible
- Step 2 – Completing your client’s profile.
Learn more about Express Entry for authorized immigration representatives before you begin.
Step 1 - Check client’s eligibility
- On the account home page, click Apply for Express Entry.
- Select the province or territory where your client plans to live.
- Click Next.
- In the list of language tests, select the one your client took.
- Click Next.
- If applicable, fill in the date the language test took place.
- Click Next.
- Fill in your client’s test scores for speaking, listening, reading and writing.
- Enter any other language results.
- Click Next.
- If applicable, select the second language test your client took.
- Click Next.
- If applicable, fill in the date the second language test took place.
- Click Next.
- Fill in your client’s test scores for speaking, listening, reading and writing.
- Enter any other language results.
- Click Next.
- Select how many years of skilled work experience your client has had in Canada in the last 3 years.
- Select the relevant NOC level.
- Click Next.
- Depending on your answers, the system will take you to:
- the Your results page or
- another page with questions about work experience.
- Select how many years of skilled work experience your client has had in the last ten years.
- Select the relevant NOC code. If you don’t know the NOC code, click Find your NOC.
- Click Next.
- Answer the remaining questions to determine your client’s eligibility.
- Click Next after you answer each question.
Your client’s eligibility is shown in the Your results page. If your client is eligible, you’ll see the steps to create and submit a profile.
Step 2 - Complete client’s profile
- In the Your results page, click Continue to start the profile.
If you decide to complete the client’s profile at a later time and date, in the Representative Queue section, click the Continue Profile button.
- Answer the questions.
- Click Next.
The Express Entry profile page appears.
You must complete all the sections of the profile. Each section has a form. Click Start form to begin a section.
For each form, the status will show:
- Not started
- In progress or
- Complete
Once a form is filled in, the status will change to Complete in green text.
To modify a completed form, click Update form.
Fill out profile forms
Select a heading to open a form and complete all its sections.
The progress icon at the top right means the form is incomplete or in progress.
The green checkmark means that the section is complete.
How to modify pre-populated information
The system automatically populates some fields with information you already gave us about your client.
To modify the pre-populated information:
- Click the Save and Exit button.
- Return to the Account home page.
- Click Continue Profile.
- Click Modify Family Information at the top of the page.
- To leave a form in progress and return to it later, click Save and exit at the top or bottom of the screen.
On the Application/profile details (Personal details section) form, under the ID documents - summary heading, fill in the fields exactly as shown in the document and click Save and add.
The system lists documents in the ID documents - summary area. If this area lists more than 1 document, you can add more.
- Click Next to move to the next part of the form.
When you finish filling in a form:
- Click Check for Completeness at the top of the form to see any missing information.
- If information is missing or incorrect, click the links to change the information.
- Click Next to move to the next field.
- Once all forms are complete in the Express Entry profile page, click Continue.
You’ll see the Your Declaration and Electronic Signature page.
- Select I agree to the terms about personal information.
- Select I agree or I disagree under consent for use of information for research and evaluation purposes.
- Fill in your given and last names.
- Answer the security question.
- Click Sign.
The Signature page appears. This page lists your answers and your consent to use information.
- Review your answers in the Signature page to make sure they are correct.
- Click Transmit.
- Carefully review the Congratulations! You have successfully submitted your application or profile page.
- Click Exit Questionnaire.
After you submit the profile
If your client is accepted into the Express Entry pool of candidates, you’ll get a message in the messages section of your client’s application and in your email.
This message will have the client's Express Entry number or Personal Identification Number.
At this time, you can also register your client with Job Bank, but it’s not required.
The Express Entry pool
You’ll receive the client’s eligibility results and a comprehensive ranking system (CRS) score in the client’s profile.
We may send your client an Invitation to Apply at any time. While your client is in the pool:
- start gathering any required supporting documents for your client’s application for permanent residence
- update profile information if the client’s situation changes
Find out how the pool works.
Invitation to apply
If your client is selected from the pool, we’ll send you an Invitation to Apply (ITA).
![]() Need help? Find answers to your questions about Express Entry in the Help Centre.
Need help? Find answers to your questions about Express Entry in the Help Centre.
International Experience Canada applications
There are 2 steps to International Experience Canada applications:
- Step 1 – Checking your client’s eligibility, and if eligible
- Step 2 – Completing your client’s profile.
Step 1 - Check client’s eligibility
- On the account home page, click Apply for International Experience Canada (IEC).
- Select the country that issued your client’s passport, your client’s current country/territory of residence, and your client’s date of birth.
- Click Next.
- Indicate whether your client has received a letter from one of the listed organizations that prove it will help your client plan their trip or find work in Canada.
- Click Next.
- If you indicated Yes, select the name of the organization.
- Answer the remaining questions to determine your client’s eligibility.
Your client’s eligibility is shown in the Your results page. If your client is eligible, you’ll also see the steps to create and submit a profile.
Step 2 - Complete client’s application
- In the Your results page, click Continue to start the profile.
If you decide to complete the client’s profile at a later time and date, in the Representative queue section, click the Continue Profile button.
You must complete all the sections of the profile. Each section has a form. Click Start form to begin a section.
For each form, the status will show:
- Not started
- In progress or
- Complete
Once a form is filled in, the status will change to Complete in green text.
To modify a completed form, click Update form.
Some sections of the application have already been completed or partially completed (in progress) with information you already gave us to determine your client’s eligibility. If you need to change this information, you’ll have to start over from the beginning.
- To leave a form in progress and return to it later, click Save and exit at the top or bottom of the screen.
- Click Next to move to the next part of the form.
When you finish filling in a form:
- Click Validate at the bottom of the form to see any missing information.
- If information is missing or incorrect, click the links to change the information.
- Click Next to move to the next field.
- Click Save and exit to return to the eService page where you can move on to the next form.
- In the Application details form, choose the category or categories that your client wants to apply for. Selecting No for a category means your client will not be invited to apply for that category.
- Once all forms are complete, click Continue from the eServices profile page.
You’ll see the Your Declaration and Electronic Signature page.
- Select I agree to the terms regarding personal information and disclosure.
- Fill in your given and last names.
- Answer the security question.
- Click Sign.
The Signature page appears. This page lists your answers and your consent to use information.
- Review your answers in the Signature page to make sure they are correct.
- Click Transmit.
- Carefully review the Congratulations! You have successfully submitted your application or profile page.
- Click Exit Questionnaire.
After you submit the profile
If your client is accepted into the International Experience Canada (IEC) pool of candidates, you’ll get a message in the messages section of your client’s application and in your email.
The IEC pool
While your client is in the pool, start gathering any required supporting documents for your client’s application for temporary residence. Your client could get an Invitation to Apply at any time.
Invitation to apply
If your client is selected from the pool, we’ll send you an Invitation to Apply (ITA).
You have 10 days to accept or decline the ITA.
If you accept the ITA, you can start the application for temporary residence for your client.
- Complete a temporary resident web form.
- Upload the required documents.
- Pay the necessary fees.
- Submit the application to IRCC.
If you decline the ITA, your client is placed back in the IEC pool.
If no action is taken and the ITA expires, your client’s profile will be removed from the pool and they’ll have to submit a new profile.
![]() Need help? Find answers to your questions about International Experience Canada in the Help Centre.
Need help? Find answers to your questions about International Experience Canada in the Help Centre.
Electronic Travel Authorization (eTA) applications
- On the account home page, click Apply for an Electronic Travel Authorization (eTA).
- On the next page, click Continue. You will be redirected to apply online for an eTA.
- Click Apply for an eTA at the bottom of the page.
- Answer the questions to find out if your client needs an eTA.
- Make sure to select Yes where it asks Are you applying on behalf of someone?
- Click Next.
- The Parent/guardian or representative details section will appear. Under I am, select the designated body you belong to. The required fields change based on your selection.
- Enter your information.
- Click Next.
- In Representative’s declaration and Representative’s authorization, check the boxes and click Next.
- On the next page, fill in the details for your client. The system pre-populates some information based on information you previous entered.
- In Consent and declaration, check I Agree.
- Enter your name in the Signature box.
- Click Proceed to Payment.
- In the Summary of Fees page, click Transmit and pay.
- Make a payment for the eTA.
Once the payment has been approved, the system automatically send us the eTA application.
You’ll get a confirmation message in the client’s submitted applications.
You can find your client’s application by searching for it.
Interim Federal Health Program (IFHP) applications
- On the account home page, click Apply for temporary health care benefits for refugees.
- Answer the questions.
- Click Next.
- Select the type of request for coverage that applies to your client’s situation.
- Click Next.
- If your client is eligible, select the city where your client lives or the city they live closest to.
- Click Next.
- Select the documents that you’ll upload.
- Click Next.
- Review your answers and make any edits by clicking on the pen icon.
- Click Continue.
- Read the summary of the four steps required to submit your client’s application.
- Click Continue.
- Upload the documents you selected before.
- Click Next.
- Click I agree, fill in your given and last names, answer the security question and click Sign.
- Review the Signature page and click Transmit.
- Carefully review the Congratulations! You have successfully submitted your application or profile page.
- Click Exit Questionnaire.
How to link an application to your account
You have to link your client’s application to your APR Portal account; your client can’t do this for you.
- On the account home, click Add a client’s application to your account.
- Select the type of application you want to link.
- Complete all of the fields in the form and click Search for my application.
Once an application is linked to your account, you will see it in the applications table. If we’ve processed the application, you have to search for it.
When more than 1 result matches the information you give us, the system sends you back to the APR Portal home page. You’ll see the most recently submitted application and you’ll receive all future correspondence for your client.
If the information does not exactly match the information on the application form you’ll get a warning. You can only link the application when all of the information matches.
If there are no results, you see the message that your attempt was unsuccessful. You can try again or contact us for help.
How to remove a third-party representative from an application
- The client completes a Use of a Representative form [IMM 5476] to cancel your appointment as their representative.
- The client uses the Web form to upload the form.
- If you submitted their application online or linked your account to their paper application, the client signs in to their account.
- In the section What would you like to do today? they click the Link application to this account button.
- The client follows the instructions to link the existing e-application back to their account.
- The application will no longer be connected to your account after the client has linked the application back to their account.
How to close an Authorized Paid Representatives Portal account
Please submit a request to close your account to the Immigration Representatives mailbox.
Glossary
- Authorized Paid Representative
An authorized paid representative receives pay for immigration services and is a member, in good standing, of one of the following:
- a provincial or territorial law society
- the Chambre des notaires du Québec
- a body designated pursuant to subsection 91(5) of the Immigration and Refugee Protection Act (IRPA)
- Express Entry
We use Express Entry to manage applications for permanent residence under these federal economic immigration programs:
Provinces and territories can also recruit candidates from the Express Entry system through their Provincial Nominee Programs to meet local labour market needs.
Ministerial Instructions set out the rules for the Express Entry application management system.
Find out more about how Express Entry works.
- Interim Federal Health Program
The Interim Federal Health Program (IFHP) provides limited, temporary coverage of health-care benefits to
- resettled refugees
- refugee claimants
- rejected refugee claimants
- certain others who are not eligible for provincial or territorial health insurance
- Electronic Travel Authorization
- Visa-exempt foreign nationals who fly to, or transit through a Canadian airport, need an Electronic Travel Authorization (eTA). Exceptions include U.S. citizens and travellers with a valid Canadian visa. Canadian citizens, including dual citizens, and Canadian permanent residents cannot apply for an eTA.Visa-exempt travellers do not need an eTA when entering Canada by land (e.g. car or bus) or sea (e.g. cruise ship).